
Pointy's Gpose Tips
Pointy tips from a pointy hat!
If you're ever overwhelmed by the insane amount of ffxiv plugins packed with features, this is a place for you to parse and learn how to utilize them, so maybe you'll have an easier time than I have learning it all, and the tech doesn't get in the way of fun.
Community Resources
Posing Tools
| Anamnesis |
|---|
| Your good ole stand-alone gposing tool (meaning you can use it while plogons are down!) that allows for character & gear customization, animation control and posing. |
| Ktisis |
|---|
| An insanely robust in-game posing tool that allows for character customization, animation control, environment/weather control, lighting, and all things posing. |
| Brio |
|---|
| An equally-insanely robust in-game posing tool that adds more features every time you blink. As of Jan 2026 at least, it includes all features available within Ktisis, with different UI so it's almost down to preference or habit which one you use. (I still use all three!) |
reference sheets
| Breadbunni's NPC model Compendium |
|---|
| Reference sheet of ingame models, including NPCs, VFX, objects, props, mounts, minions, etc. Extremely handy for when you're looking for specific models. |
| Ainyan's Compendium of Non-Weapon Held Objects |
|---|
| Reference sheet of ingame props that usually includes more than you can search in Brio or Glamourer, along with preview images and associated animation IDs. |
| Sayo's Animation Sheet |
|---|
| Reference sheet of ingame animations, their IDs, descriptions and associated props if available. This includes all player emotes along with NPC and special event animations. Extremely handy if you need to ctrl+find a specific animation and check whether it applies to your race/gender. |
gpose & reshade guides
| Leyla's Gpose Guide |
|---|
| An incredibly helpful guide to gposing by a pro gposer, including posing tool 101's, Reshade tips and a ton of screenshot post-editing guides. |
| Reshade REST Guide by BarricadeMKXX |
|---|
| A helpful guide to using the REST (ReshadeEffectShaderToggler) addon with Reshade for better DoF and Battle vfx results. |
| Elva's Reshade Tips |
|---|
| Handy tips for using Elva's shader presets specifically as well as Reshade presets in general |
Complete Guide
🚧 WIP 🚧
Pre-Gpose Prep
🚧 WIP 🚧
Character Customization / Glamour Set-up
🚧 WIP 🚧
Gpose tips
Reshade / Gshade Tips
Contact
I'm always happy to talk gposing so don't hesitate to DM me for anything gpose related.- Note I'm on GMT and may not respond instantly.- Use of GenAI: While I make sure that nothing I create and/or involves using genAI, I'm still learning about all these new tools and shaders we keep getting, and try to learn how every shader effect roughly works. If you notice that any of my gposes use textures or shaders that utilize genAI, please do let me know.- If you're wondering how any of my gposes are made, also don't hesitate to ask. If asked frequently enough, I'll probably turn it into another Pointy Tip!Have fun creating your stories ♥
- Pointy
better Lighting
It’s useful for any gpose to stay in the habit of adding extra light points to any source of light you have in your scene, whether it’s natural light, flames, glowing objects or weapons, etc. Even with post-Dawntrail improvements to lighting, it can still be improved significantly with extra light points!Let’s take a look at how we can enhance a simple campfire scene:
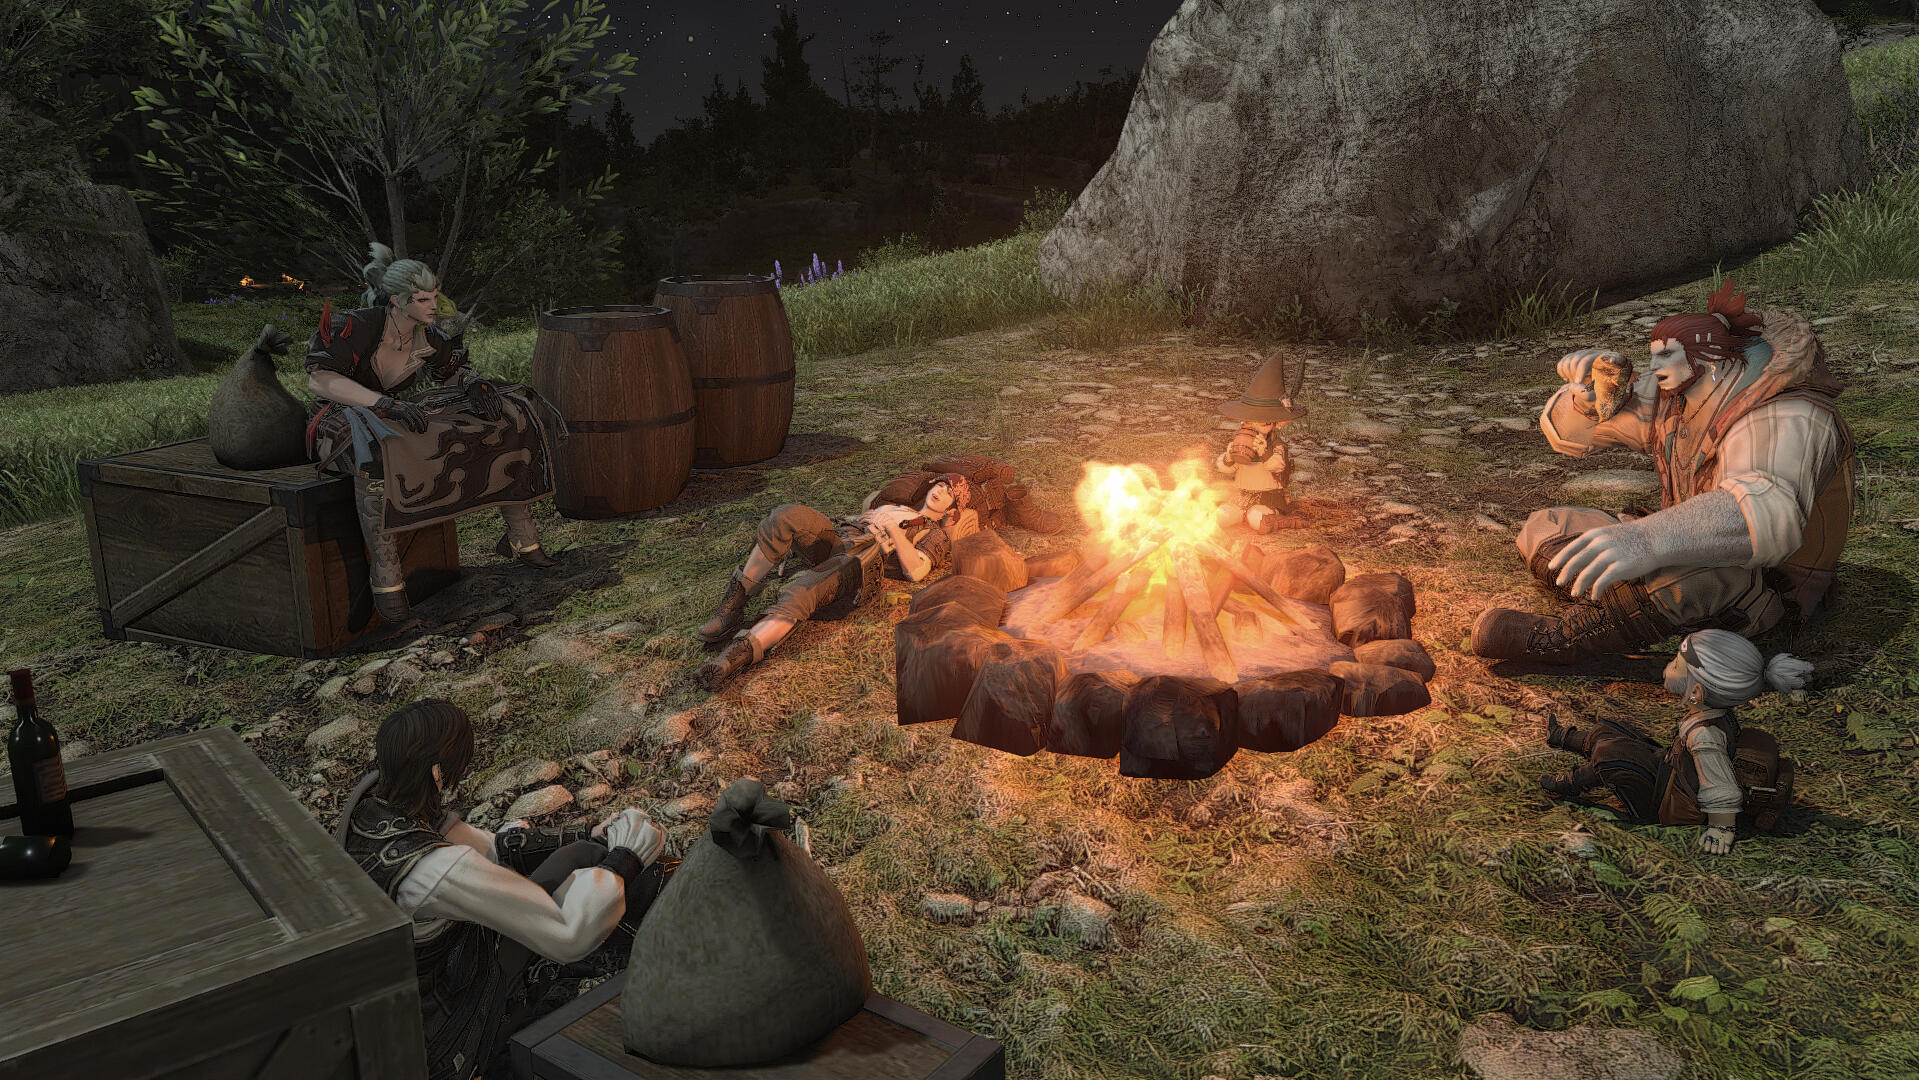
Our guys are posed and comfy, but the scene's looking pretty flat, isn't it? Let's play with a couple of lighting methods, one vanilla and the other with plugins.
100% Vanilla: Adding a Simple Light Point to Your Light Source
- Position your camera as accurately as you can in the center of the fire (or whatever light source you’d like to enhance)
- Pop a light source there with a warm tone and relatively low intensity, either Type 1 or 2.
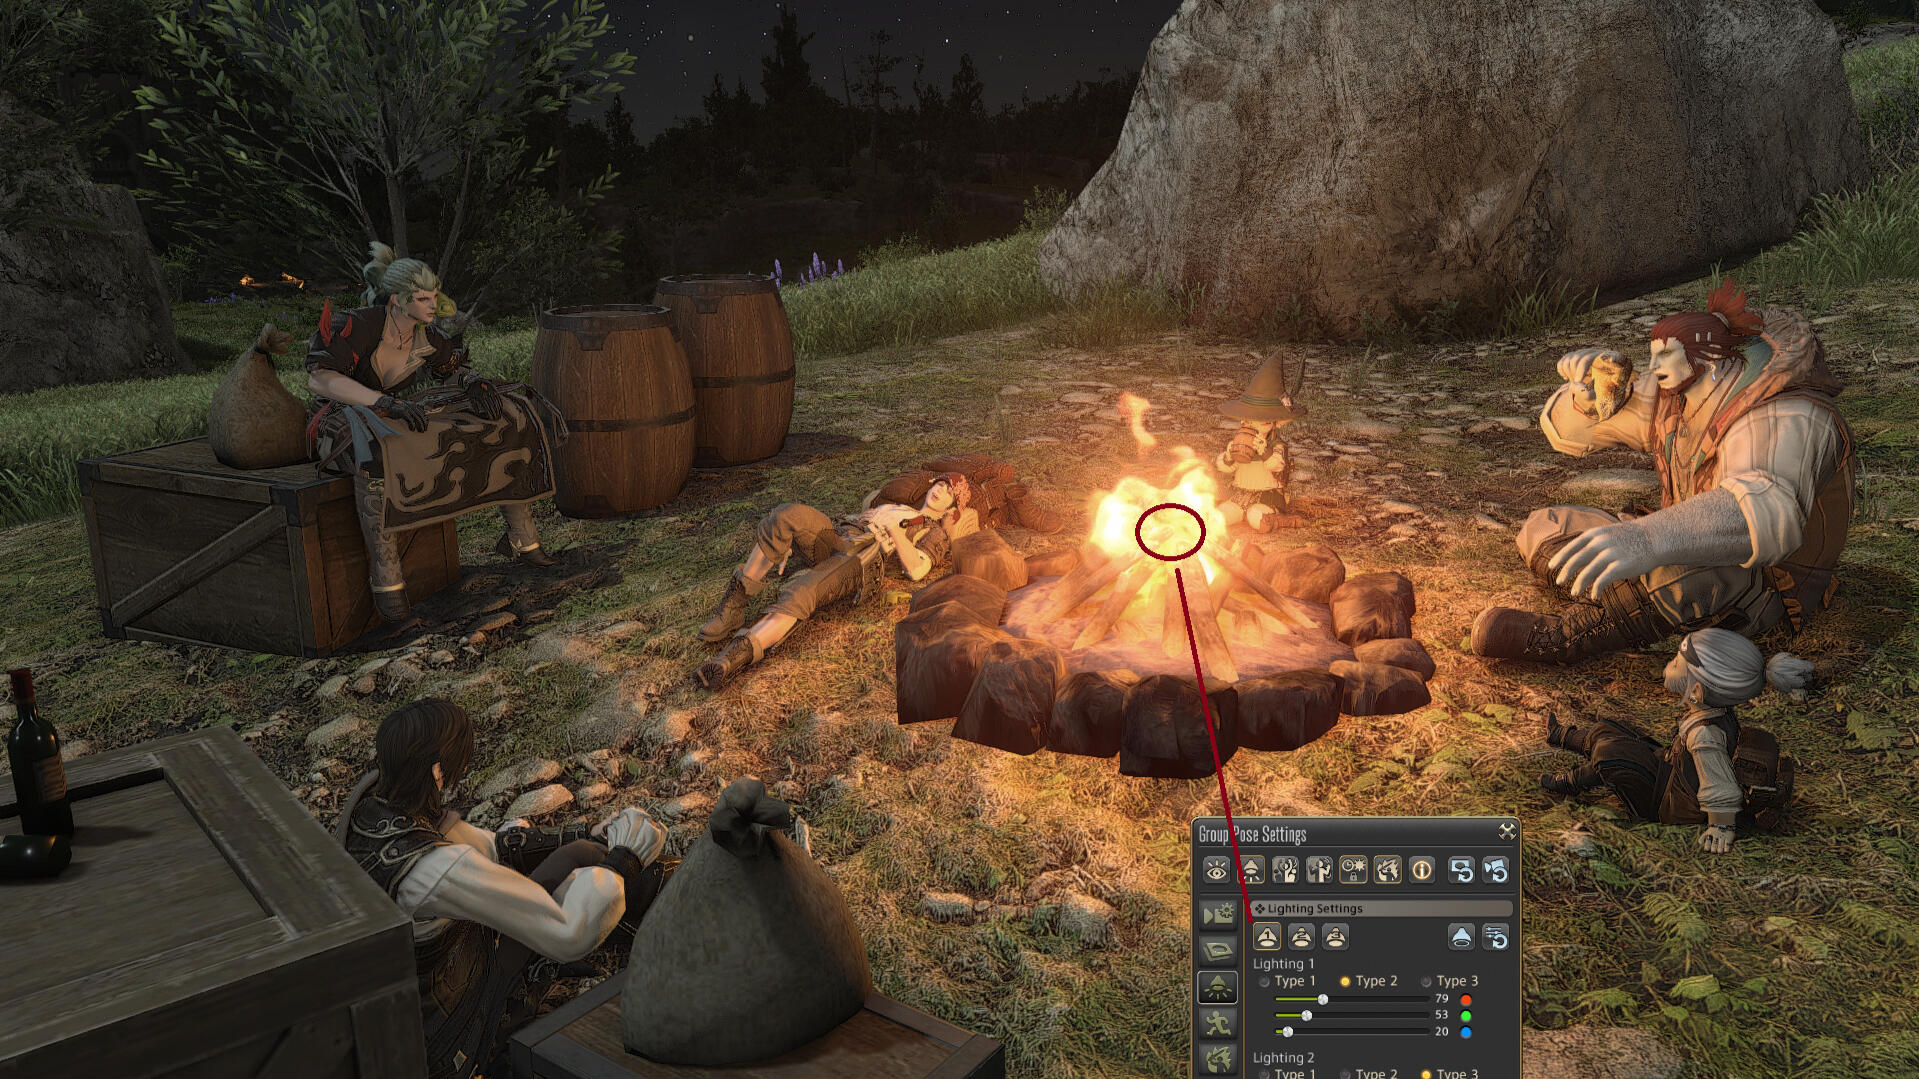
Already it’s a much warmer light that reaches farther than the default light of the campfire, and you can further tweak it depending on how you want to light the characters you’re posing.
A good rule of thumb would be to avoid lighting that’s so harsh it washes out most of your character’s features (like the one sleeping next to the fire here! She’s pretty much washed out and you probably don’t want your character lit that harshly if they’re the focus of your gpose. But this is good enough for showcasing and adding a nice atmospheric vibe to a group pose)
Plugins: Enhancing Your Light Points with Ktisis and/or Brio
If you don't have either of these plugins, refer to the Resources section for downloads, but this guide assumes you're already familiar with basic controls.
Once you have a light point added like the one above, you should be able to see that light point we have just added listed on your Actor list as Camera Light 1 or something similar, on both Ktisis and Brio. For the sake of this guide, I'm going to stick to Ktisis controls, but the controls are more or less the same between the two plugins.Clicking it brings up an Object Editor window that gives you tons more control over your light point. We will only cover specific options in this guide.
For a more complete guide on lighting control with Ktisis/Brio you can read this section, or watch the amazing Asukal’s gpose tutorials using Ktisis lighting here & here. For fellow visual learners, I find that watching a pro go through the process gives you a much better grasp on it than any written guide.
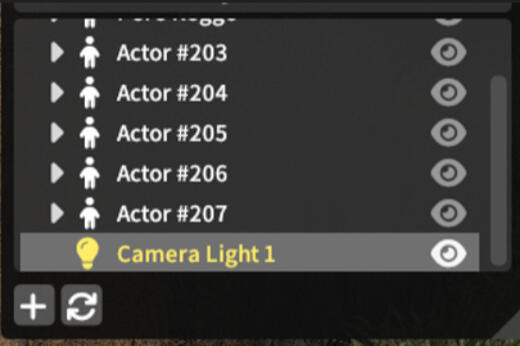
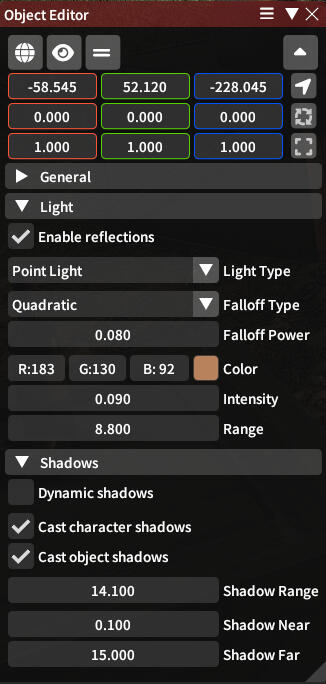
For this basic guide, though, we’ll stick with a regular point light that gives off omnidirectional light, which works best for a campfire.
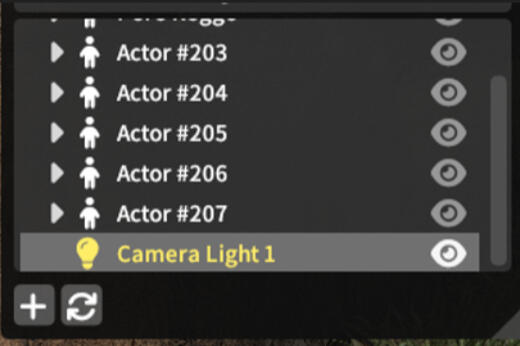
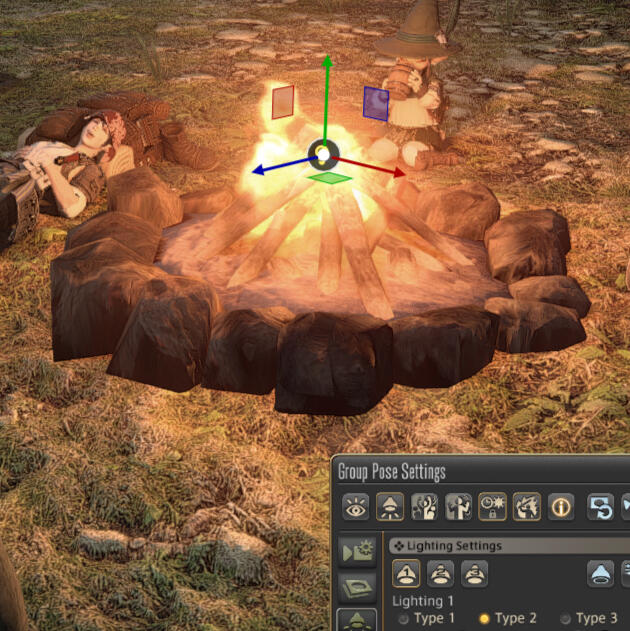
For starters, you can click the eye icon next to it to view the light point in your 3D view. You can also position it more accurately anywhere you like with the gizmo (extra handy for tiny light sources like candles or small lanterns.)
For soft, warm light sources like candles and flames that are relatively close to the character, I find I rarely need to set the intensity any higher than 0.09 and often at .02 for candle flames. A little bit can go a long way here.As for range, for night scenes like this one, I would drag the range slider up to where the light just about hits all the characters/object you want to highlight and no farther. Here, I had it go just far enough to reach the boulder in the back, because I still want the background relatively dark and the beautiful night sky to complement the scene.
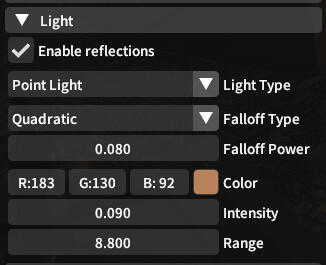
Now to my absolute favorite feature: Let there be shadow! You’ll want to check both “cast character shadows” as well as “cast object shadows.”
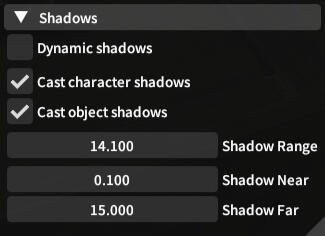
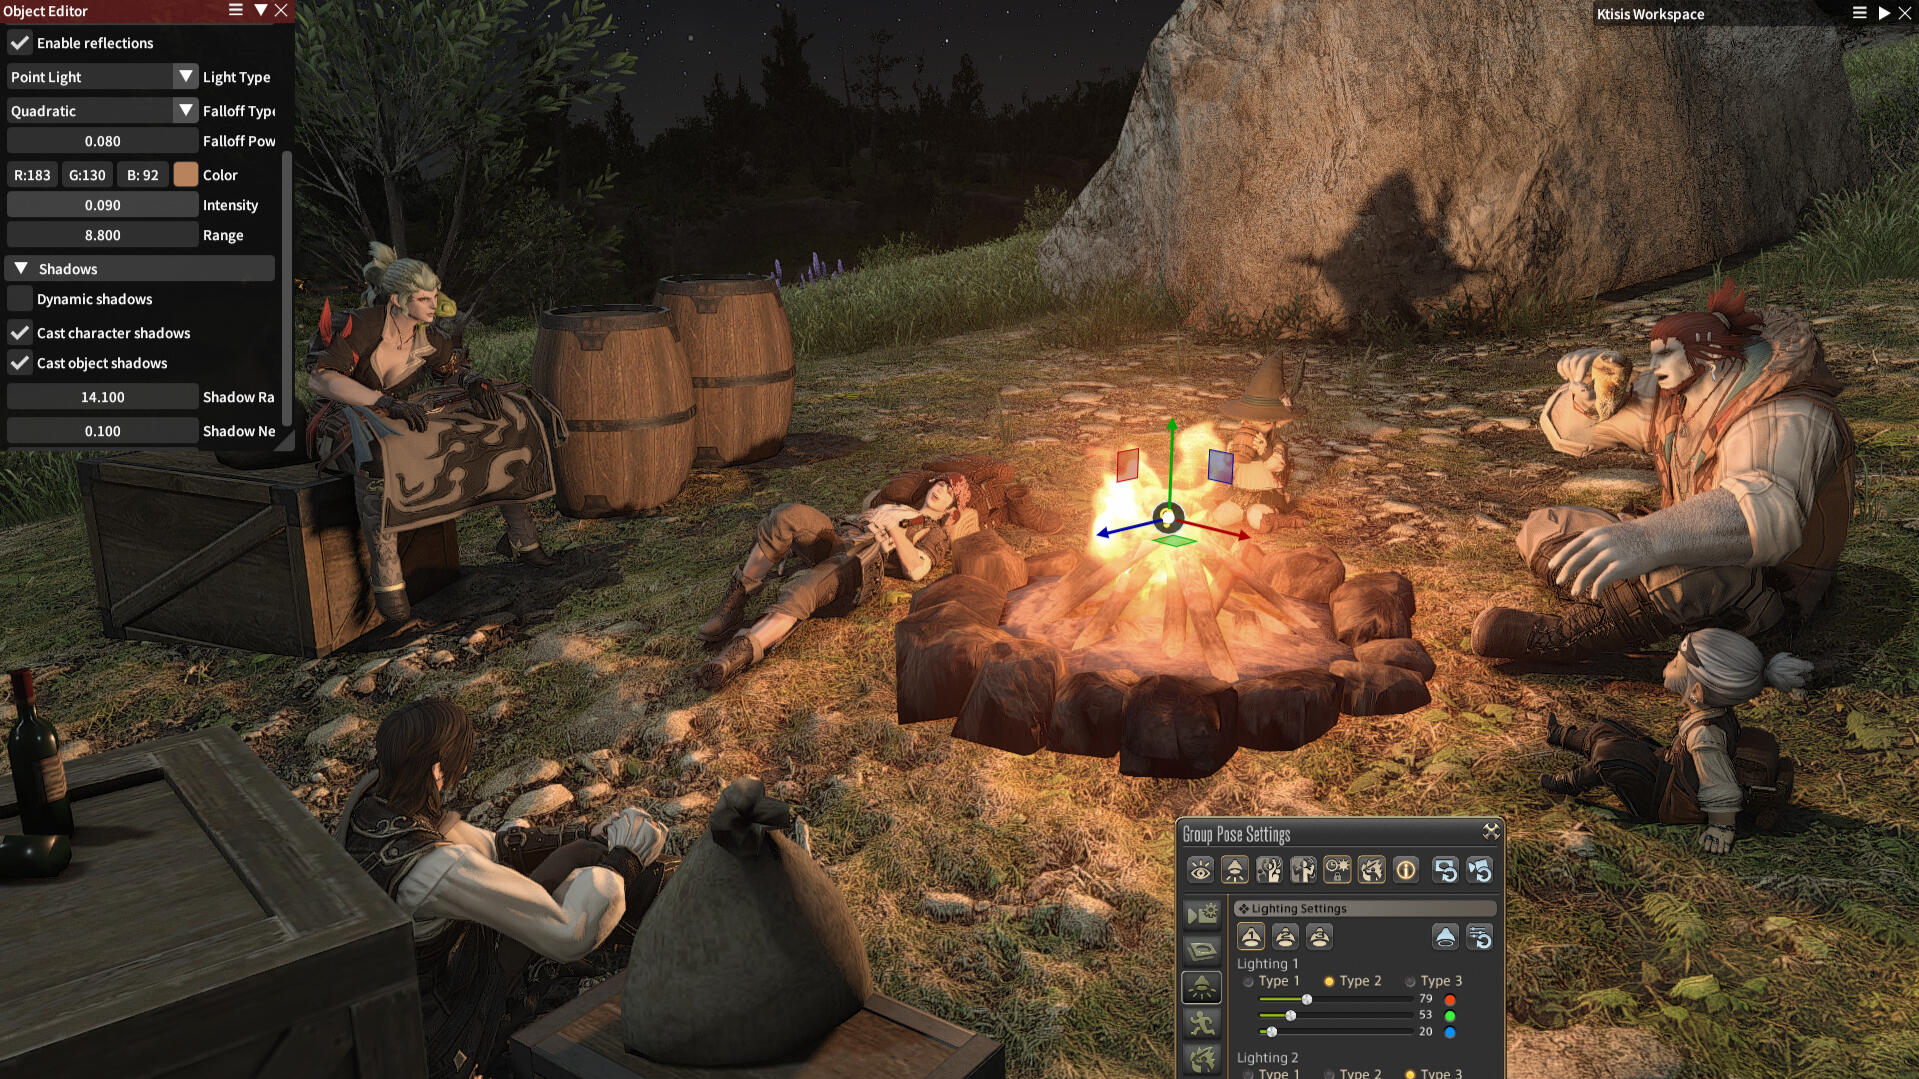
When your light sources cast actual shadow against your characters and objects, your scene is that much more realistic and immersive.
You can further manipulate the character and object shadows that already exist by changing the time of day and therefore the direction these shadows are cast, if it helps make your scene more realistic. In the case of omnidirectional lighting like this gpose, though, it’s difficult to use natural day/nightlight to get all vanilla shadows to make sense in relation to the light source.
Lastly, make sure that “Enable reflections” is checked in your Object Editor window so that different metallic and glass textures have a nice shine to them, depending on the intensity of your light point.
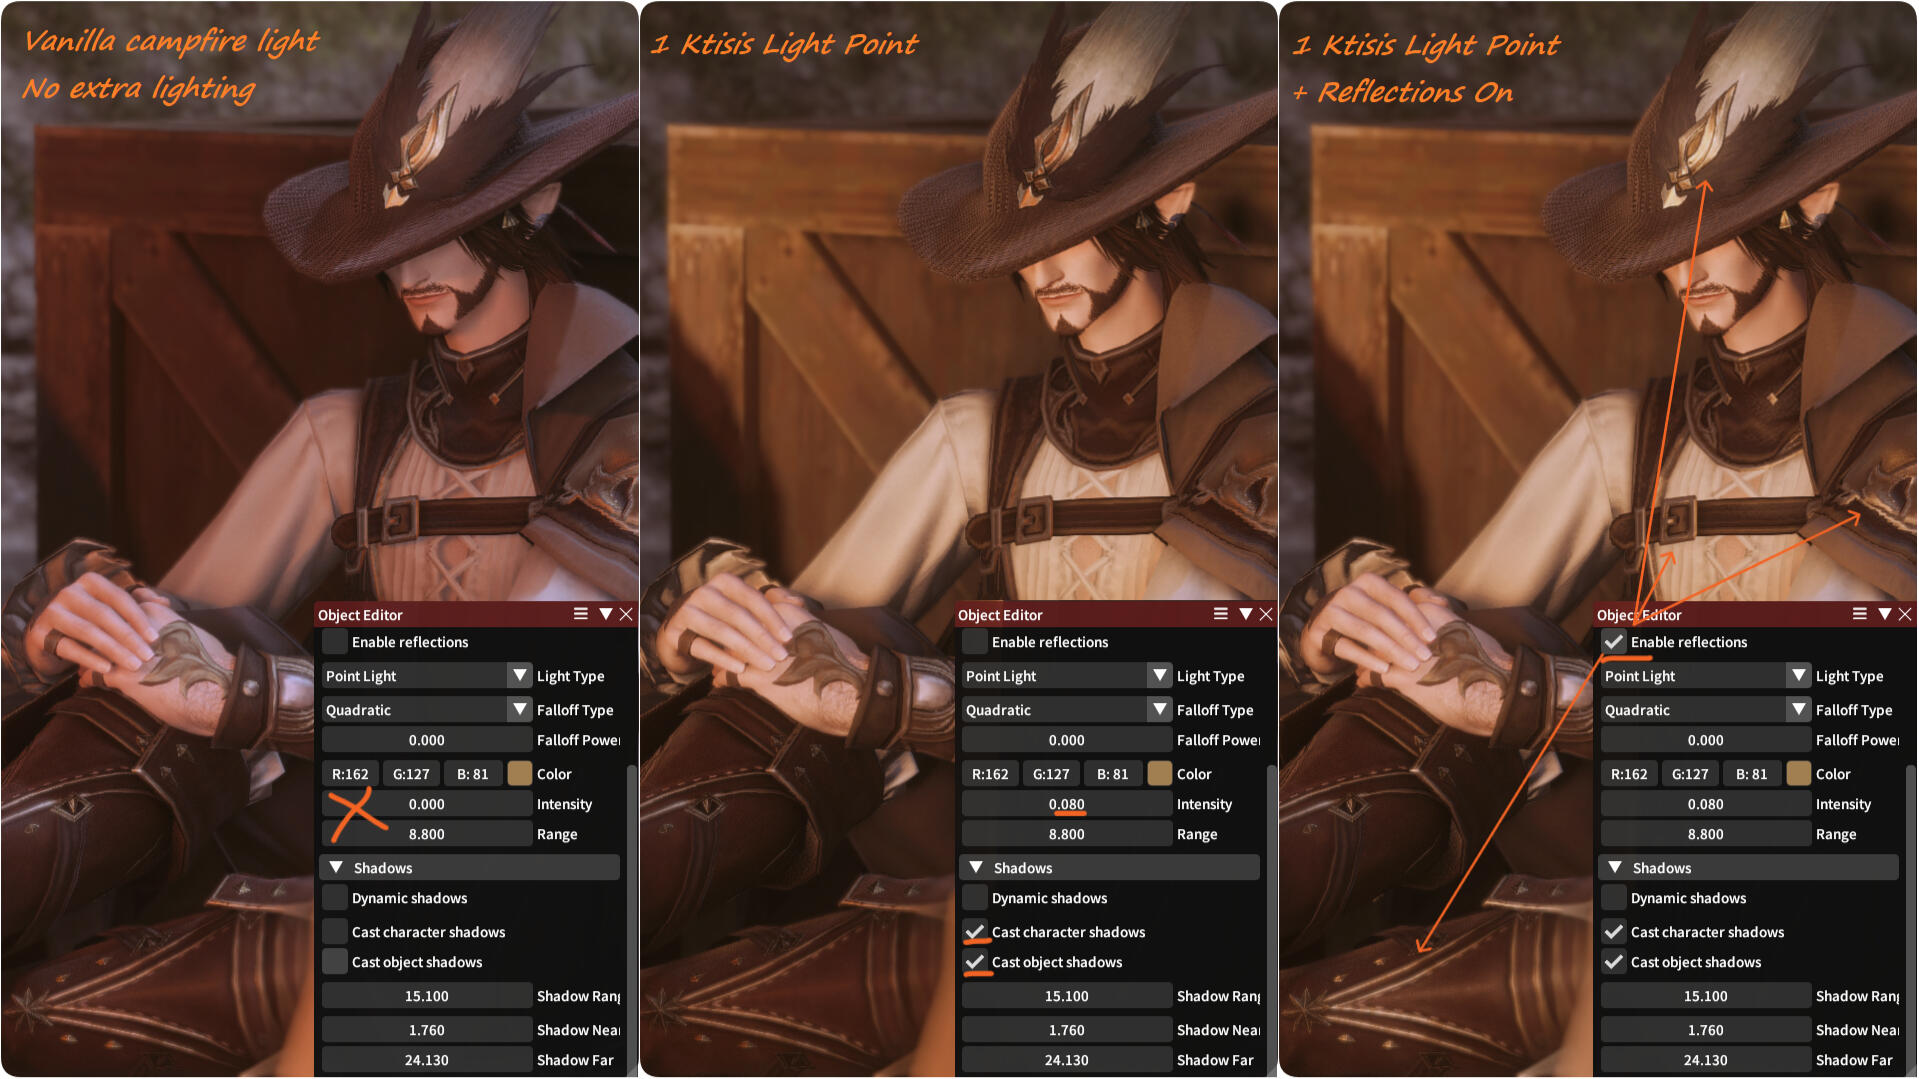
We've already made our scene so much warmer with a single enhanced light point. Isn't lighting control neat? Now let's see how much better it can look with a good shader preset.
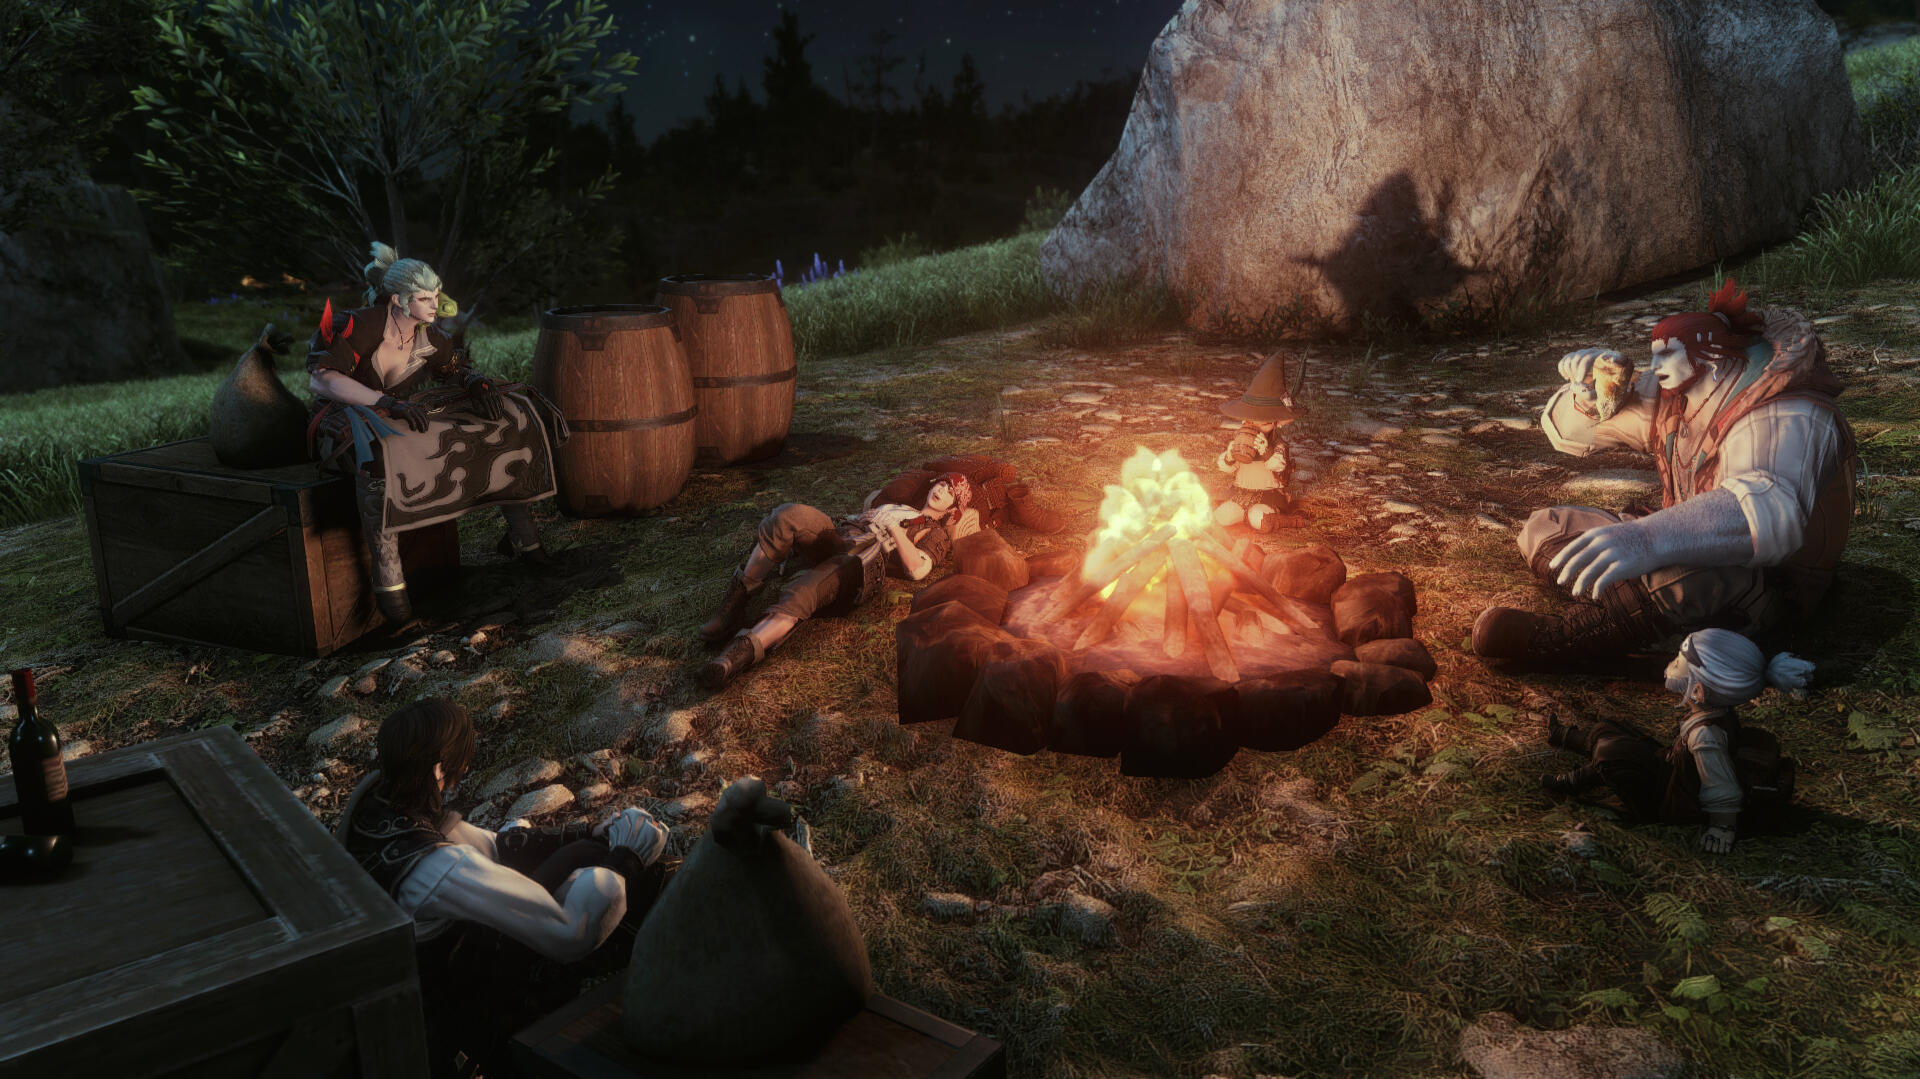
Now that's a campfire you actually want to sit around and swap your raid horror stories.
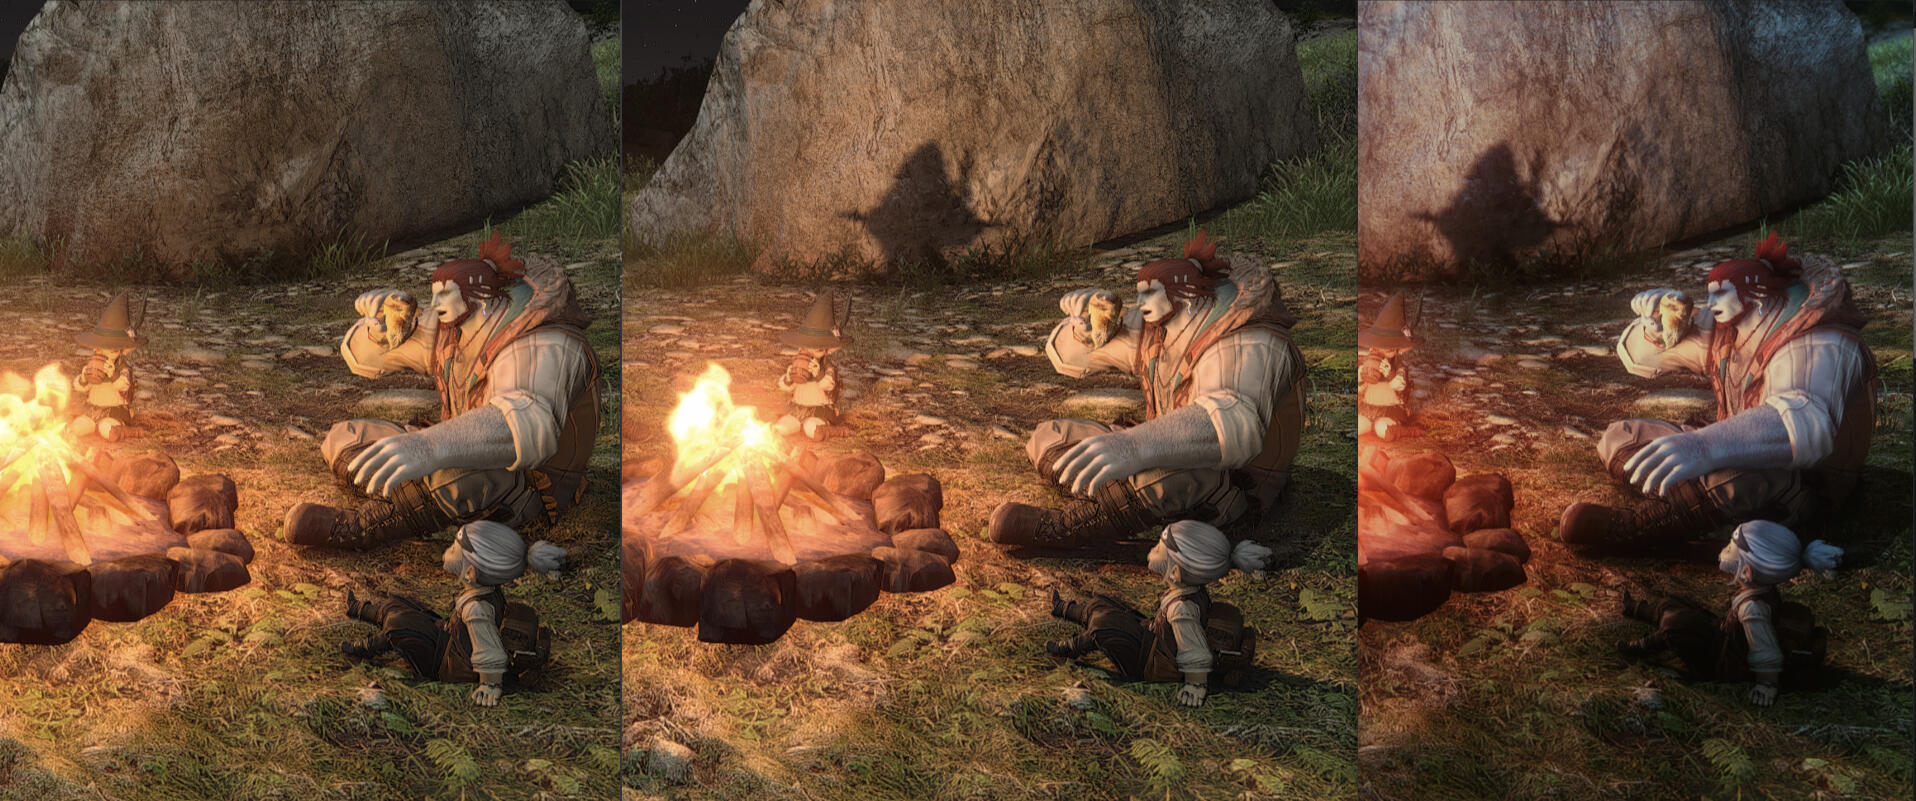
This goes way beyond campfire light of course. In addition to the three simple light points available in the vanilla gpose menu, you can have as many light points and shapes as you want.
It’s not that vanilla lighting is always bad, it’s that adding extra light points to it further emphasizes the light in such a way that even if the light source isn’t visible in your frame, you can tell by how the character is lit and by the shadows they cast that there is a warm, cozy light source nearby, and that’s the kind of atmospheric lighting we’re going for.
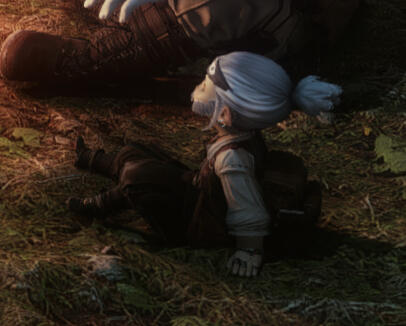
So if you're only looking at this one little guy and you can see there's cool bluish moonlight on one side of him and warm red light on the other, you can pretty much tell what kind of environment he's in, without actually seeing a moon or a flame in the shot. This is a nice goal to aim for whenever you're lighting your scene.
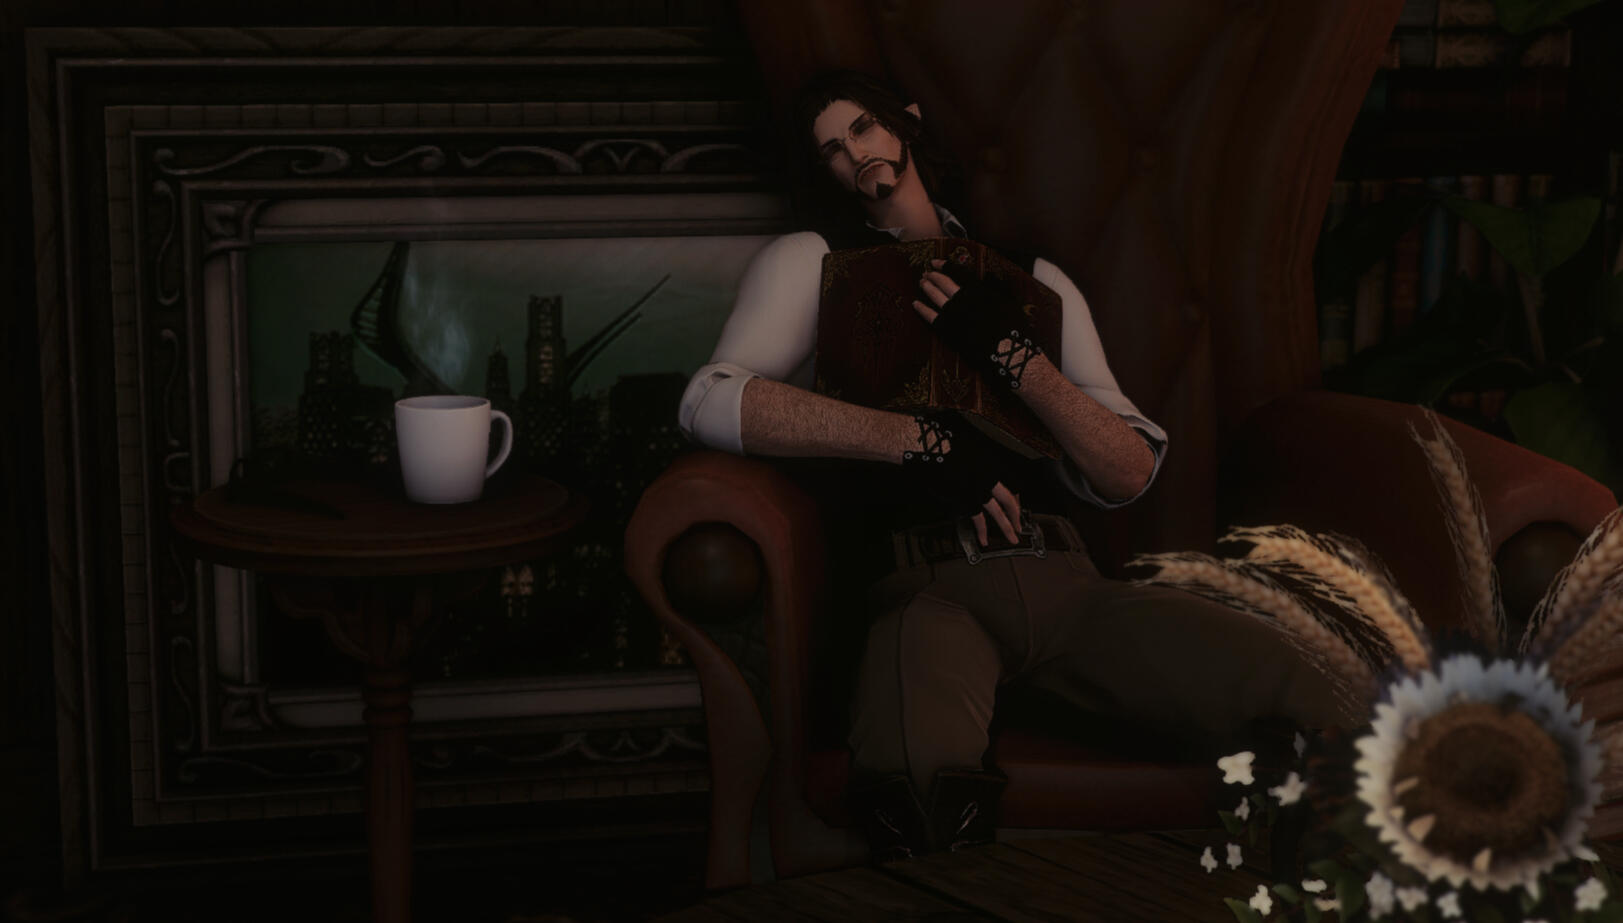
Here's another clearer demonstration of the same idea.On the left there's zero extra lighting. On the right, I added a light point on a fireplace.
Just looking at the left one, would you have known there was a fireplace to the right of the frame? Probably not because so many in-game light sources, usually flames, don't actually cast the right amount of light on surrounding objects, if at all.But looking at the right shot, it's probably very obvious that there is a fireplace, even if you don't see it.
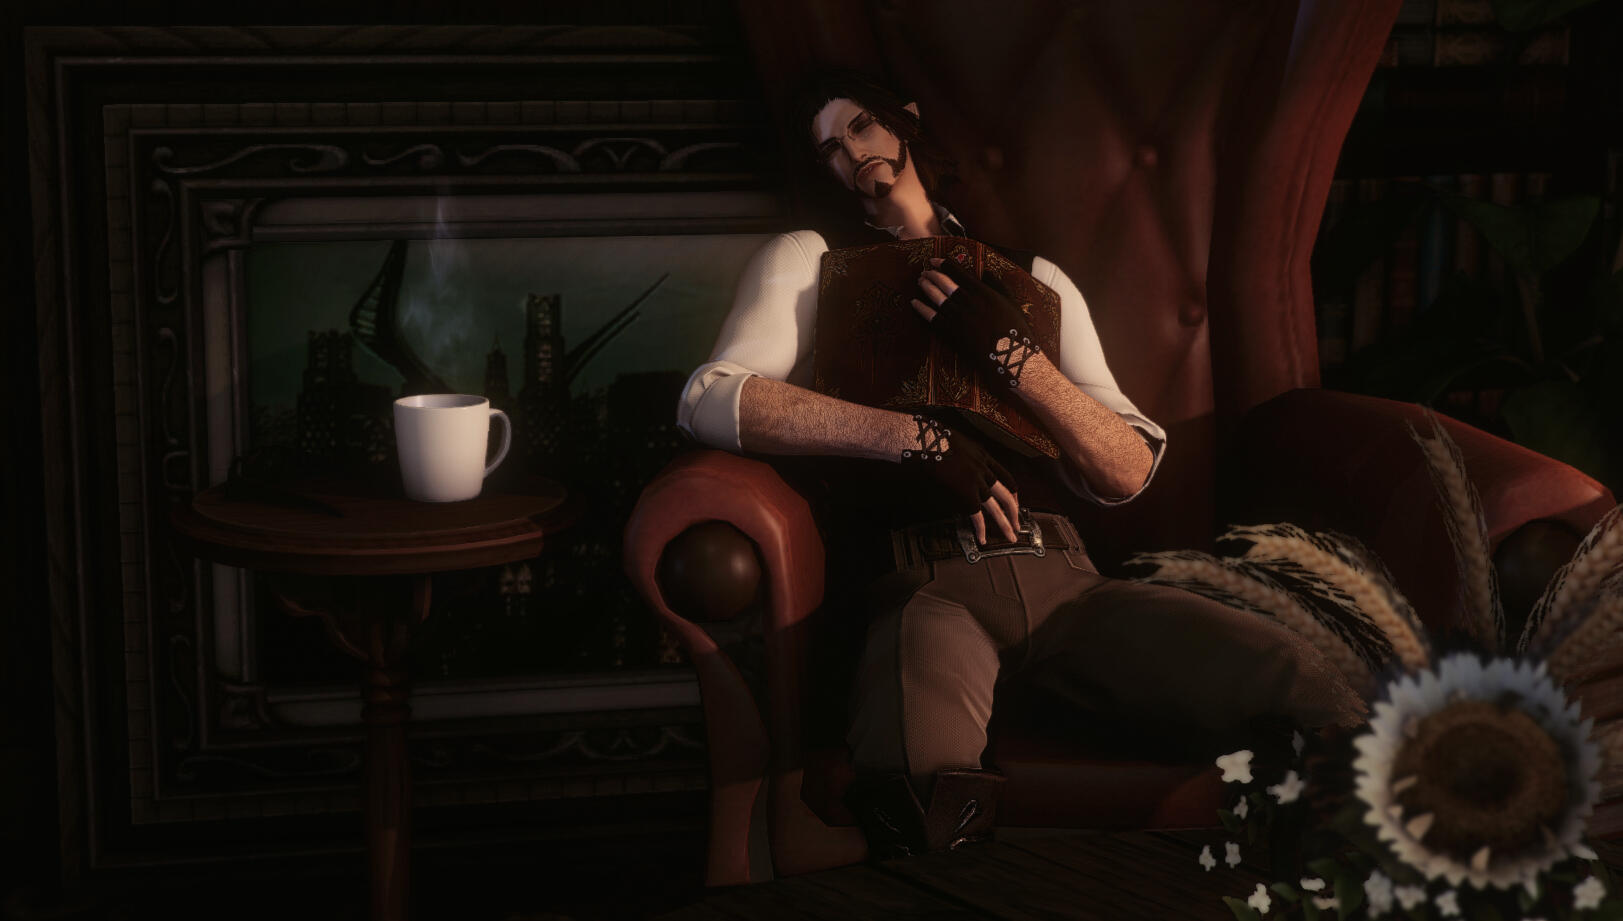
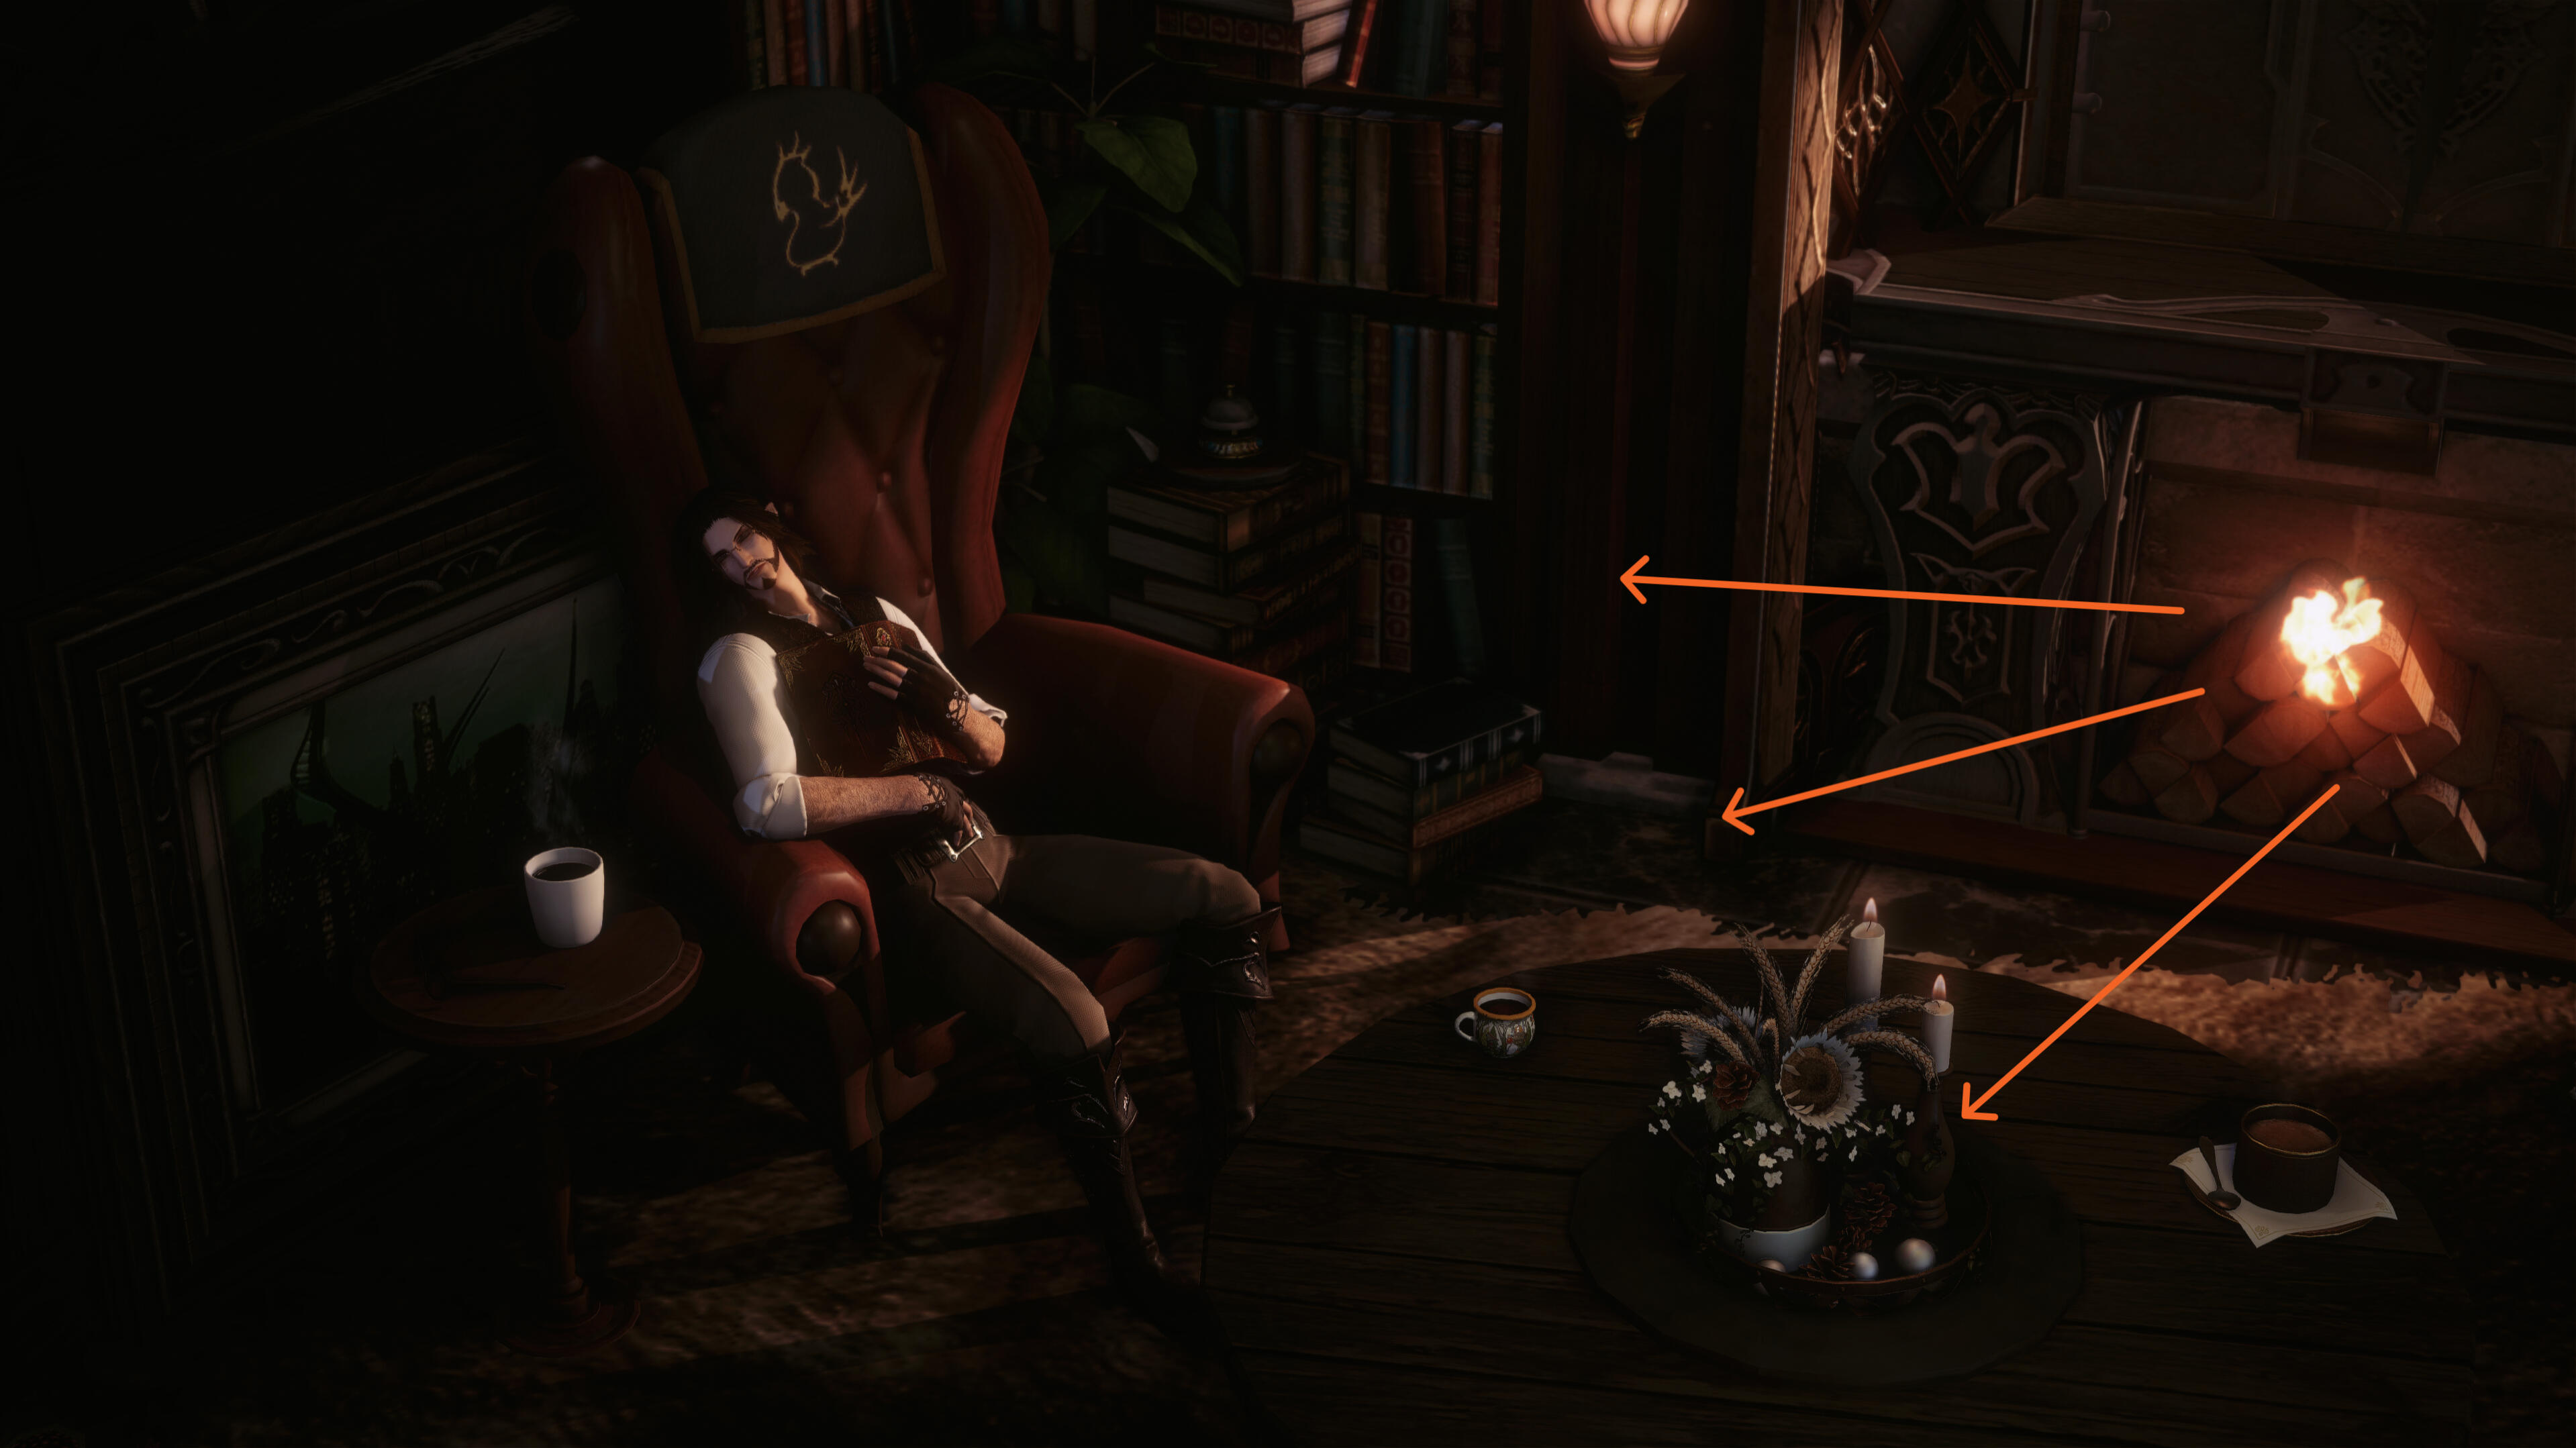
This way, we can let lighting tell more of the story than the frame shows.Also it's way cozier, pops out your main object/character and shows more of a dynamic play between light and shadow where it would otherwise be way too dark and flat.
(Even if your scene is meant to be dark! Lighting can still add much needed contrast and shape for all your favorite, dramatic tropes.)
Let's take a look at another example of environmental lighting and how it can enhance the vibe of your whole scene.I have this eerie gothic looking shot I want for my scene, and while the setup looks fancy enough, the lights and shadows still look rather flat.Let's see how we can fix that.
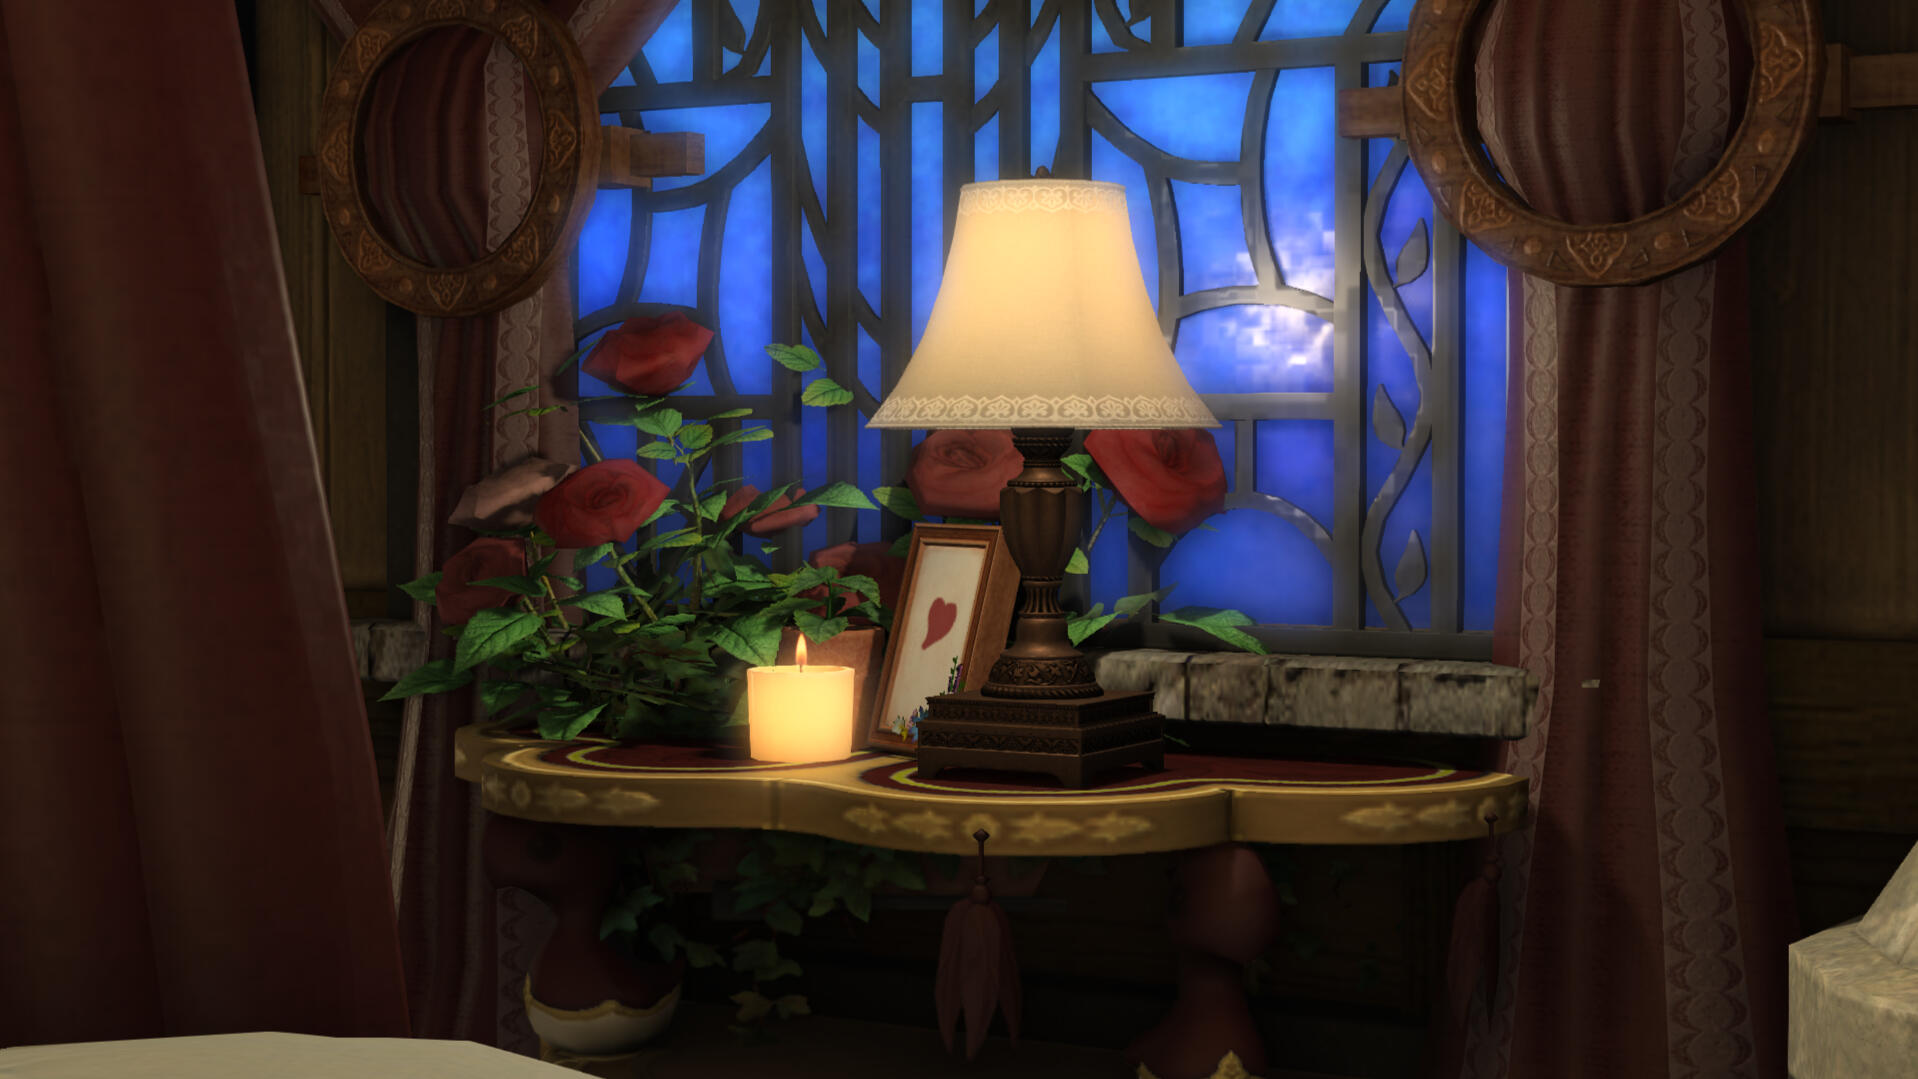
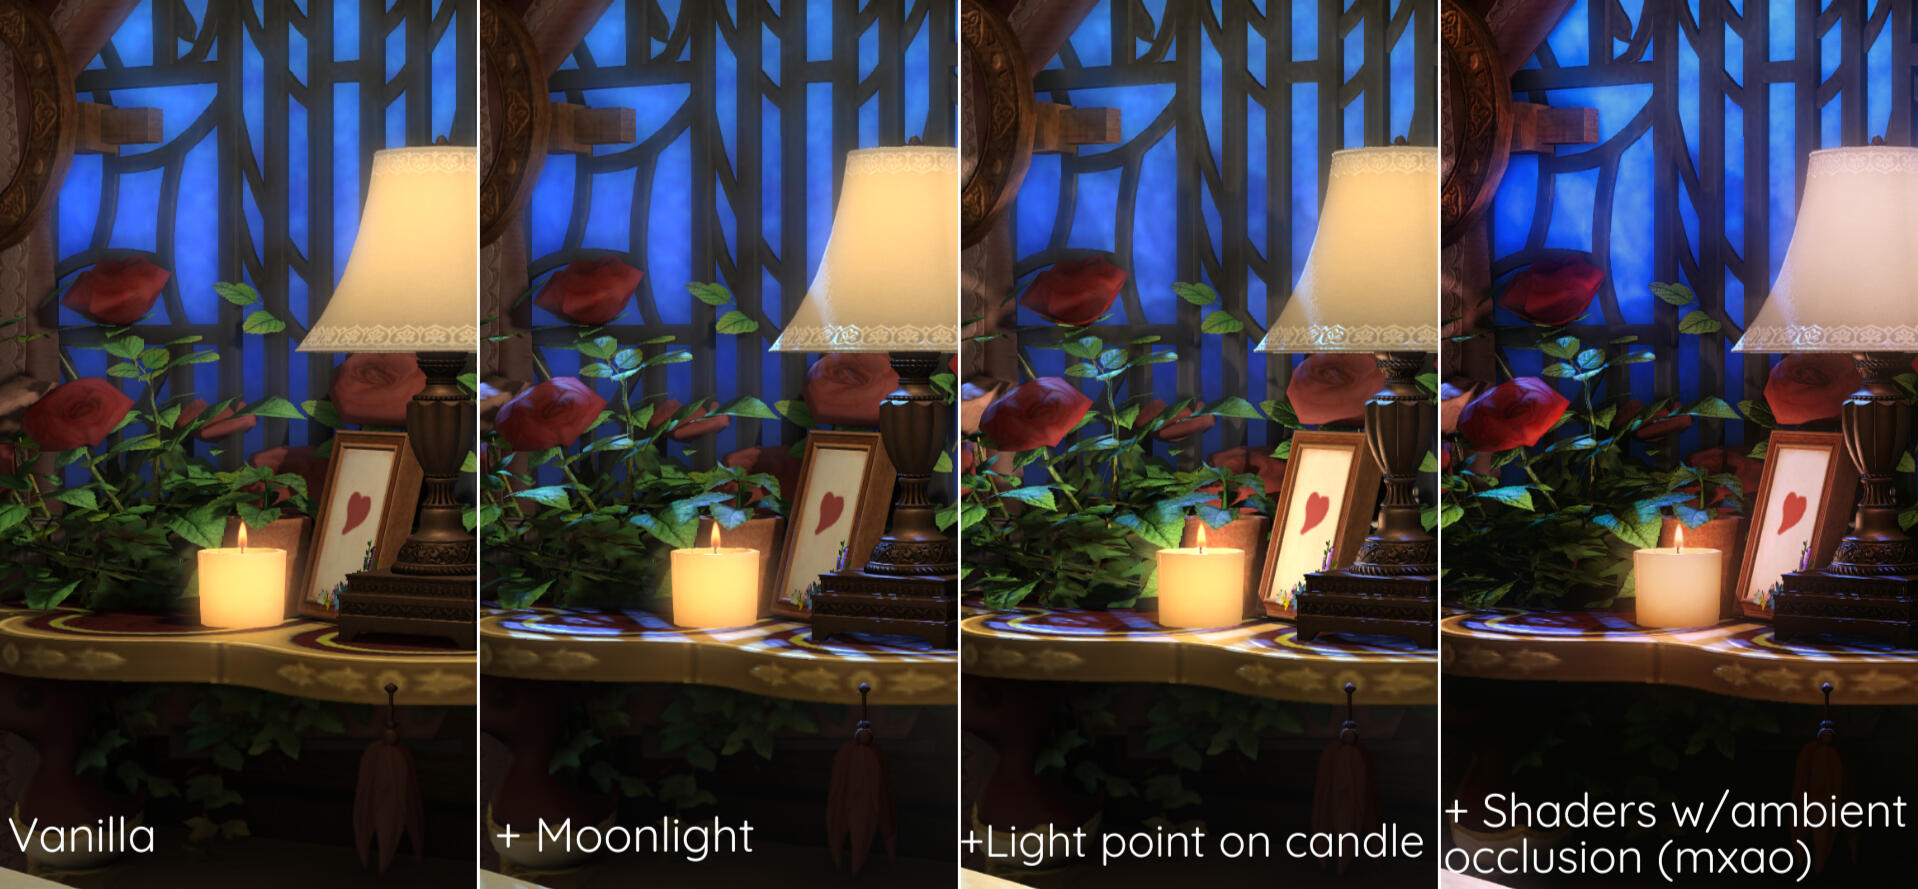
For one thing, I want actual moonlight to shine from the window to emphasize that it’s late at night. So, one simple improvement we can make is to find the right time of night for moonbeams to shine on our scene.
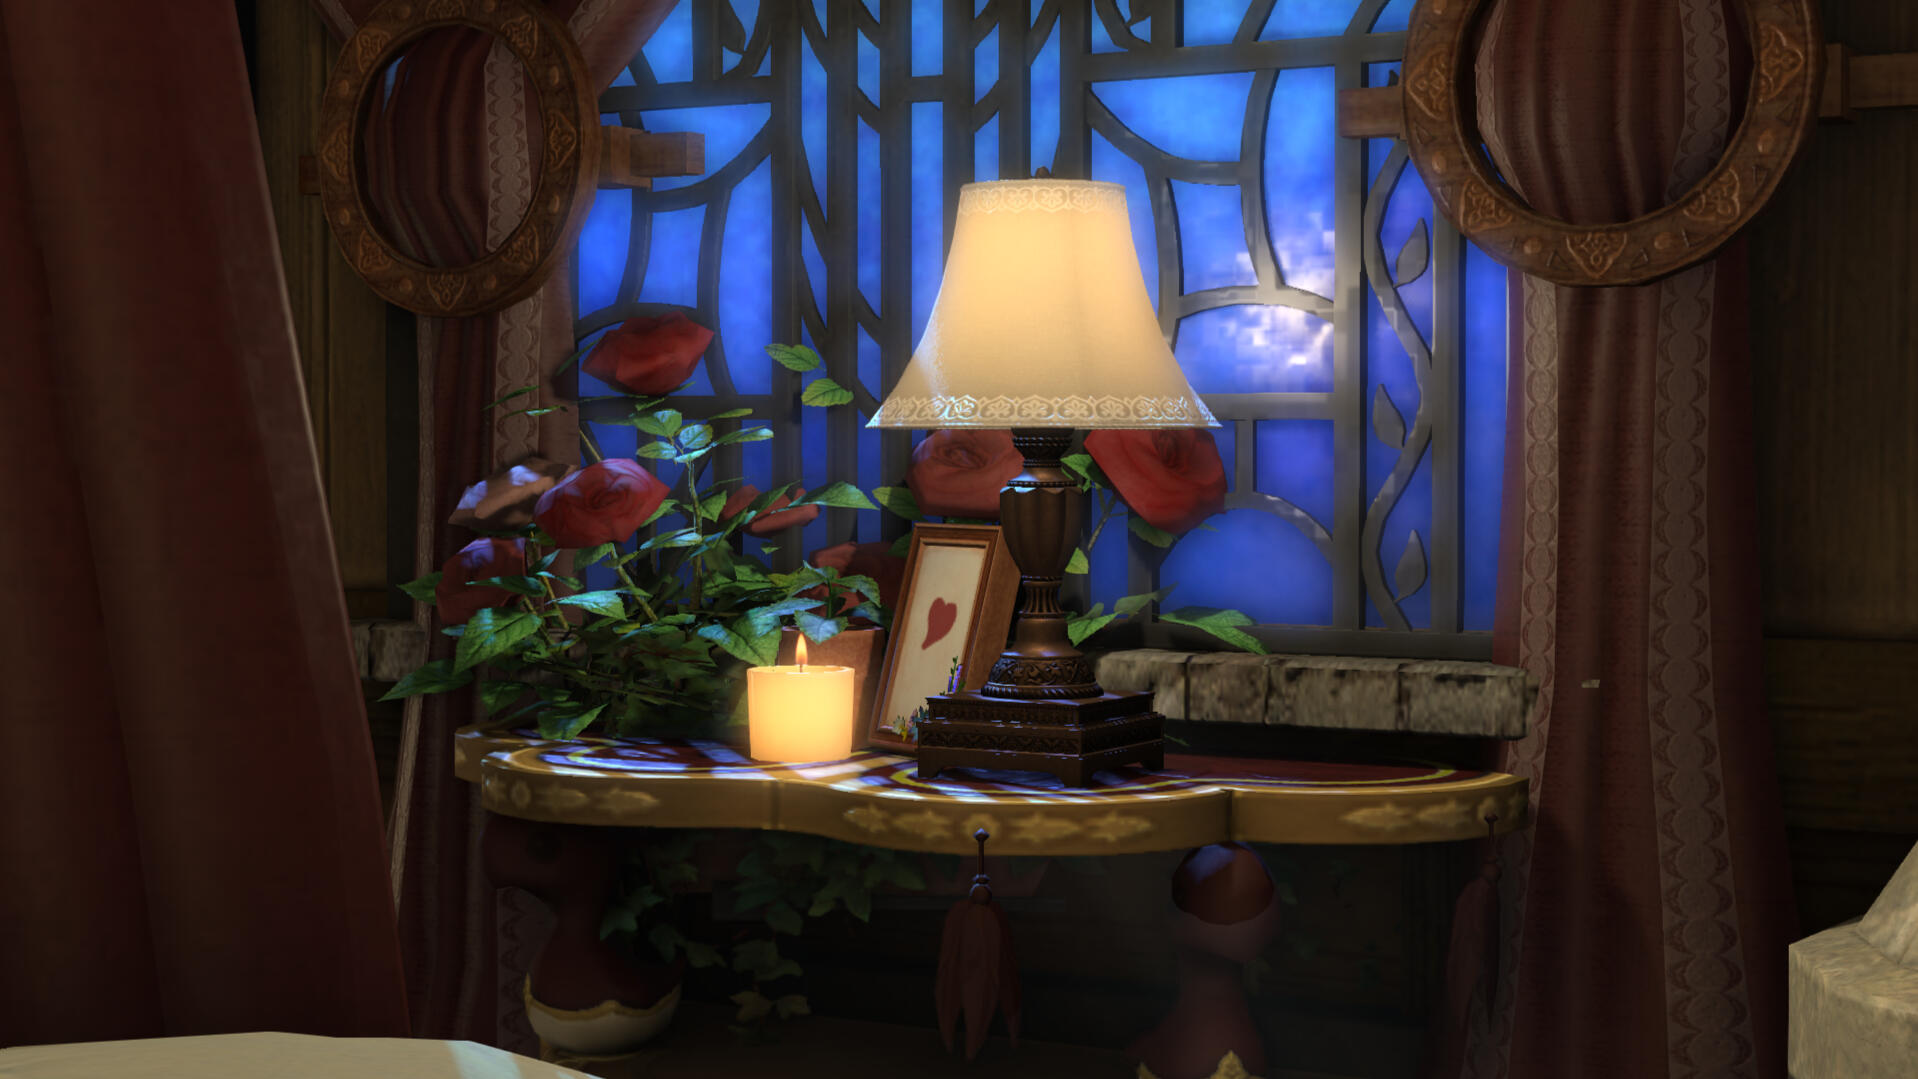
There we go, the table and roses are now dappled with pretty moonlight. That's already a +1 for atmosphere.
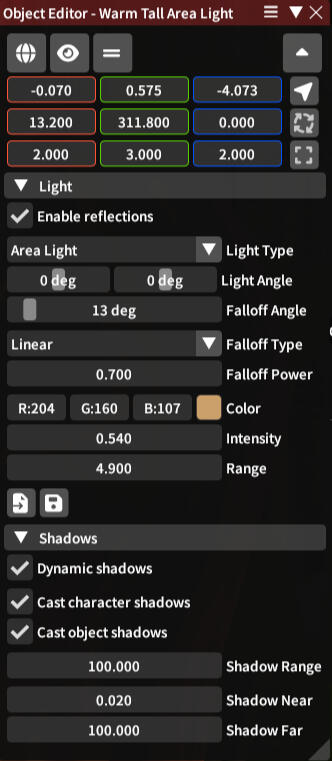
But now it's all blue and I want to enhance the warm light of the candle as well. You'll notice that the candle here, as expected, isn't actually casting any light on its surroundings.Let's fix that with a tiny light point on the candle flame, same as we did with the campfire but with even less intensity and shorter range.
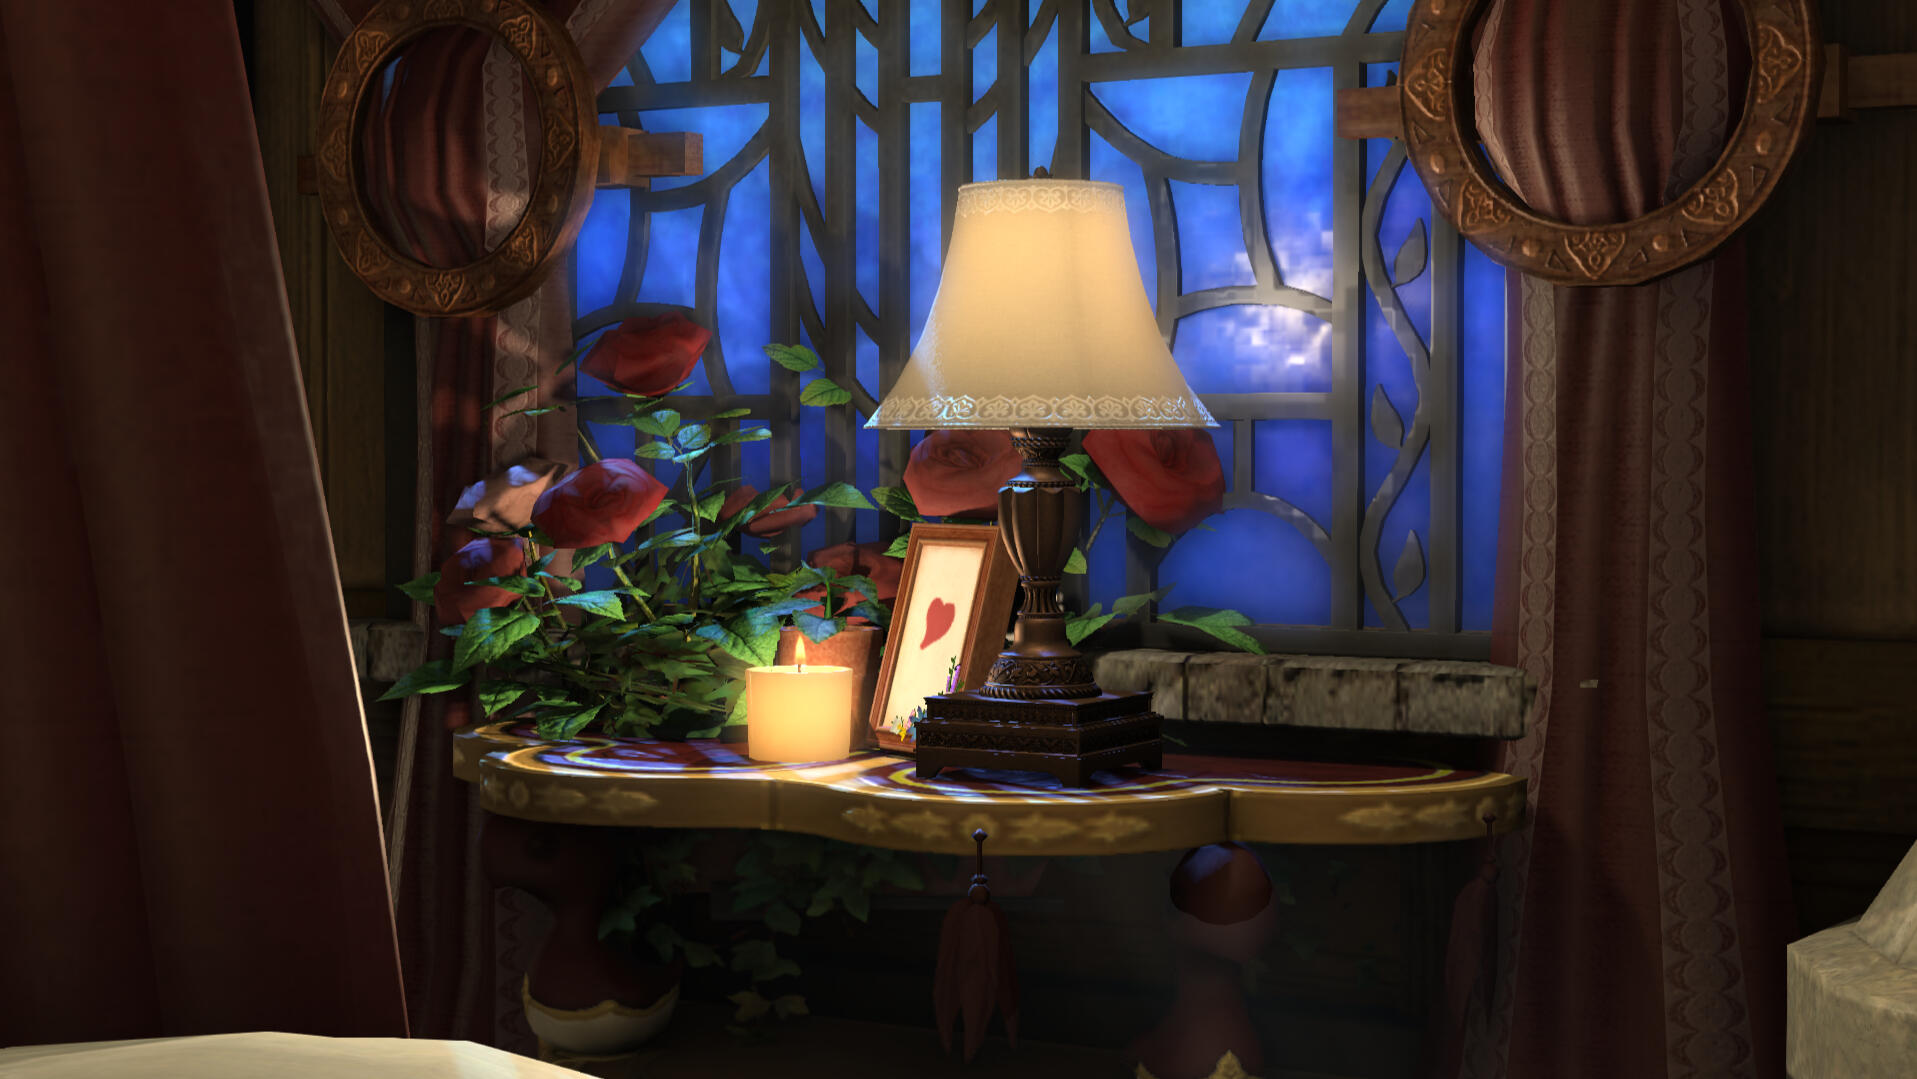
Now you can see clearly on the edges of the lamp that the candleflame is casting a nice, soft, warm light. Now everything around it has depth because we've essentially "painted" them with light and shadow. This is what we're going for with atmospheric lighting!Now pop your favorite dark shader preset on, et voila.
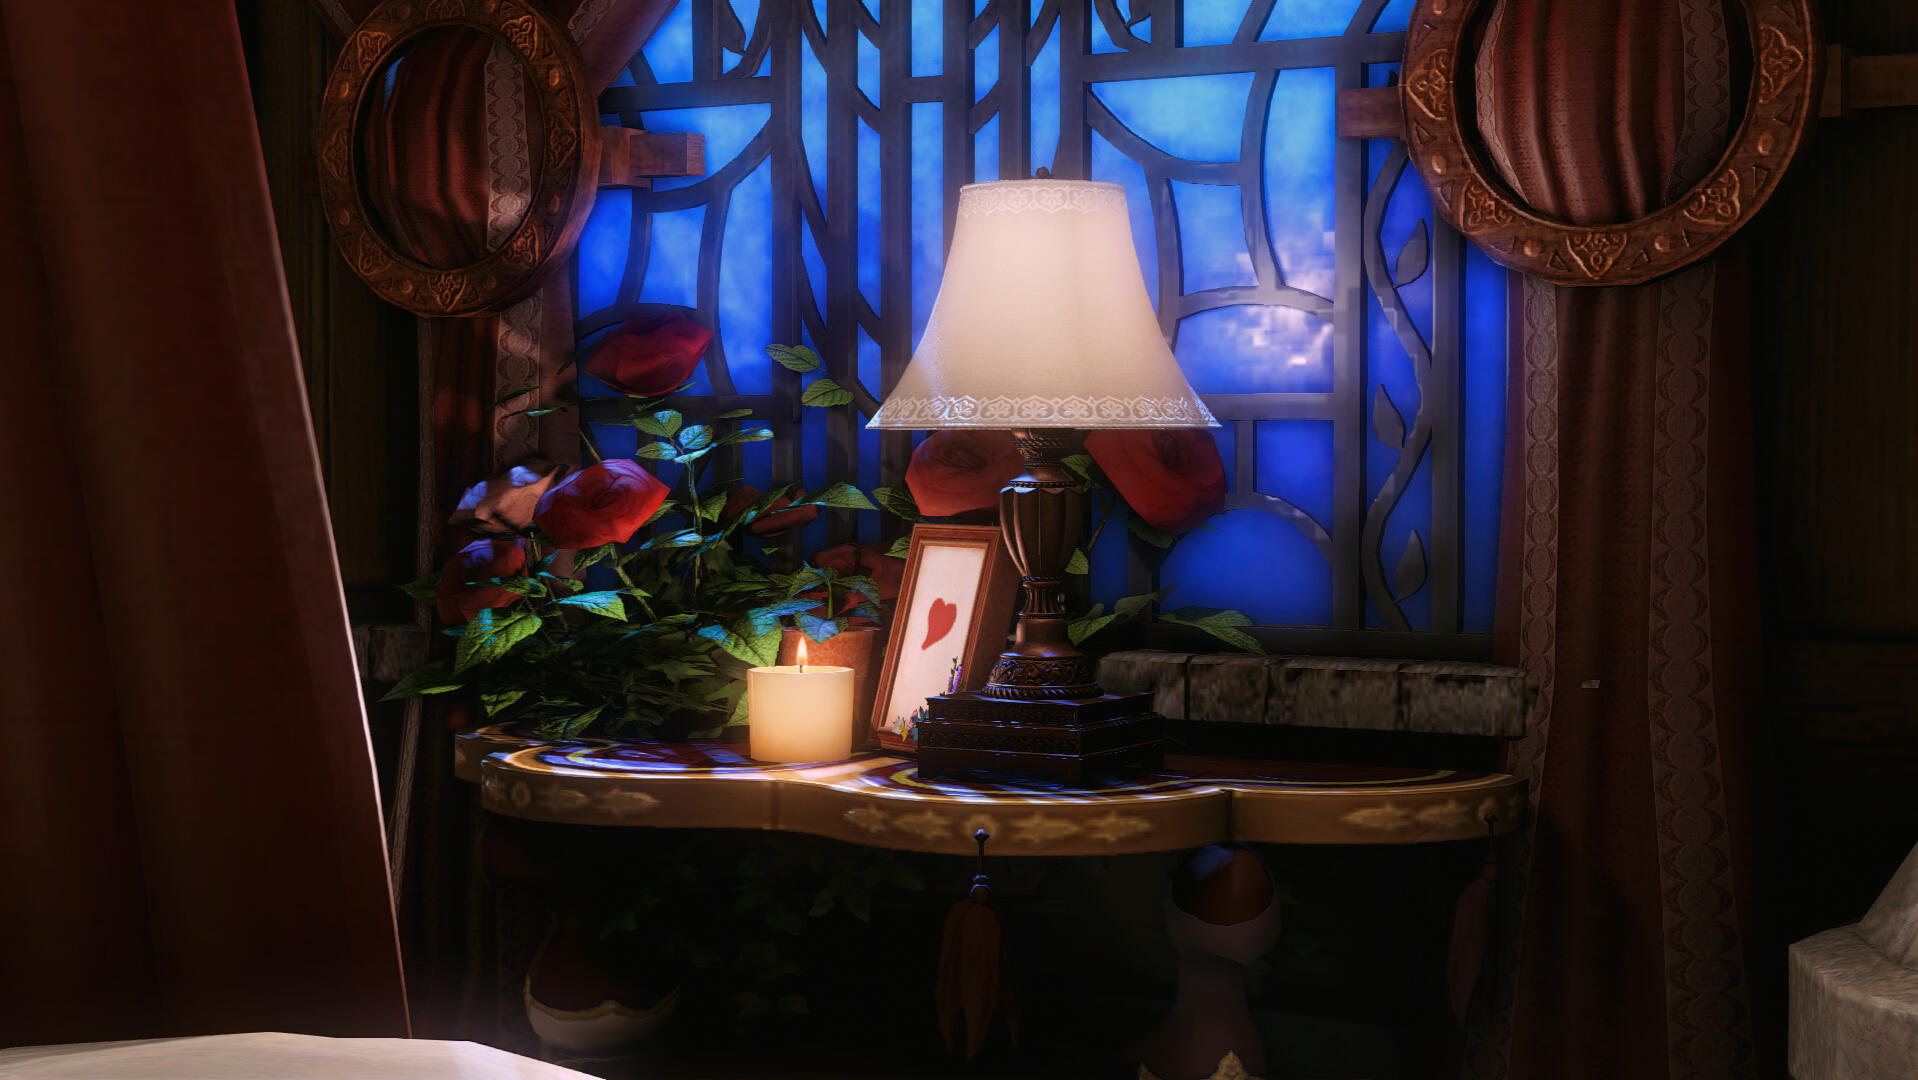
Awyeah. This is looking more like an environment I want to gpose my scene in.
While shader presets with ambient occlusion can do a lot of the heavylifting for you in terms of shadow, they only really enhance the lighting you already have in your scene to begin with, so it's always useful to be aware of your light sources in every scene, and supplement them with your own light points.Just look at how the 3 steps above enhanced our scene for us!
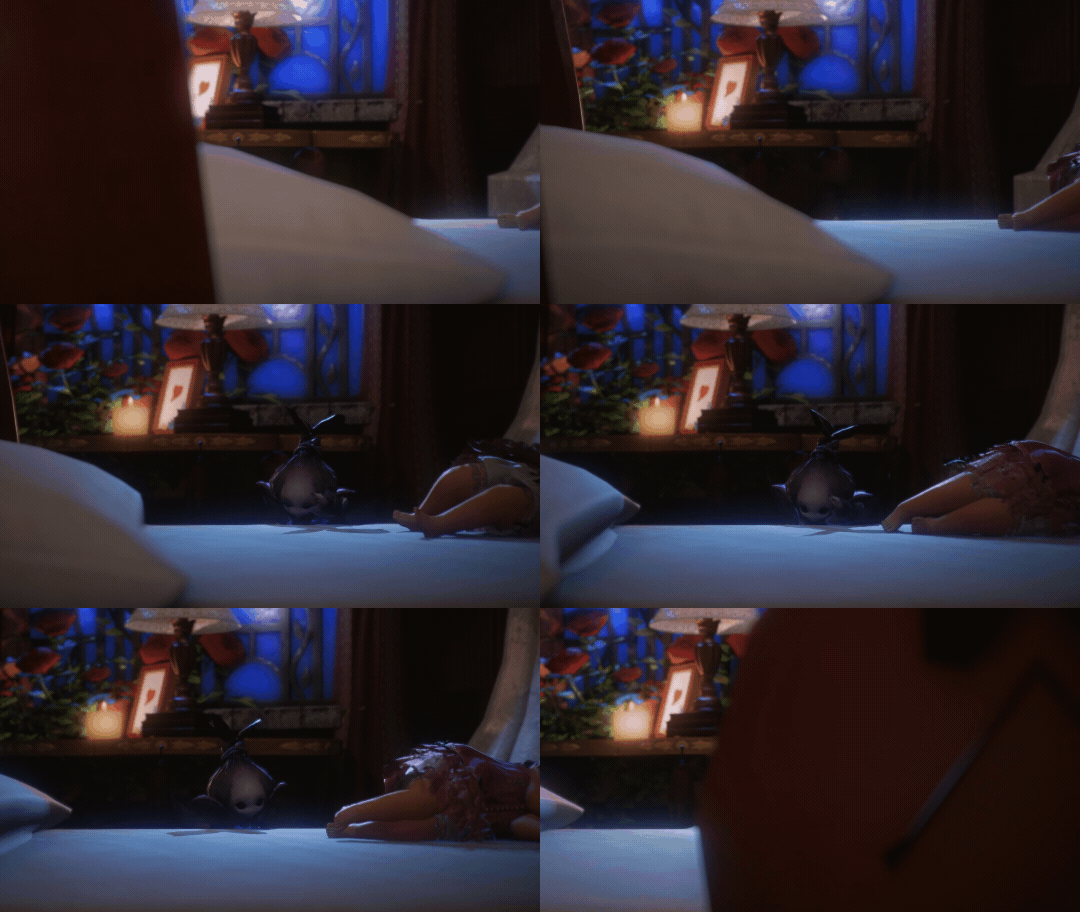
Now our scene is perfectly spoopy and ready for a sylph invasion.
Hope this motivates you to play around with lighting in your scene and "paint" your own lights and shadows. It really makes all the difference.Happy gposing ♡
Quick & Clean GIFs
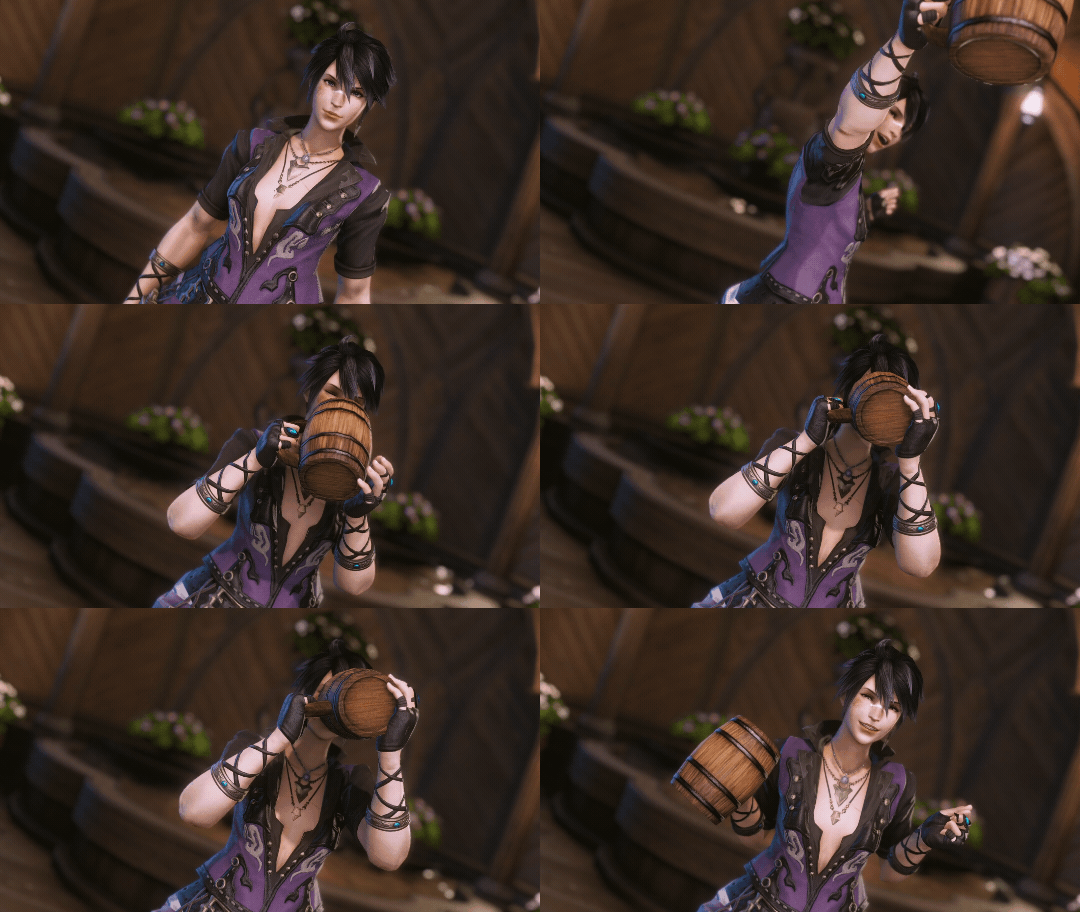
Let me preface this by saying this isn’t the only nor best way to make high quality .gifs of your game. It’s only my personal method that I hope I can sell you on! It may seem a little more convoluted than simply converting videos to gifs with your preferred video editor, but it’s a quick, tried and true method that gets you consistently high quality gifs with the smallest size. That’s because, rather than using video editors to convert videos to gifs, this little tool captures whatever is playing on your screen. So it records rather than processes. And since it automatically saves your gif, you don’t have to mess around with specs. This keeps the quality : size ratio consistent.(This also means you don’t even have to capture videos of your game to convert to gifs. You can capture gifs directly from your gpose, if that's your style.)
Tools you’ll need:- LINE for desktop: a free messaging app with a built-in GIF capture tool
- Your preferred game capture software. I’m using OBS here.
- Any video player you have, preferably with the ability to loop videos. I’m using VLC here.
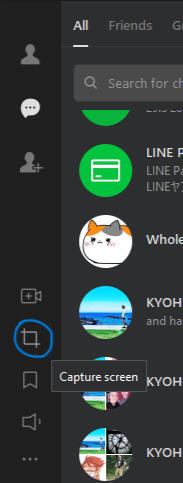
1. Get the free LINE appOnce you’ve registered a LINE account and installed it on your desktop you’re pretty much set and you can start capturing gifs.You will find the “Capture Screen” on the side bar of your LINE window. (Also available within individual chat windows so you can capture and send stuff directly.)Clicking it gives you this neat freehand tool that you can select any part of your screen with, then decide whether you want to save as a screenshot, gif or anything else.
2. Choose your dimensions and selection your areaWhat you’ll want to do first is decide on your gif dimensions because you want those exact numbers for your freehand selection tool. I generally go for a width of 540 pixels because that’s the ideal width for Tumblr last I checked.
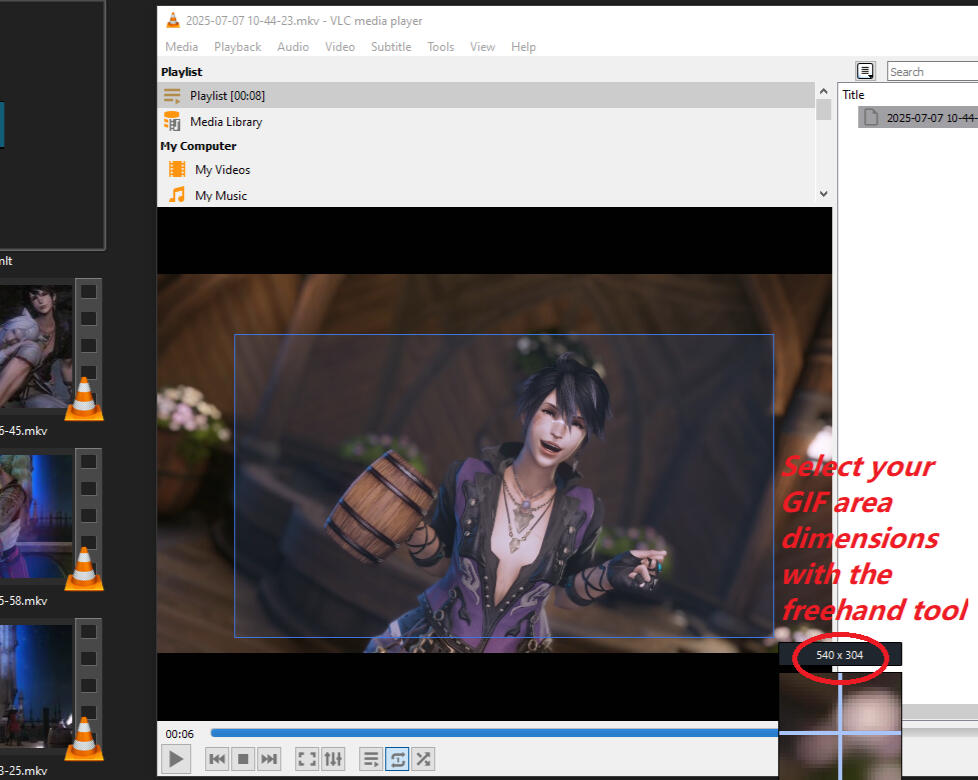
I set the the height at 304 because that roughly corresponds to my screen & video capture resolution (1920x1080 or aspect ratio 16:9). You can set it to whatever height you want your gif at, but keep in mind the larger your selection area the larger the file size and the lower the quality. I find that 540x304 produces gifs that are under 10mb pretty reliably, with rare exceptions.For this guide I’ll use an .mkv video I’ve already captured. I played it with VLC and kept it windowed and on loop. You’ll want a window size roughly close to the final dimensions you want for your gif or a bit larger. It doesn’t have to be super accurate.
3. Record your GIF and save!Select the area you want and you’ll get an option bar. Hit GIF to start recording and either stop recording or let it run up to 8 seconds and you’ll see a replay of your capture. You’ll have the option to save your captured GIF or hit record again to re-capture if you want.
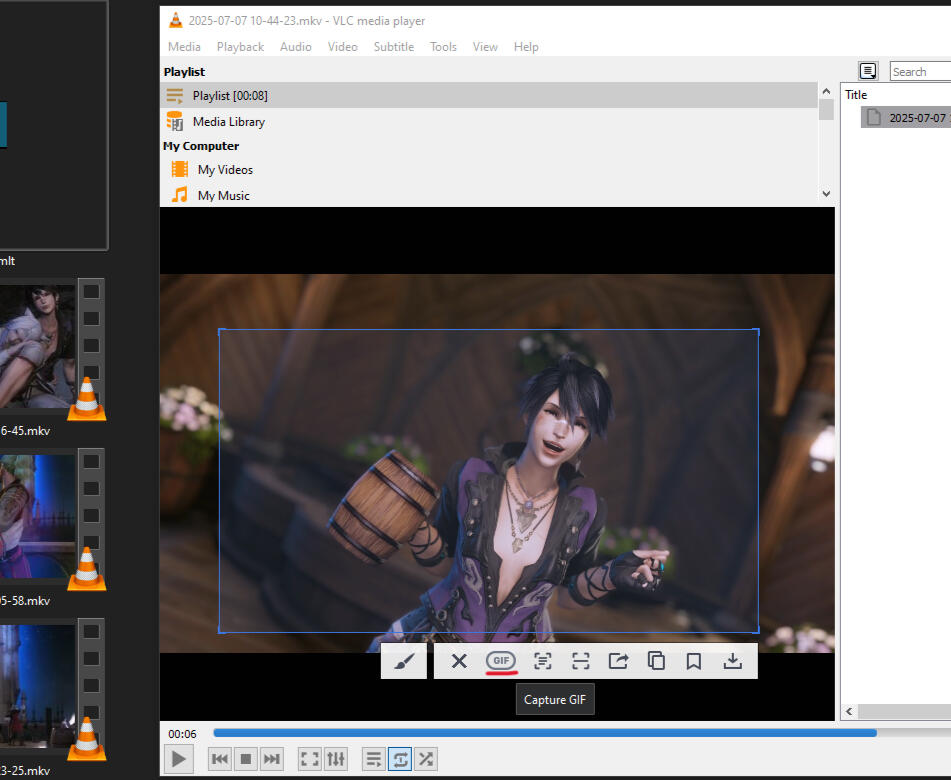
The final result here is a crisp 6-second GIF that’s 8.92MB, with barely any graininess or dithering.
Compare this to a GIF of the same resolution exported from the same video using Shotcut and limited to 30fps, with a size of 13.3MB
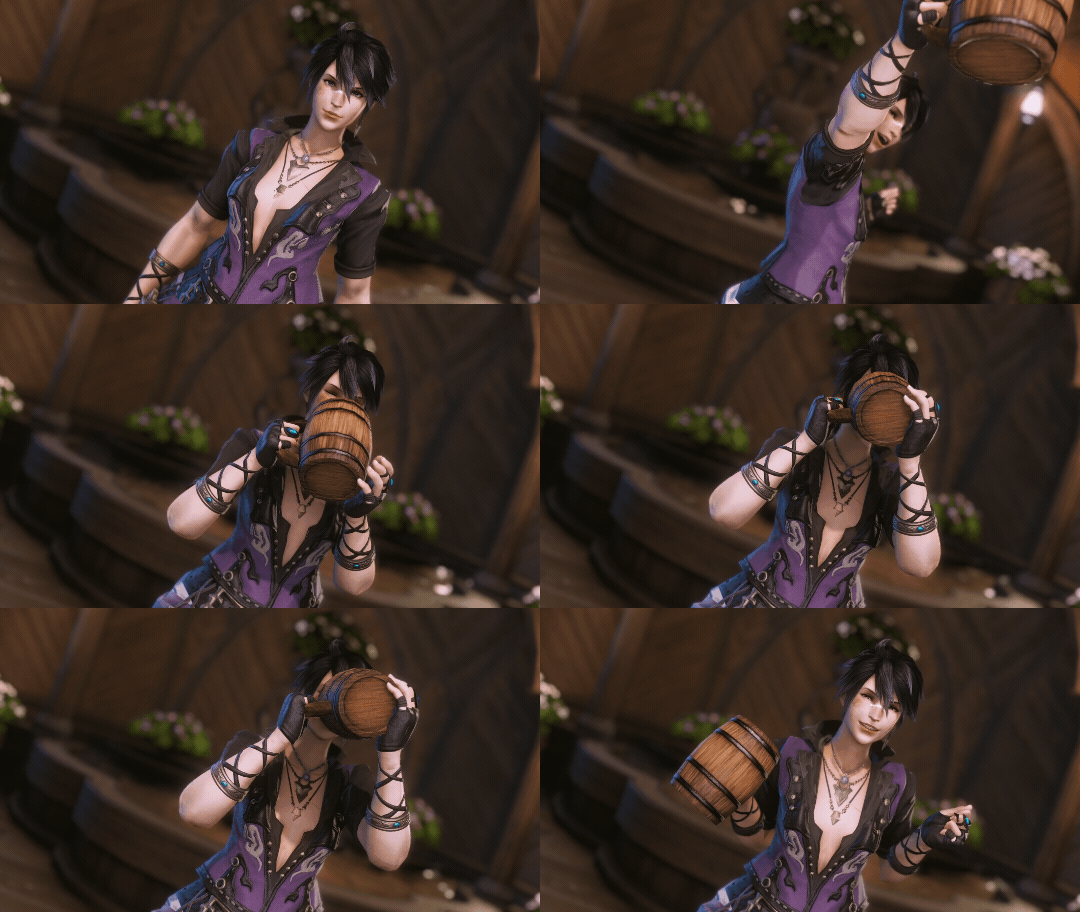
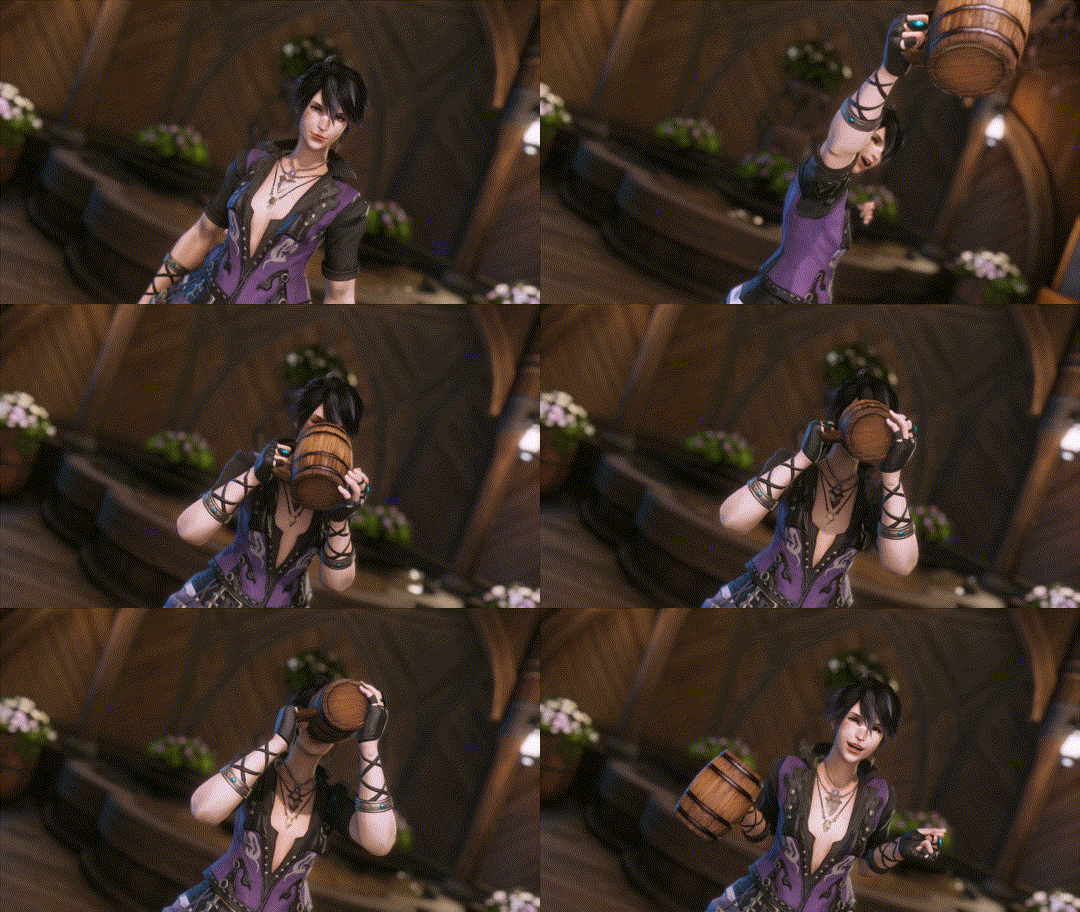
Captured with LINE, 8.92MB
Converted from video with Shotcut, 13.3MB
Pros to this method:
- Quick, clean, consistently high quality to size ratio
- No need for video editing tools or experienceCons:
- The tool only captures up to 8 seconds at a time, so that’s the duration your individual gif will be limited to.
- No video editing software means you have no control over individual frames or your framerate, so your video has to be as perfect and smooth as you can have it beforehand.
Extra Tips:
- You want to start your freehand selection from top to bottom. LINE gets dumb sometimes and if you select from the bottom up, the pop-up options and/or tooltip will show up at the top and end up in your final gif! You can adjust the selected frame by dragging but make sure you drag the bottom edge last so your buttons + tooltip end up at the bottom and will not show up in the capture area.
- The higher your video quality, the better your gif will look, without affecting file size that much, so I highly recommend capturing from raw .mkv videos rather than .mp4
Camera Motion
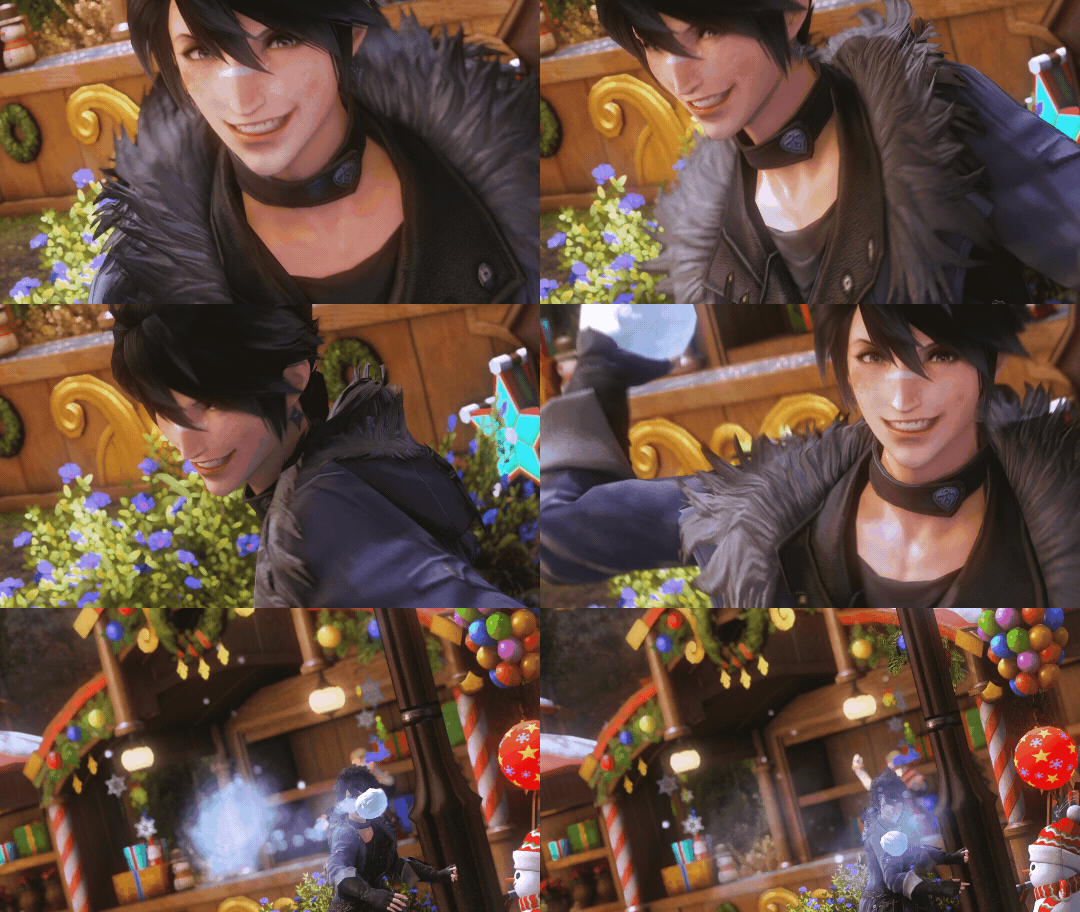
There are several ways to add motion to your animated shots that you can try individually or combine if you want. We’ll start with the most basic, vanilla method that requires no third party tools at all, then a method you only need shaders for, and lastly plugins and how they can improve on the former.
100% Vanilla: The good ole Minion-on-Shoulder trick (or Minion-on-Head if you’re a lala)
Before going into gpose, summon yourself any minion that you can /beckon to have them perch on your shoulder (or head) and then go into gpose. I’ll use my trusty owlet here.
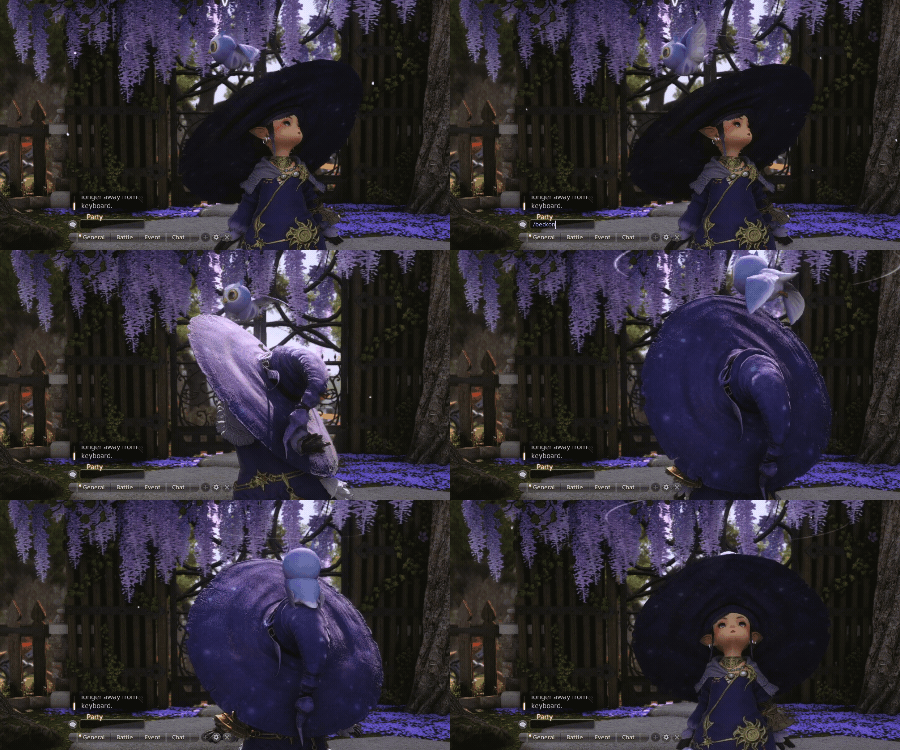
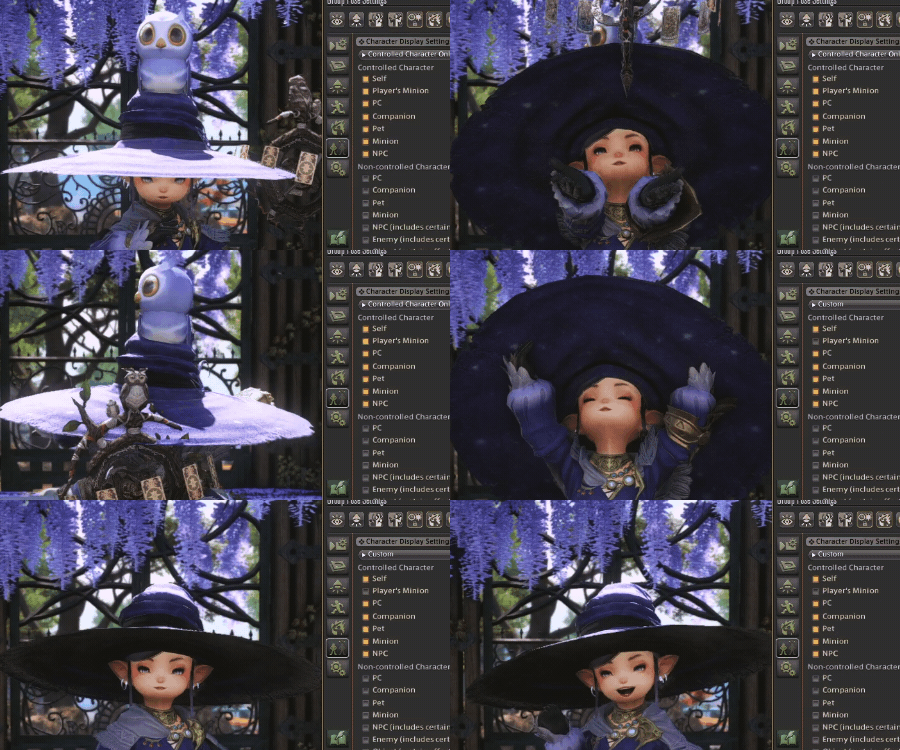
Have your character do the emote you want, then switch your target focus to the minion. The minion will be moving along your character’s motion and so will the camera as long as it’s targeting it. Even if you turn your minion invisible from your vanilla gpose menu, the camera will still be moving along your animation and it’ll make for some neat animated shots of your character.
Worth noting: if your character is a lalafell and the minion is on your head, the animation will be noticeably shakier and more extreme than a tallsie with a minion on their shoulder, because the head tends to jerk around a lot more than the shoulders, so keep that in mind.
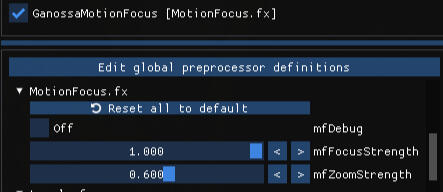
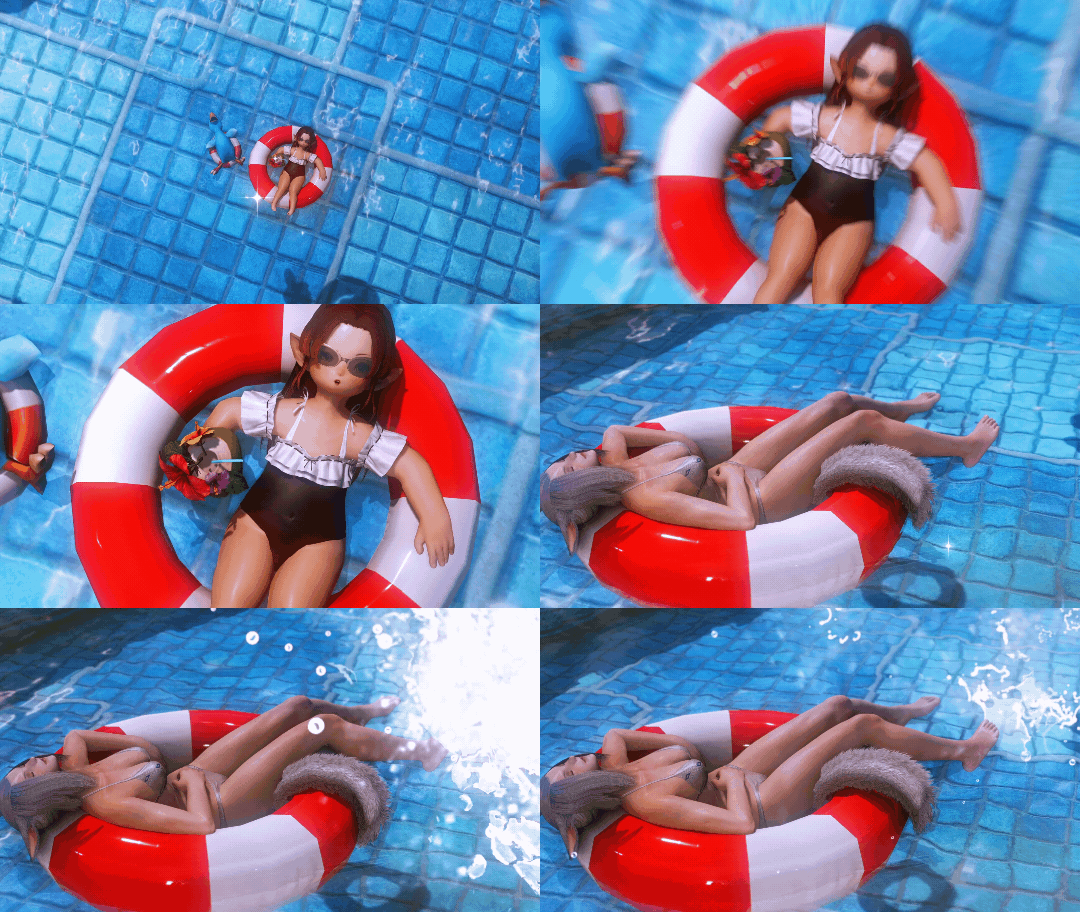
Gshade / Reshade Effect: Ganossa Motion Focus (motionfocus.fx)
This adds an extra shaky cam effect to any motion your character makes, and can be combined with the above minion trick to add even more motion.
If you can’t find this effect in your shader folder, you can get it here.
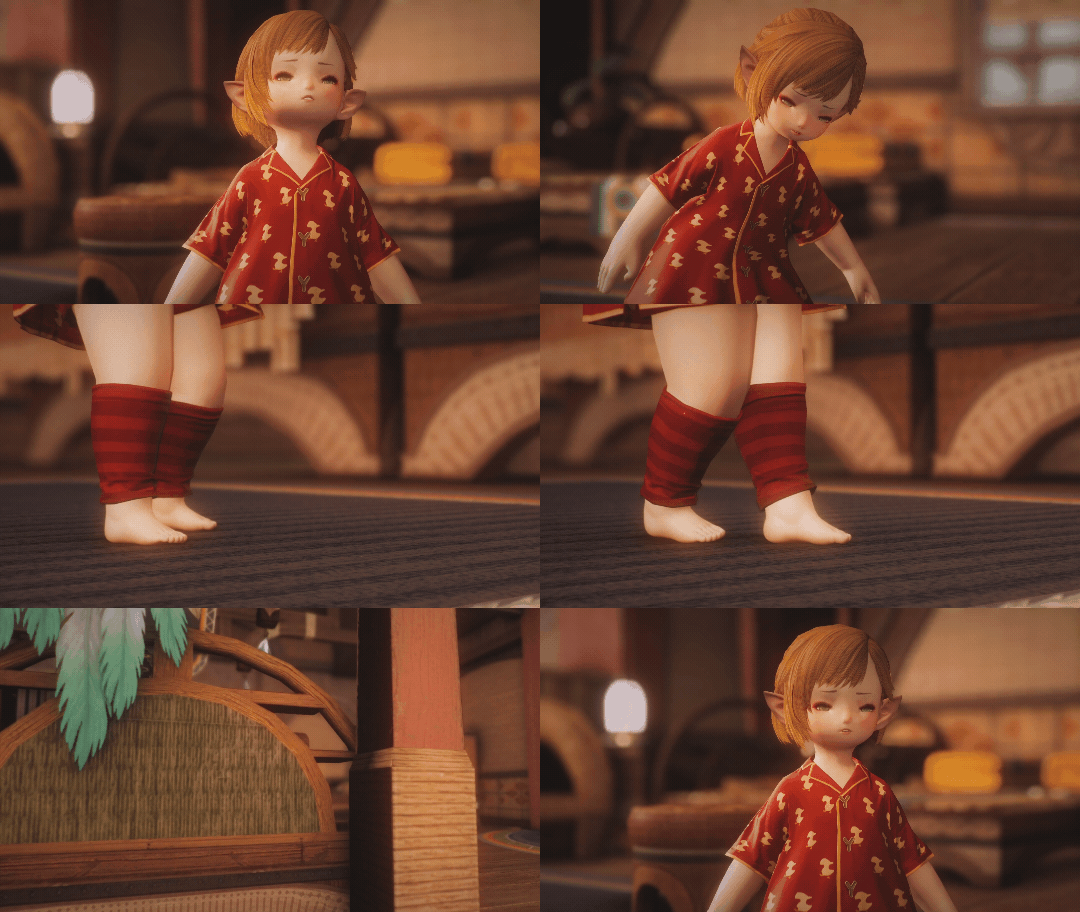
A combination of the minion-on-head trick plus motionfocus.fx was used here.
You can experiment with how much you'd like it to shake as well as zoom in/out.
Using this effect with simple animations and panning or zooming with your controller can really go a long way toward making your scenes more cinematic, and you didn't even need to leave your gpose or do any post-editing! Look at you making movies in your gpose.
Note that it can be pretty overkill, especially if you go crazy with the Focus Strength and Zoom Strength sliders. You may want to use it sparingly, particularly if you’re prone to motion sickness!
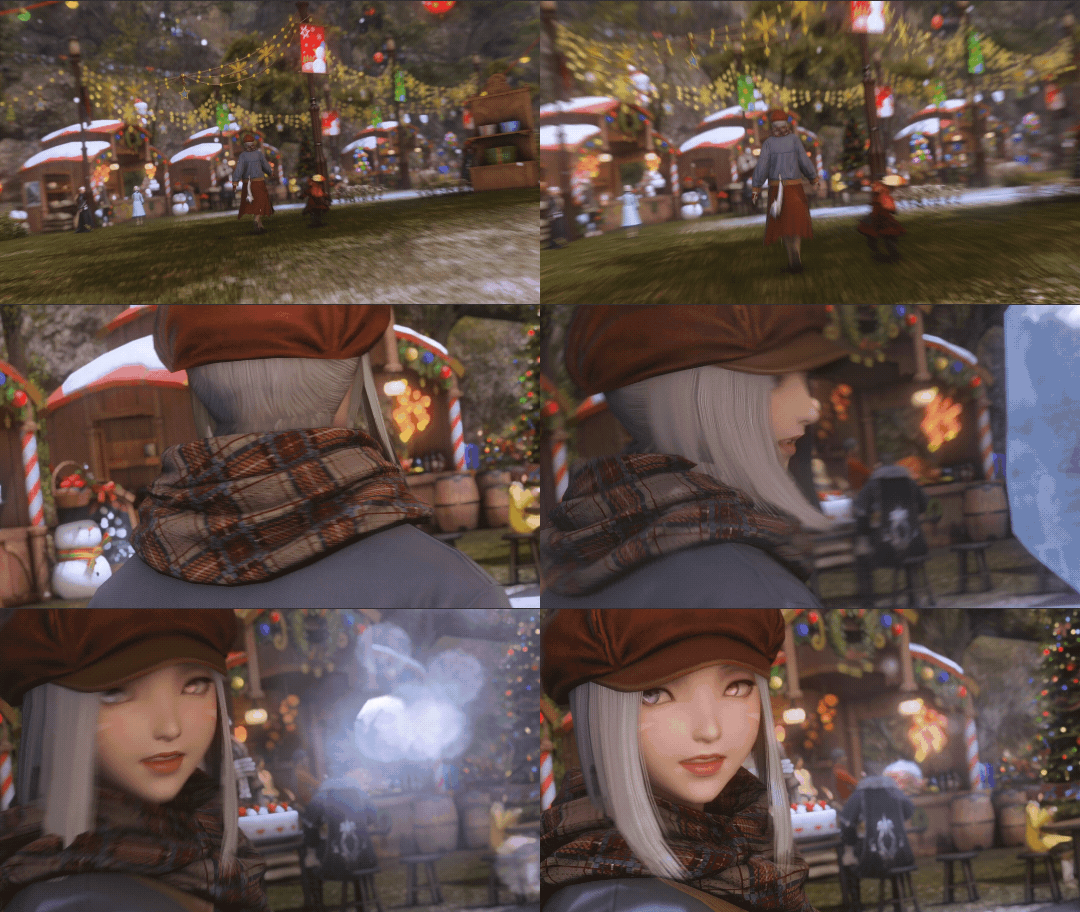
Of course, there are several more shader motion effects that add so much to your gameplay or gpose animations, such as motion blurs (FakeMotionBlur.fx for one) that look especially good in snap zoom shots!
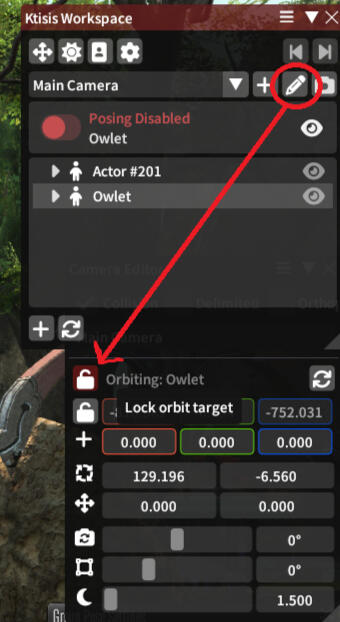
Plugins that help with Camera Motion
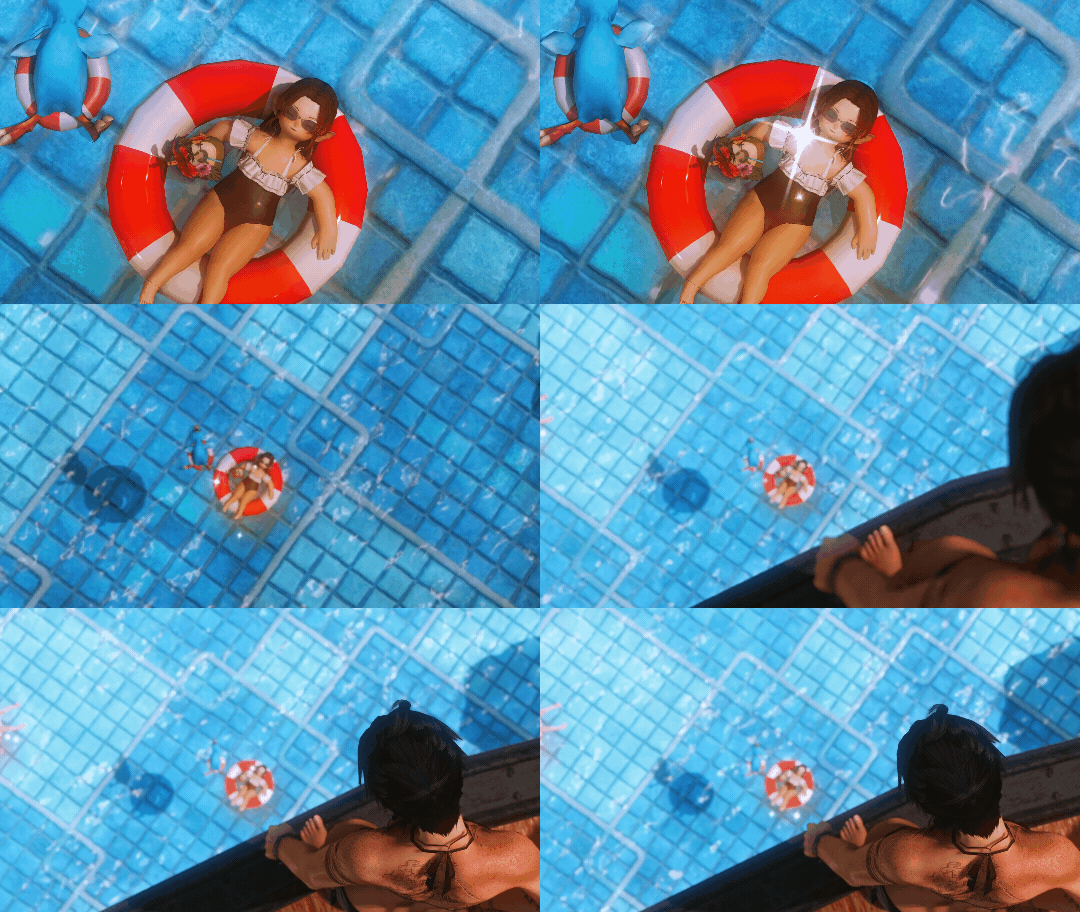
Now if you do use plugins you can make it more convenient for yourself and lock the camera orbit onto the minion with Ktisis. This way you can target and control any other actor while the camera’s still in motion.This still takes effect even if you reposition your character away from the minion currently perched on their shoulder. The minion would still move along the character’s animation. However, if you reposition the minion itself, it will lose that motion and you will have to reset the minion’s posing in order to get the camera to move along it again.
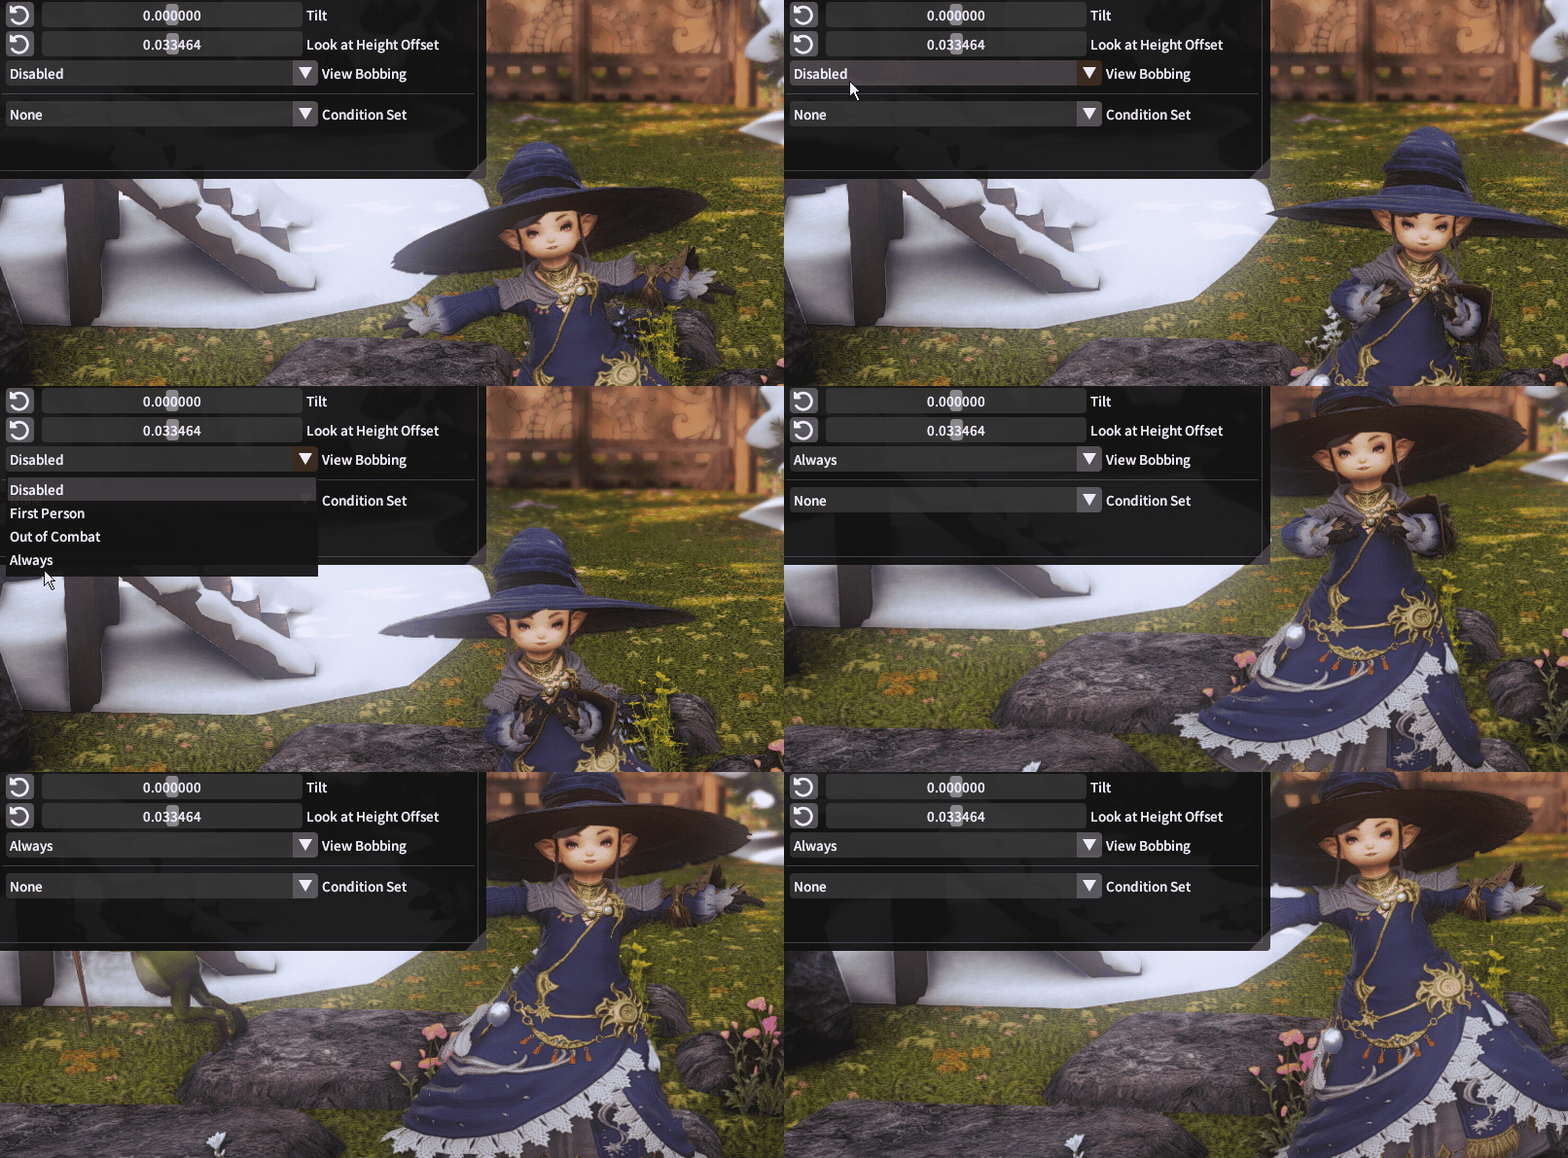
And if you'd rather do away with the minion entirely, there's another plugin that can give you the same motion tracking effect a perched minion would, without having to summon one, and that's Cammy. Thanks to Synthetic for sharing so many useful tips for the godsend that is this cam tool.
You can pull it up with /cammy, go down to View Bobbing and set it to Always before going into gpose, et voila, now your minion can run wild and free.Note that this method will have the camera follow your character around continuously even within gpose, and if you don't want that you'll have to lock the Ktisis camera on another actor in your gpose (it can be a hidden actor that acts as an anchor.)
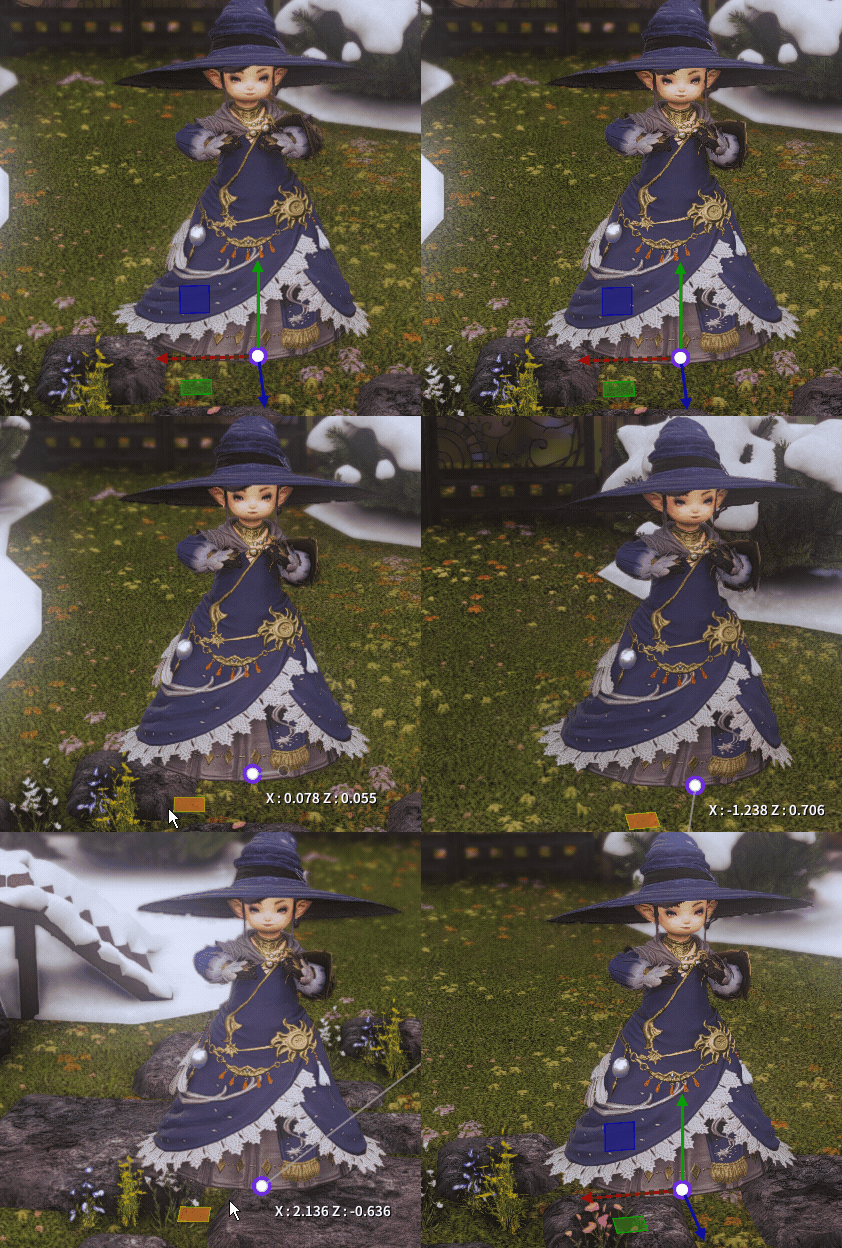
Have fun playing around with animations! and if you need to look up animation IDs or associated props, remember to check the reference sheets listed in the Resources section.
Transparent Backgrounds
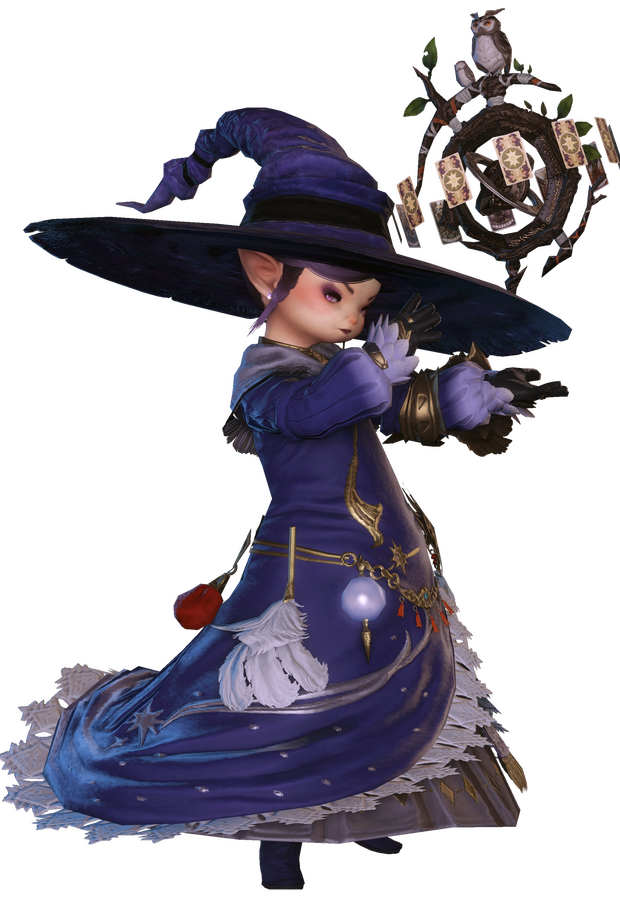
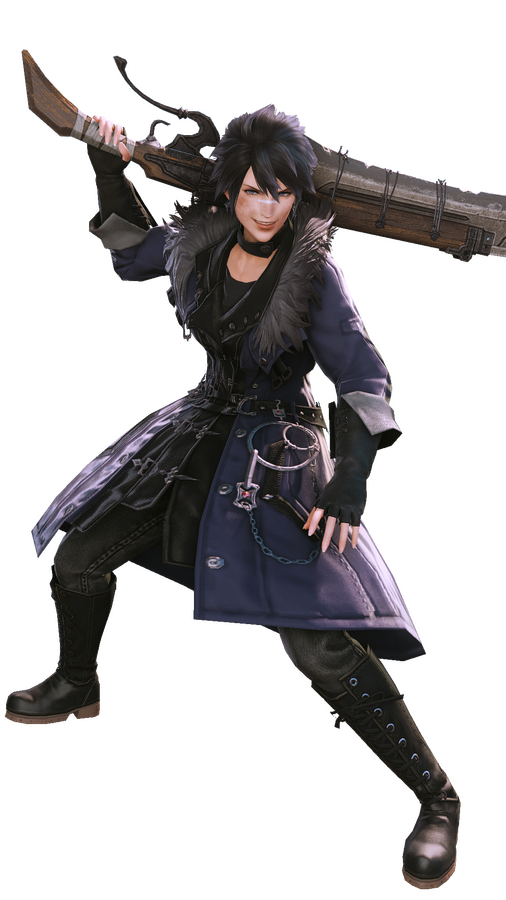
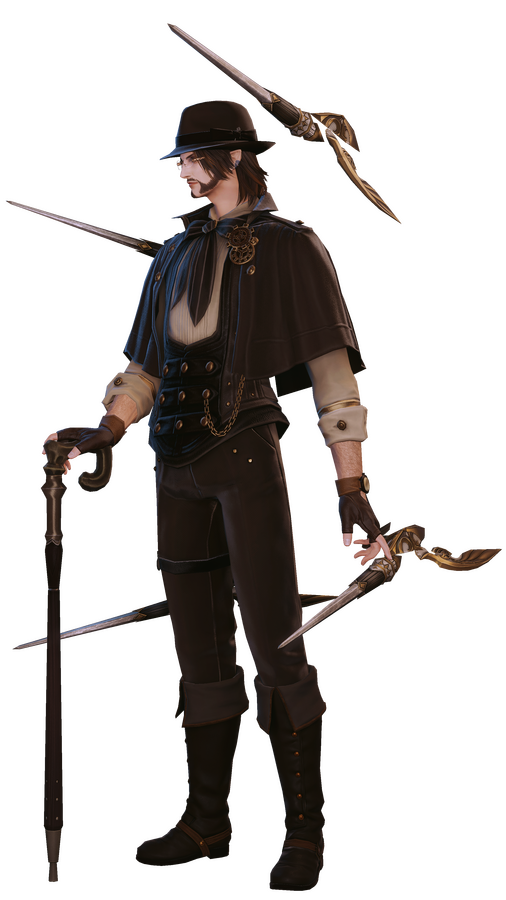
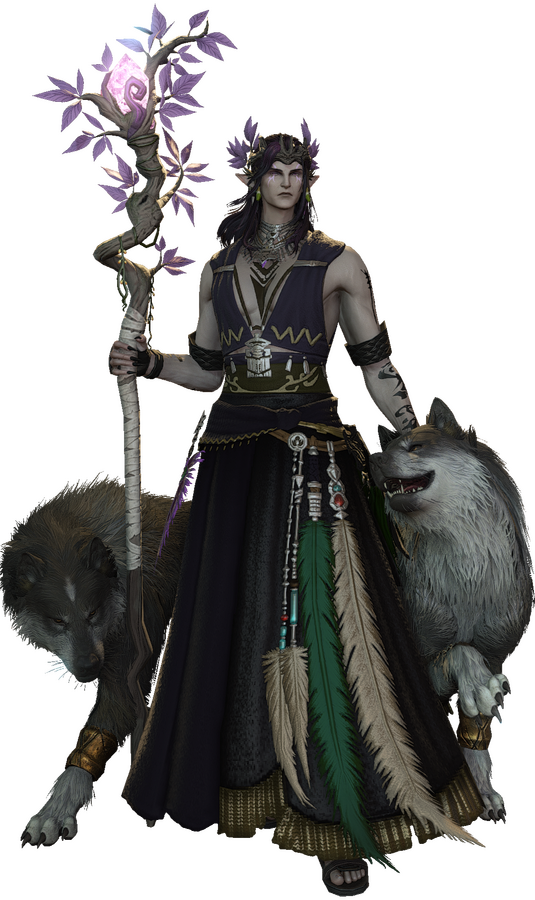
Here’s a fun thing to do with Reshade: take transparent screenshots that isolate your character from the background directly from within gpose, without having to manually remove the background in post editing.
And it only takes one shader and a couple of clicks.
Then you can use your character .pngs with all kinds of graphics for your site/profile.
Tools you’ll need:
- Reshade or Gshade
- The shader effect chromakey.fx (or chromakey2.fx )
1. Pose your character exactly how you want them.
Whatever backdrop you choose here will make little difference, but I do recommend gposing in clear weather with no particles in the air, so preferably indoors, and in a place where you have no foreground objects you wouldn’t want in you final shot. So it doesn’t have to be a studio set-up, but it helps if you have one.
It also helps if your character is raised a little bit off the ground.
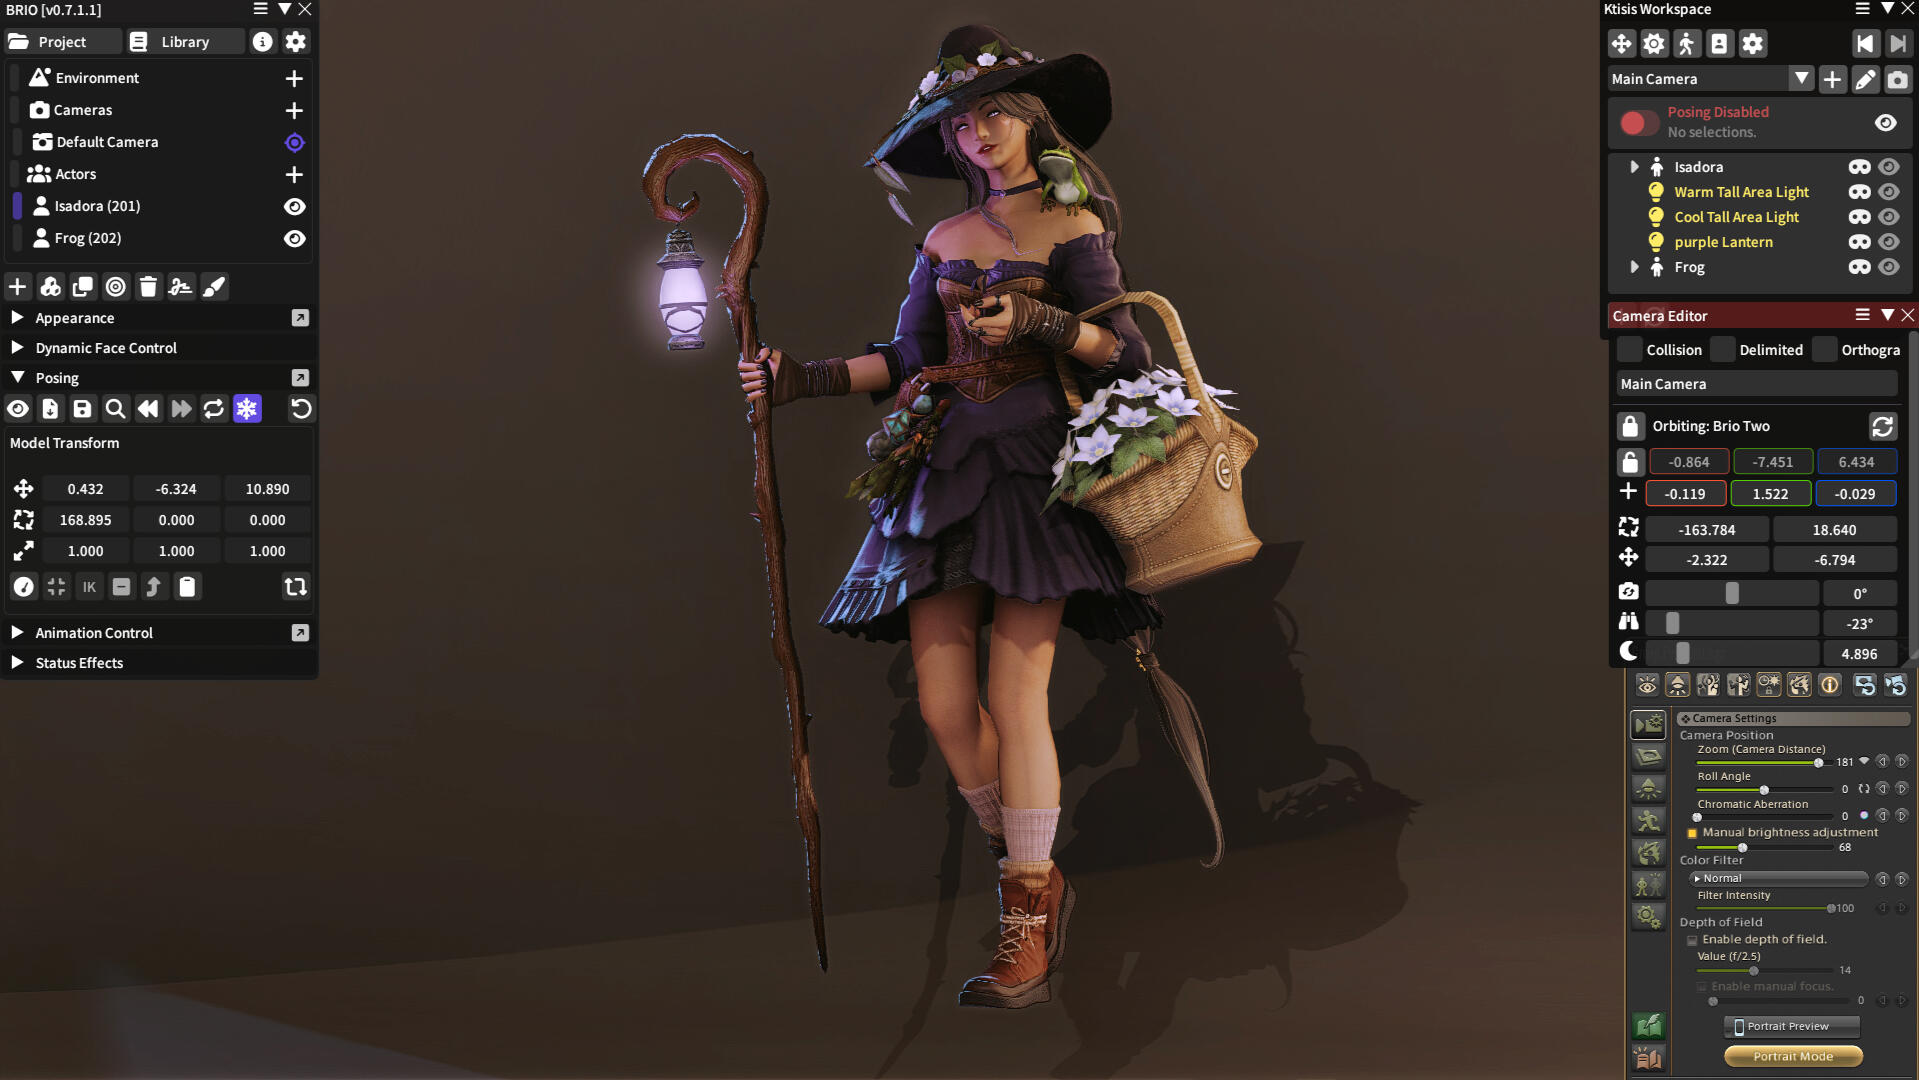
2. Frame them as clearly as possible.
If you’re taking a full body shot, it’s preferable to have the character fill your entire frame, so I’m going to use Portrait View here and have my character take up the full width of the frame. The clearer the better!(You can enable the Vertical Preview shader here if you'd like a better view but I'll keep things simple for the sake of the guide)
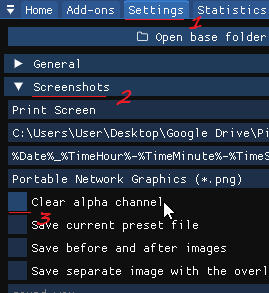
3. Uncheck "Clear alpha channel"Go to your Reshade settings → Screenshots and uncheck the first box that says “Clear alpha channel,” which should purge from your screenshots everything that Reshade registers as "alpha transparency." Now we just need to tell it what that part's going to be. In this case, it's our background. So..
4. Find and enable Chromakey.fx among your list of shaders.
Make sure it’s at the bottom of your active shader list.
Now, we're going to decide the point in our scene beyond which everything gets excluded from our screenshot.
So, the one important setting to adjust here is the depth threshold slider under Distance Adjustment. You want to set it just beyond your character (for this shot, it was around 0.045) so that the rest of the background behind them is whatever “keying color” that is set for your chromakey. You can pick whichever keying color you prefer, whether it’s the green or blue option or any custom color that's comfortable for your eyes. I’ve tested several colors and it made no difference at all to the final screenshot.
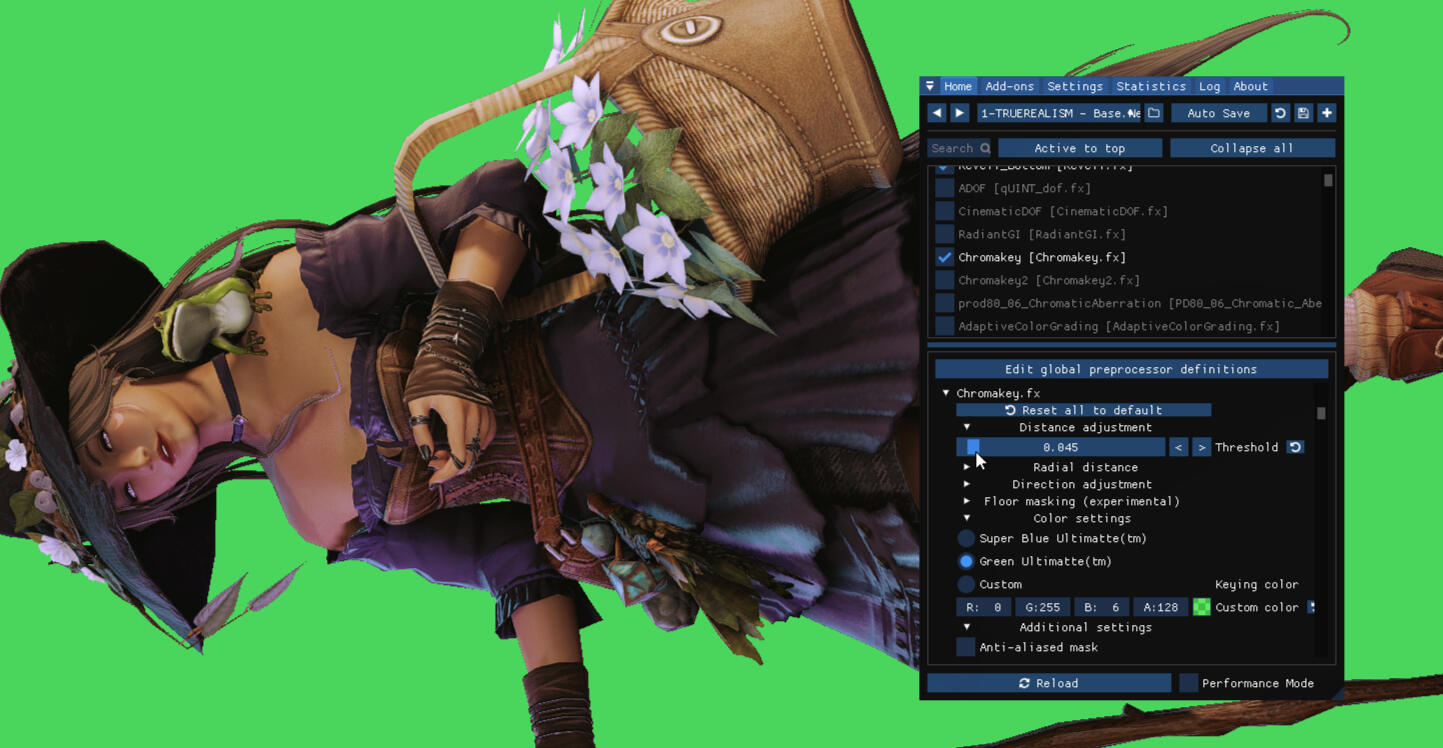
5. Take your screenshot and check your screenshot folder.
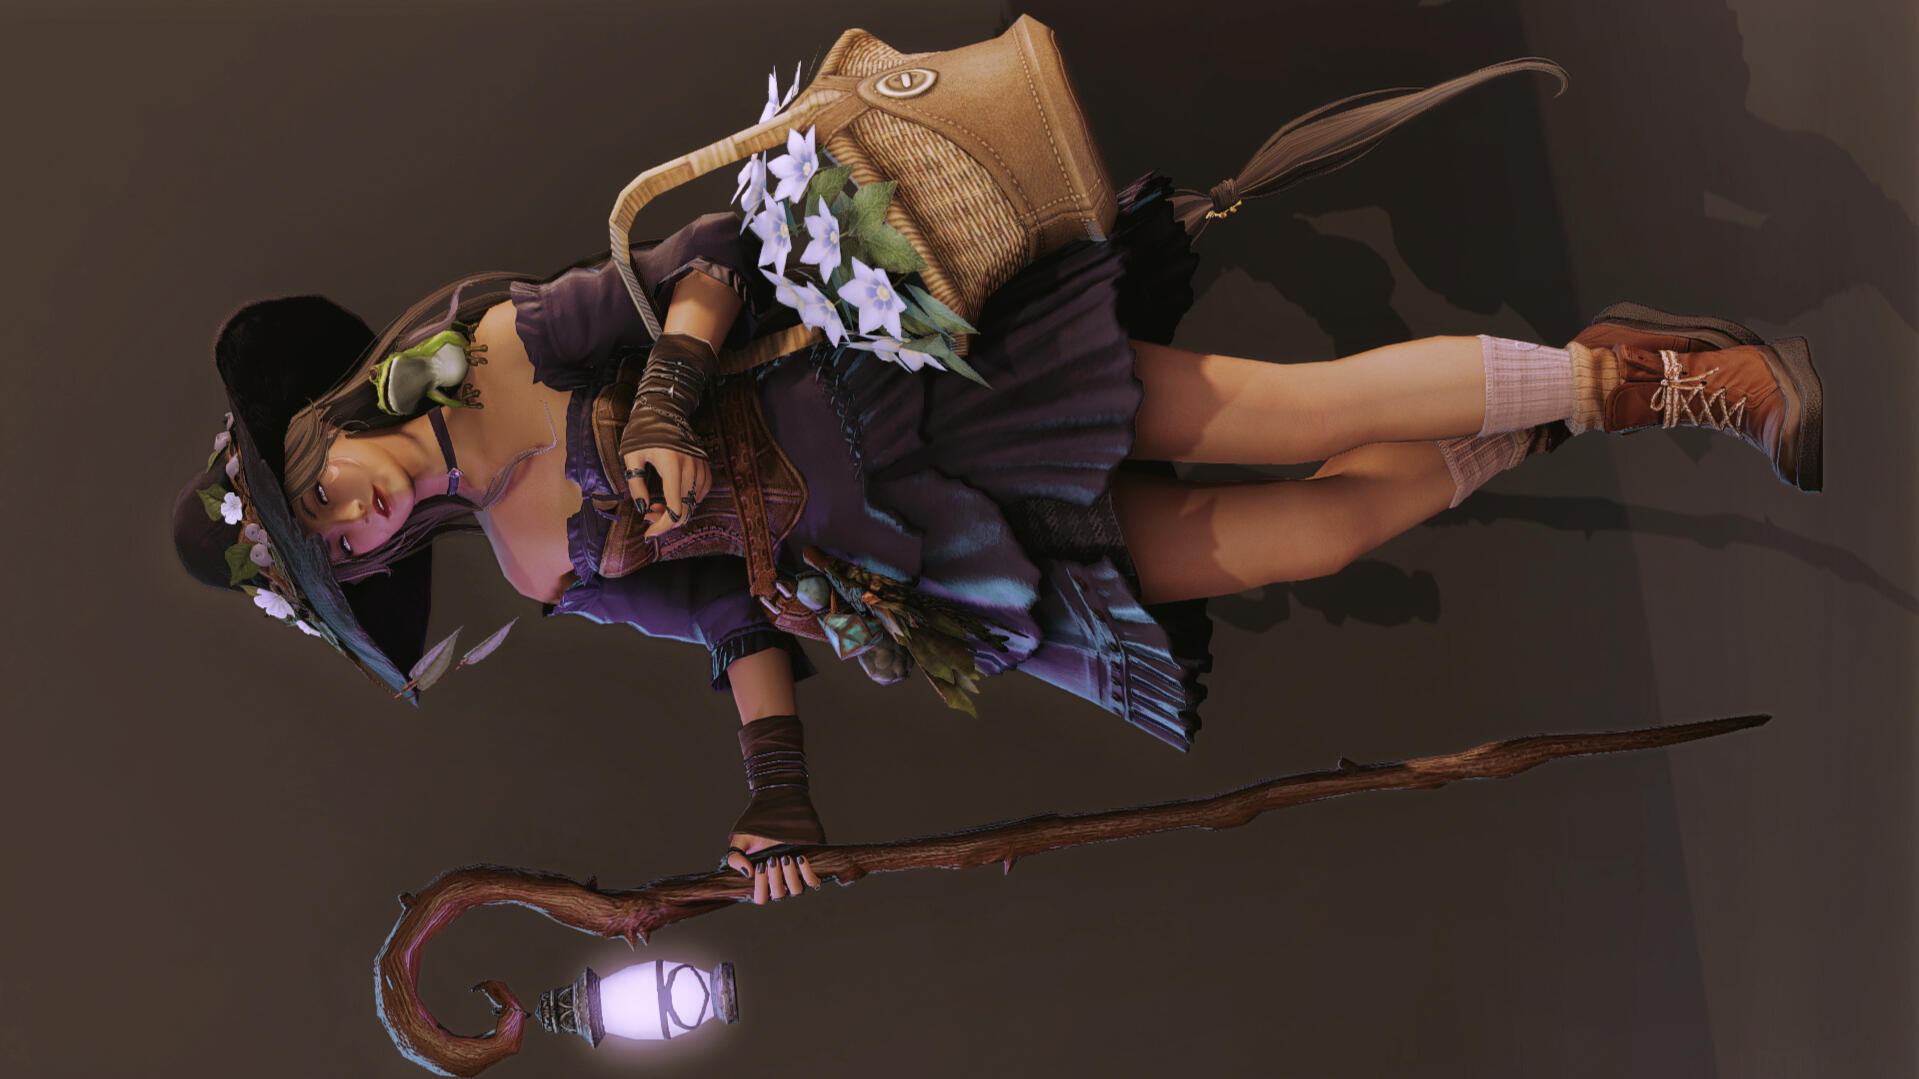
(if you’ve taken your screenshot sideways via portrait mode like I did, you can very quickly right-click it in your file explorer and turn it clockwise.)Now, it should have only your character and no other background elements at all. If it looks like this, congrats! you have a cute transparent .png of your character that you can go ahead and crop and use however you want!
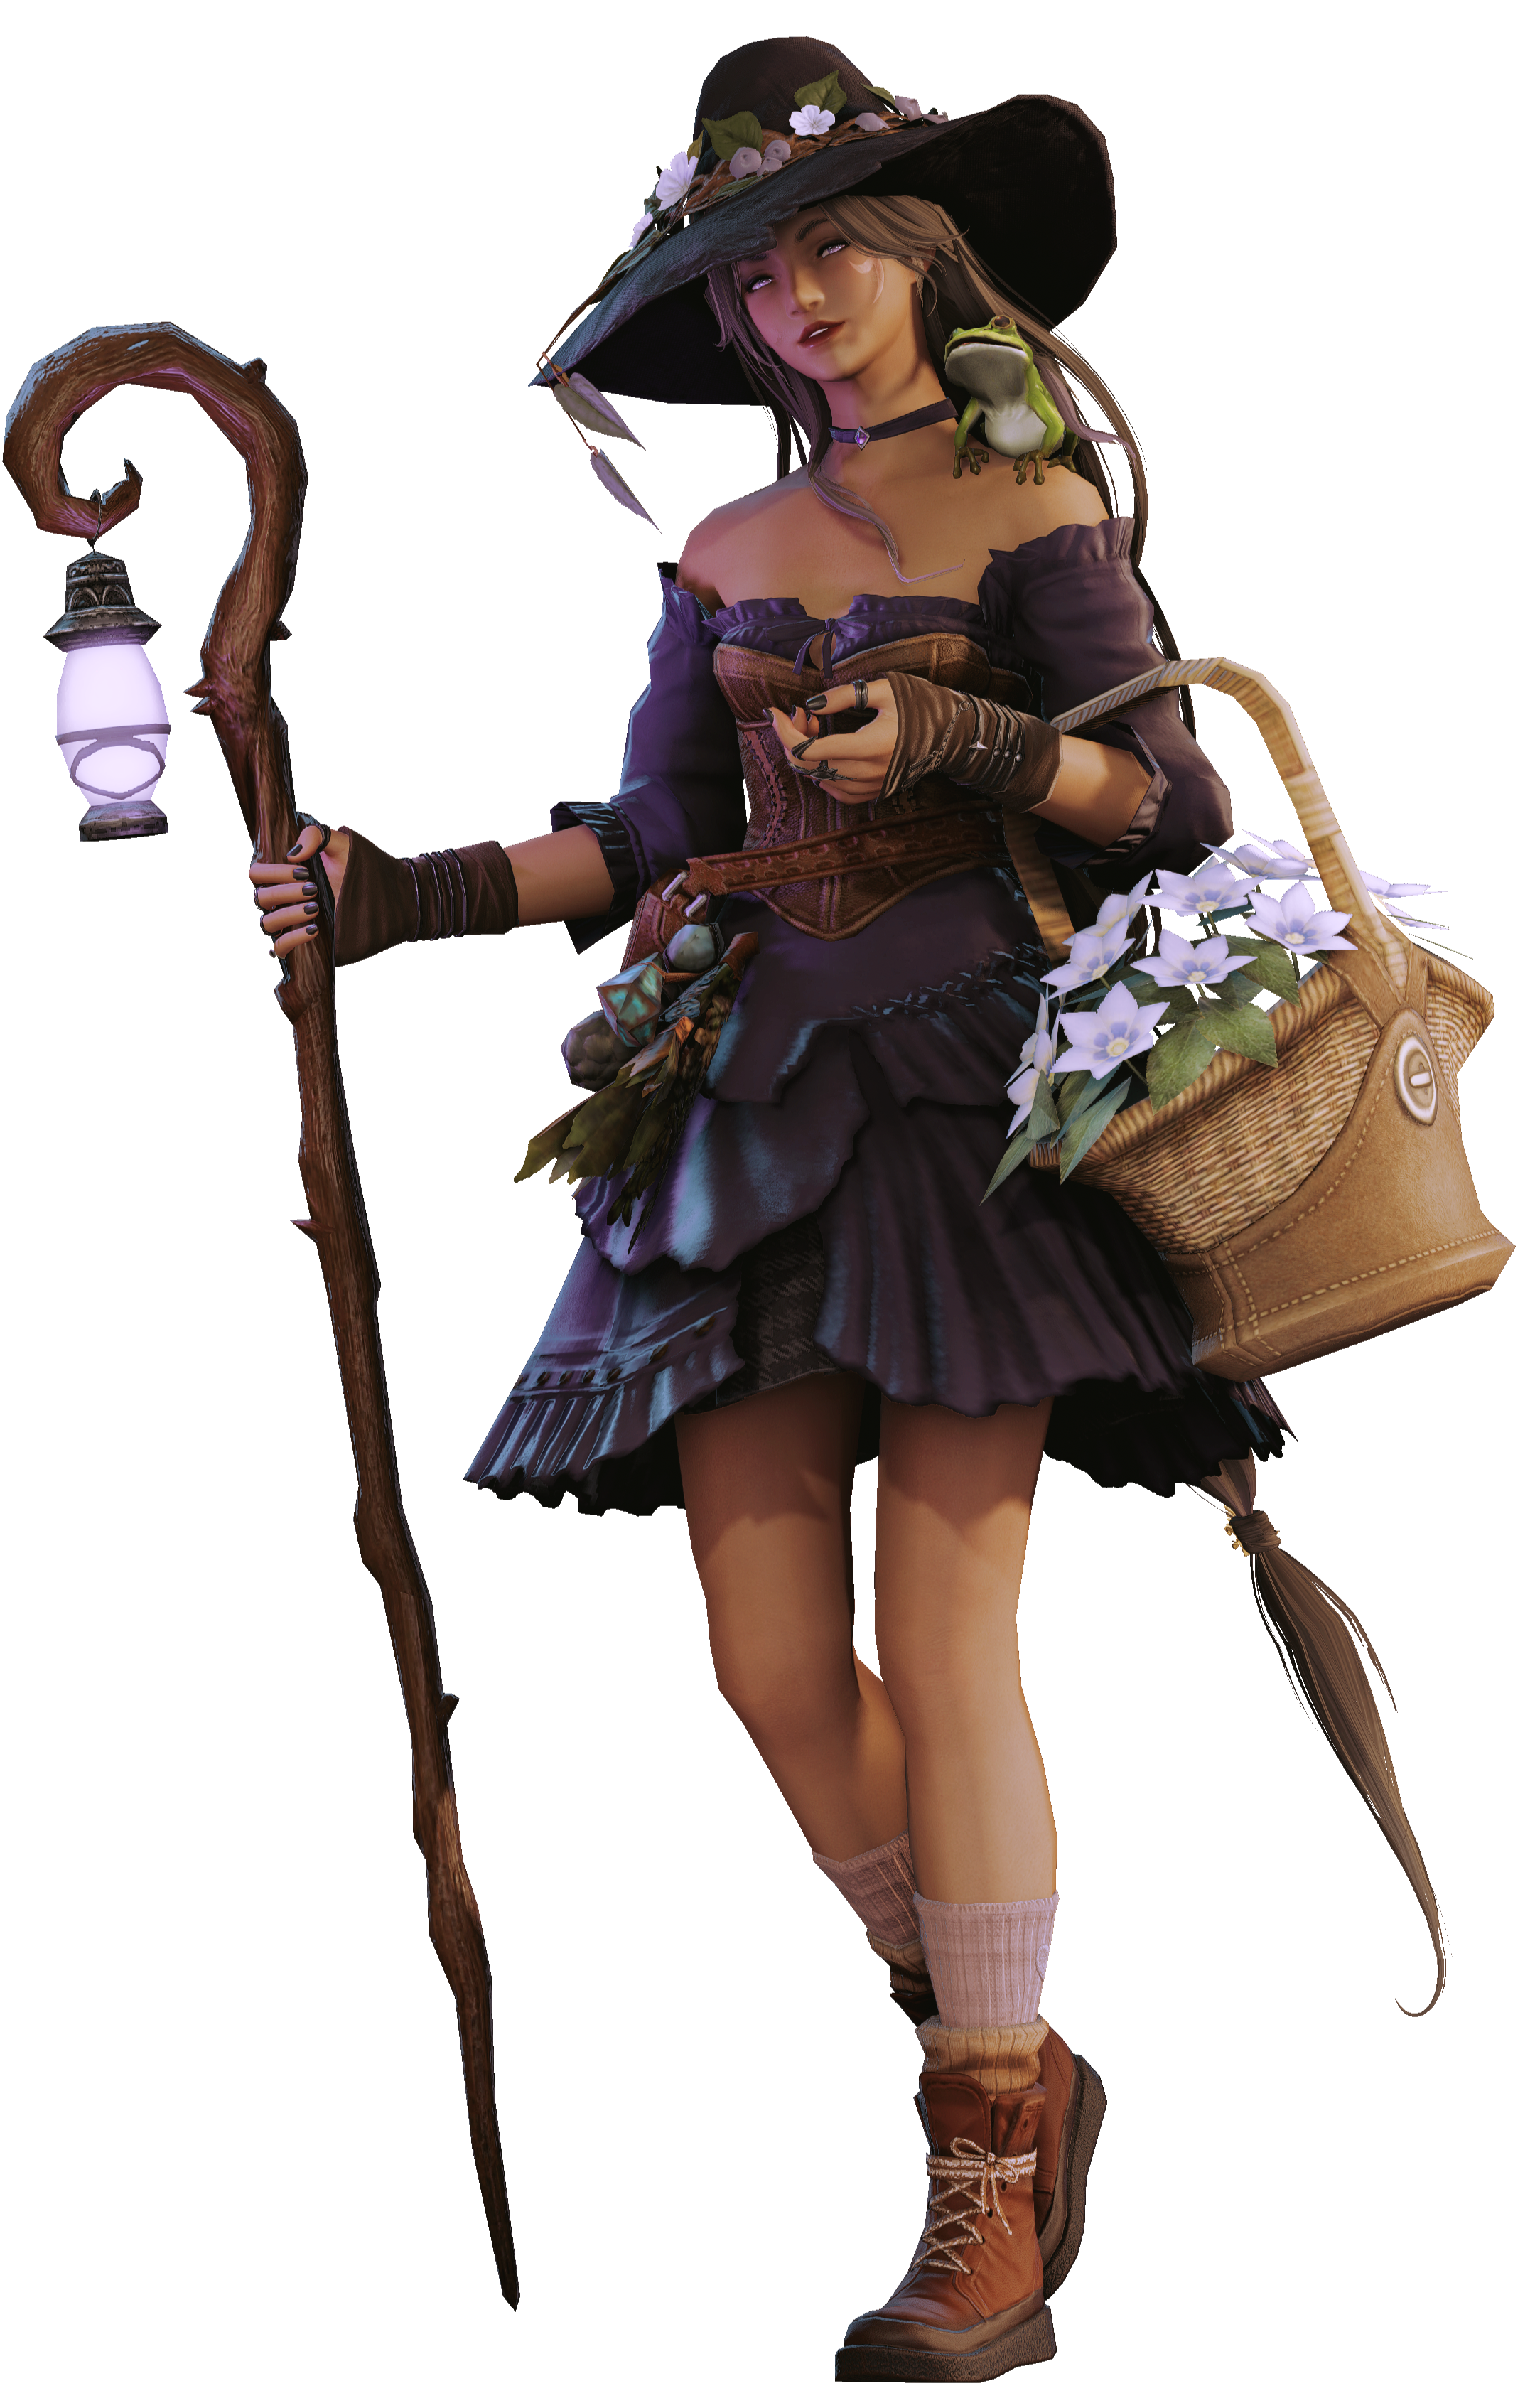
However, if it turned out all black, faded or just not quite right, there are a couple of things to check in your Reshade before retrying.
(This is how it should not look in your screenshot folder!)
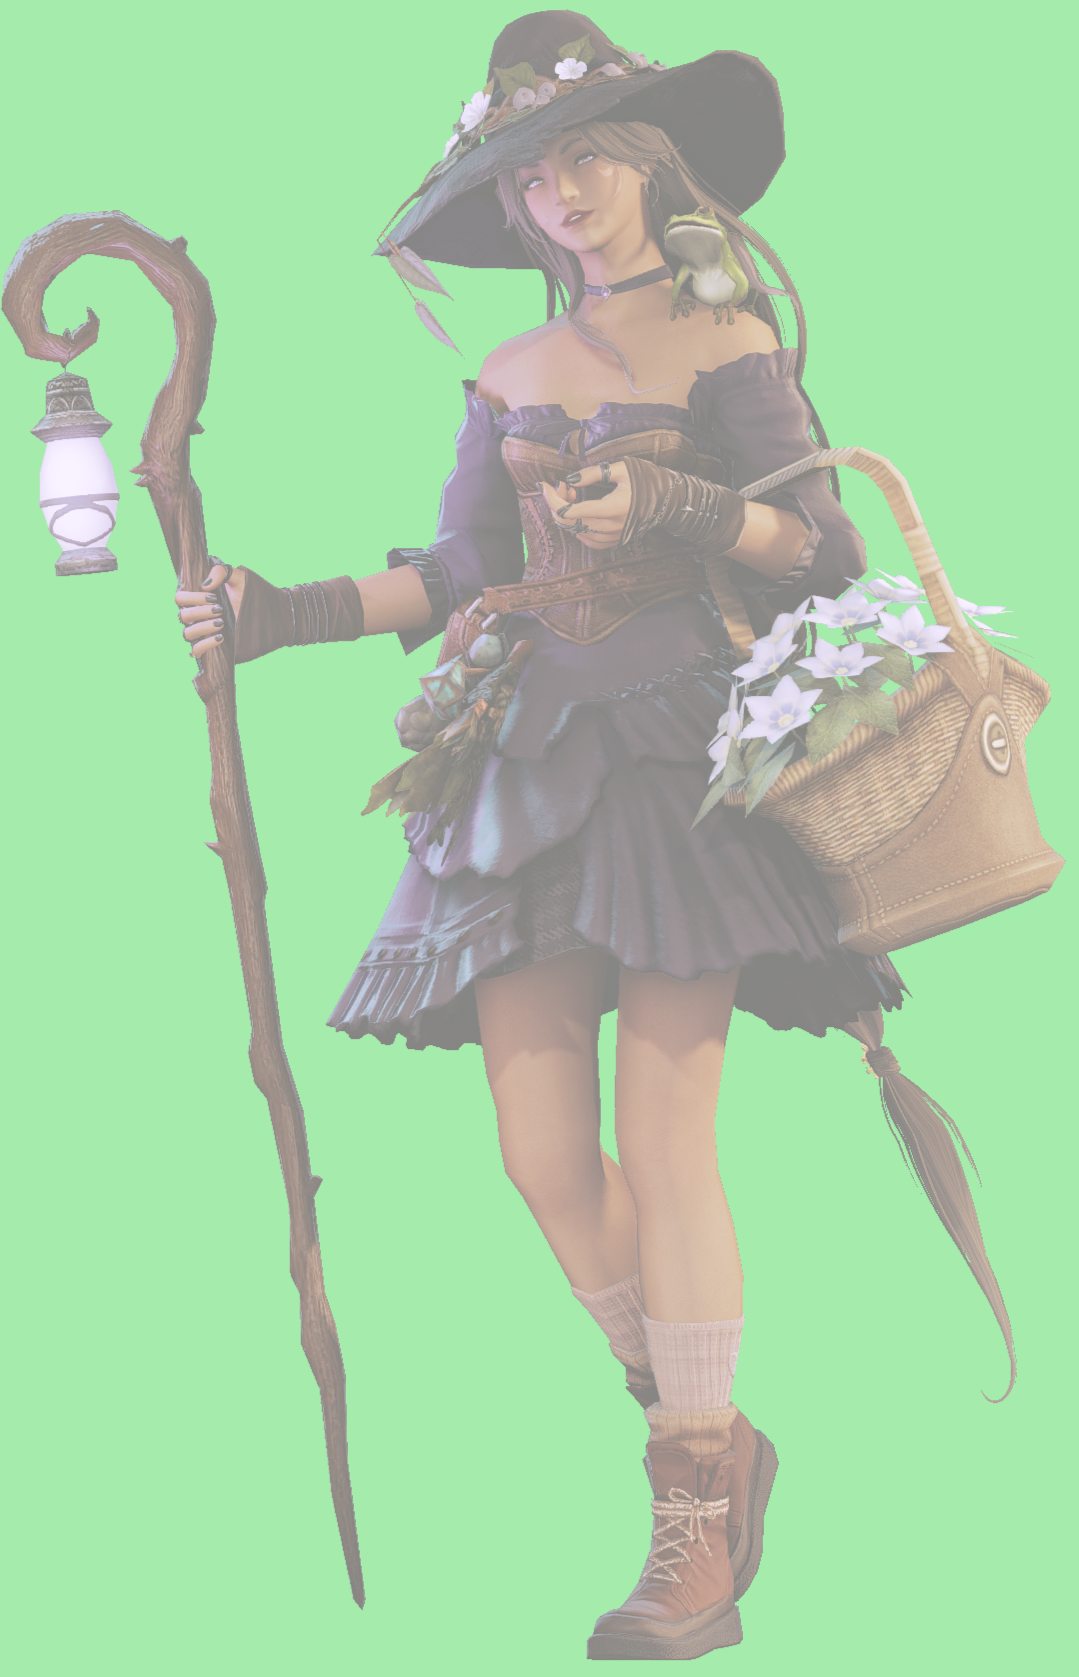
Troubleshooting- Disable Conflicting Shaders:
Again, having Chromakey.fx last on your list of shaders should mean you have the least amount of conflict with other shaders. That being said, some shaders may conflict anyway, and that’s usually depth-based ones. The ones I find cause the most issues with transparency are RadiantGI or similar shaders, DoF and similar shaders, Atmospheric density, as well as chromatic aberration and similar shaders, so try turning those off if you have any of them enabled. If you disabled the above and your screenshot still comes out looking like this you can keep testing your shaders, either toggling them off one by one, or just trying chromakey.fx by itself with no other shader enabled.
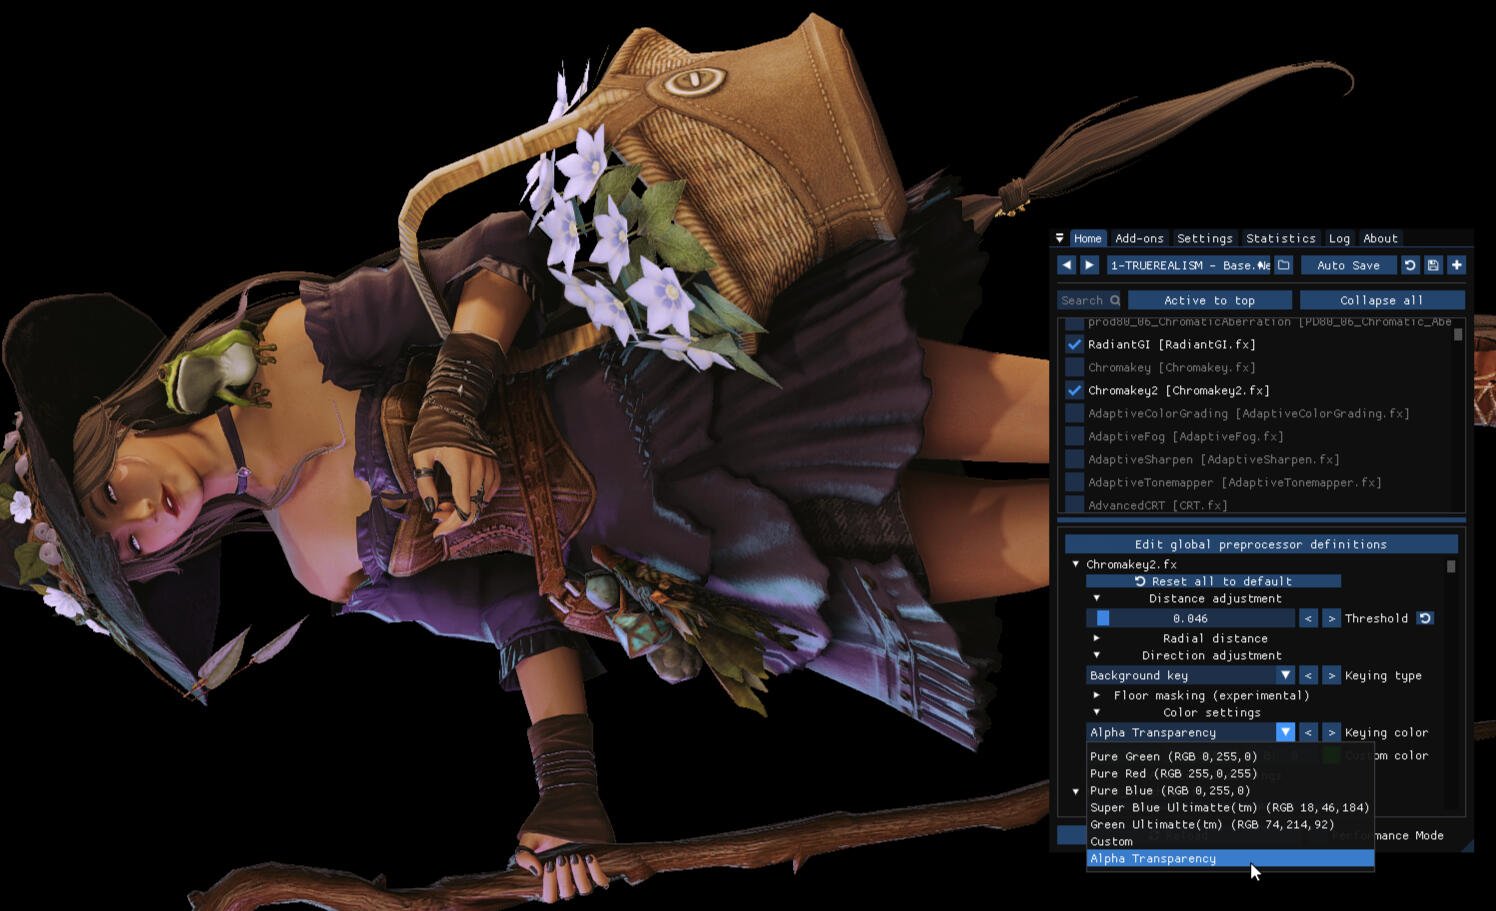
- Try Chromakey2.fx:So you only have Chromakey enabled, and you made sure to uncheck “Clear alpha channel” in your settings, and you’re taking .png screenshots with your Reshade keybind and not the game’s (or Windows default) screenshot key, and it’s still not coming out transparent? Then maybe you’ll have better luck switching from chromakey.fx to its duplicate chromakey2.fx that some people find works better for them.You may not have that one included in your Reshade so you can get it here. It basically has the same settings and involves the same process, but with the added step of setting the keying color to “Alpha Transparency.” It should make the background now look black instead, and using this option should hopefully get you a transparent background if the first Chromakey fails to.
Enhancing your Chromakey Shots1. Disabling Blooms:To get your character shots looking as sharp, clean and promotional-CG-artwork-looking as possible, I find it best to avoid shaders that scatter light over your character like blooms, lens flares, rays and ambient light. Those can absolutely enhance your regular scenic shots and add a lot of atmosphere to them, but when it’s only your character and no background to show said atmosphere, your character is just going to look washed out under all this extra light. It can look artistic if that’s something you’re going for? But generally not ideal to work with. Here’s a quick comparison to better show why I prefer to leave those out.(left is with blooms, lens flare and ambient light shaders enabled, while the right one is the same shot with all those disabled)
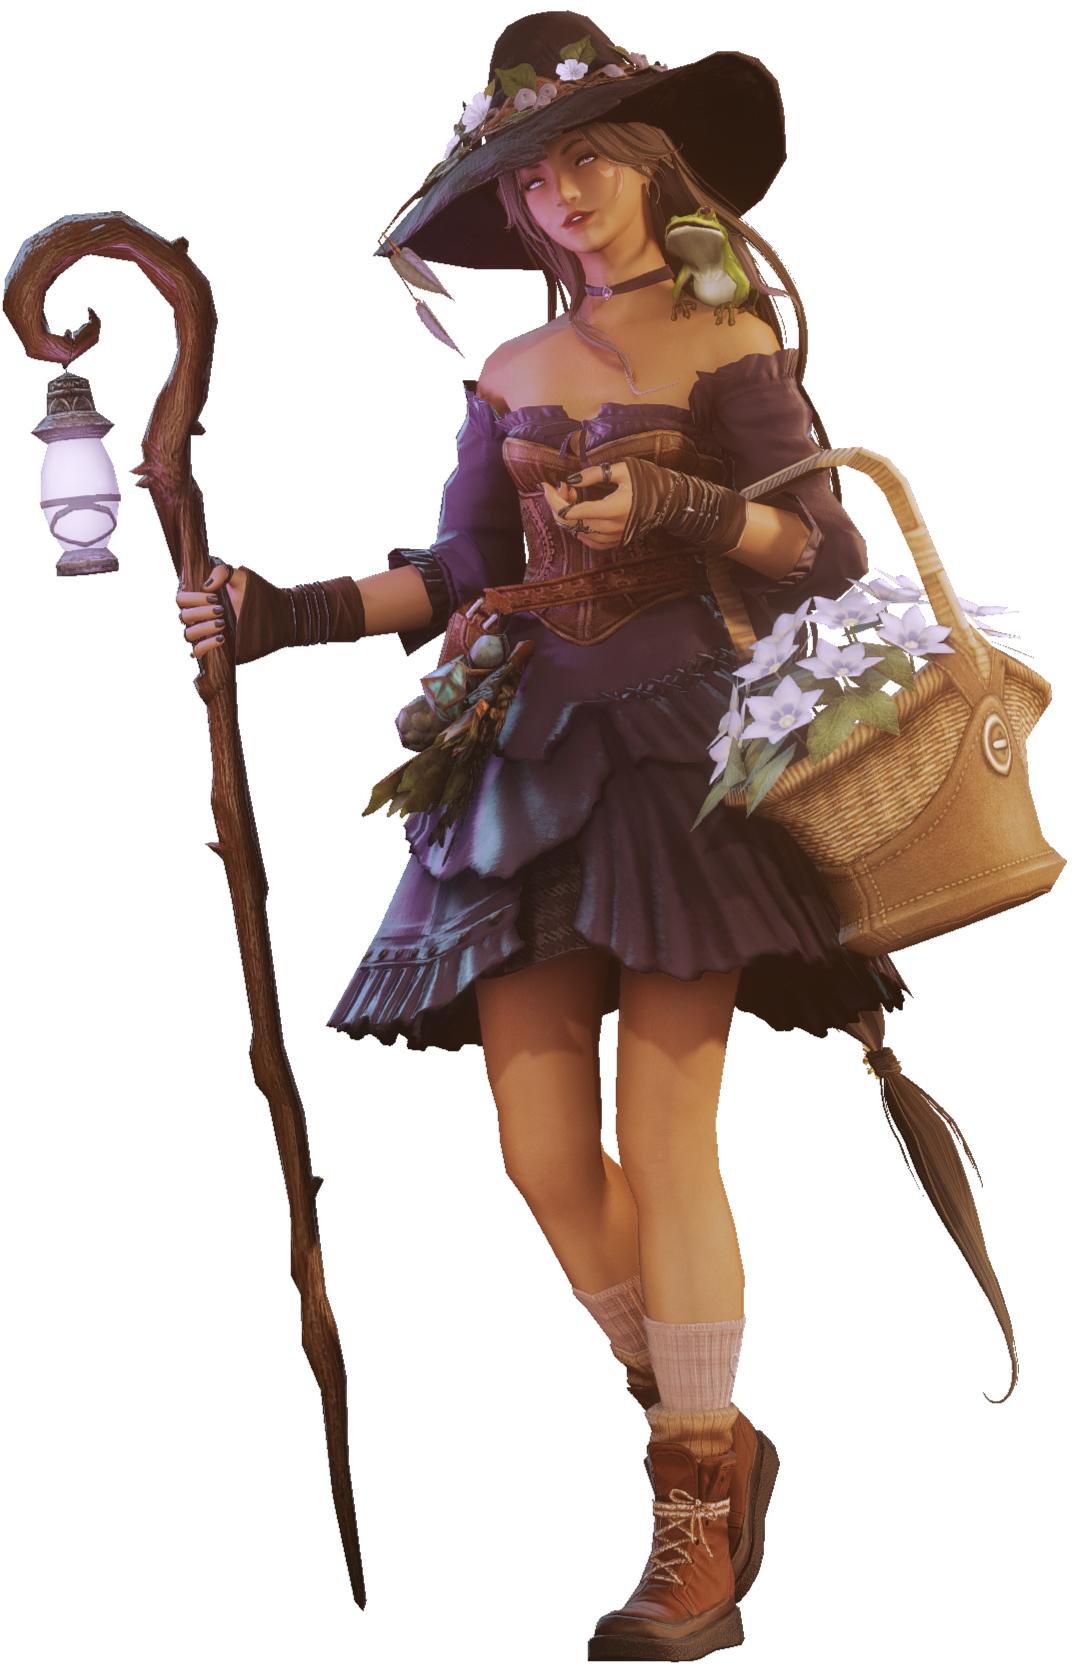
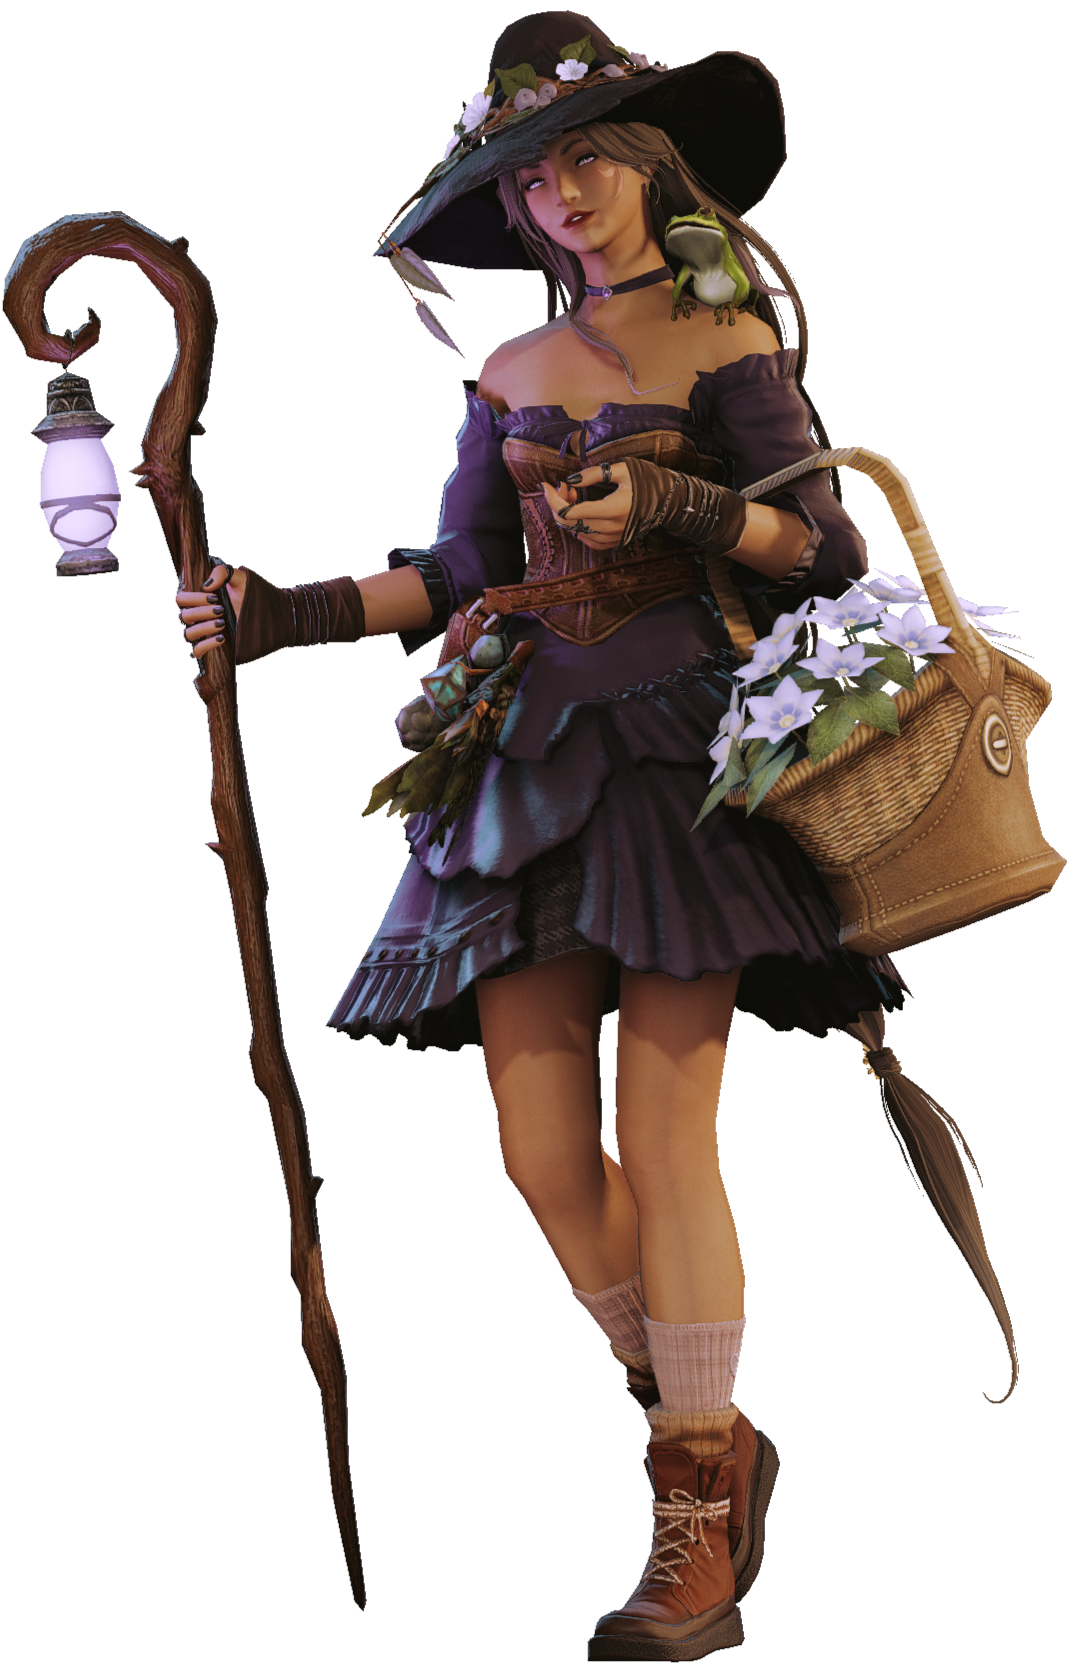
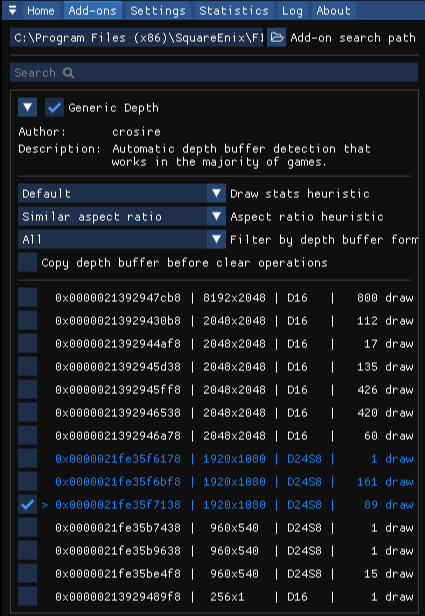
2. Minimizing Edge Loss:It can’t be helped sometimes that you find your character looking (literally) rough around the edges, especially around finer strands of hair or fluffy tails, and in some cases like when your character’s wearing sheer clothing, that layer may get purged entirely and come out invisible in your final shot.In such cases, it may help to go to your Reshade Addons → Generic Depth and toggle one of the three blue lines you find. Checking one of these three boxes should help both fill out the edges of finer hair as well as show sheer/translucent gear layers that would otherwise get purged with the alpha transparency. It may not always enhance the look of your character’s hair to have those thicker edges, so it’s really up to you whether you want to keep this option on or not.
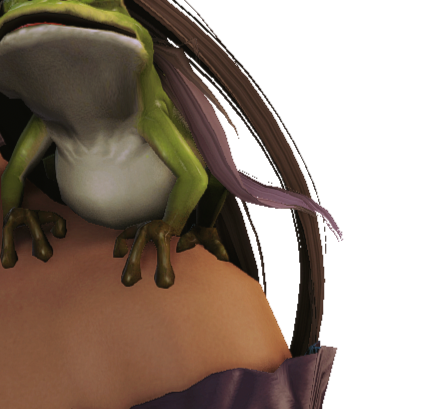
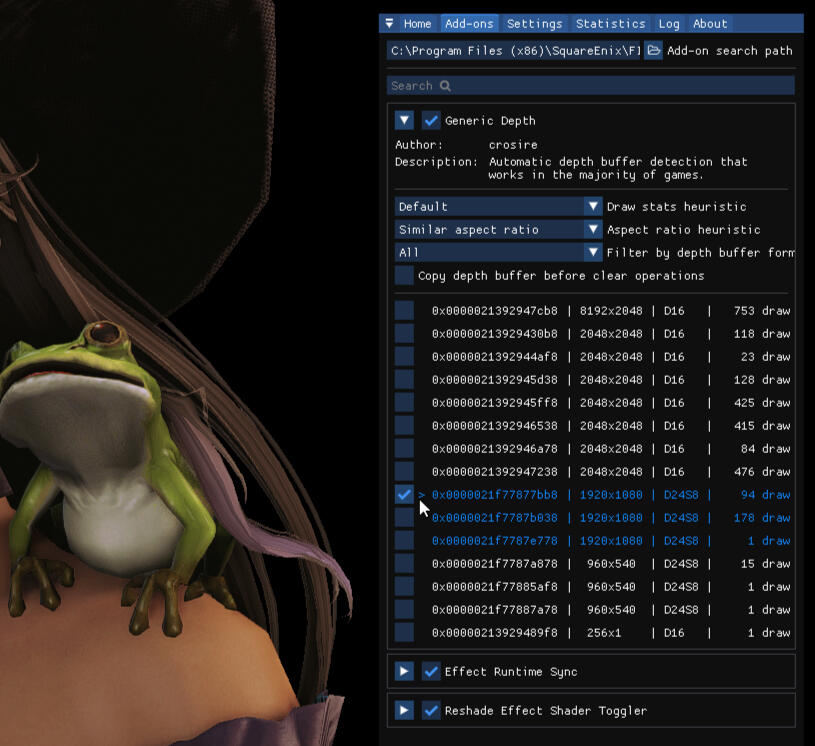
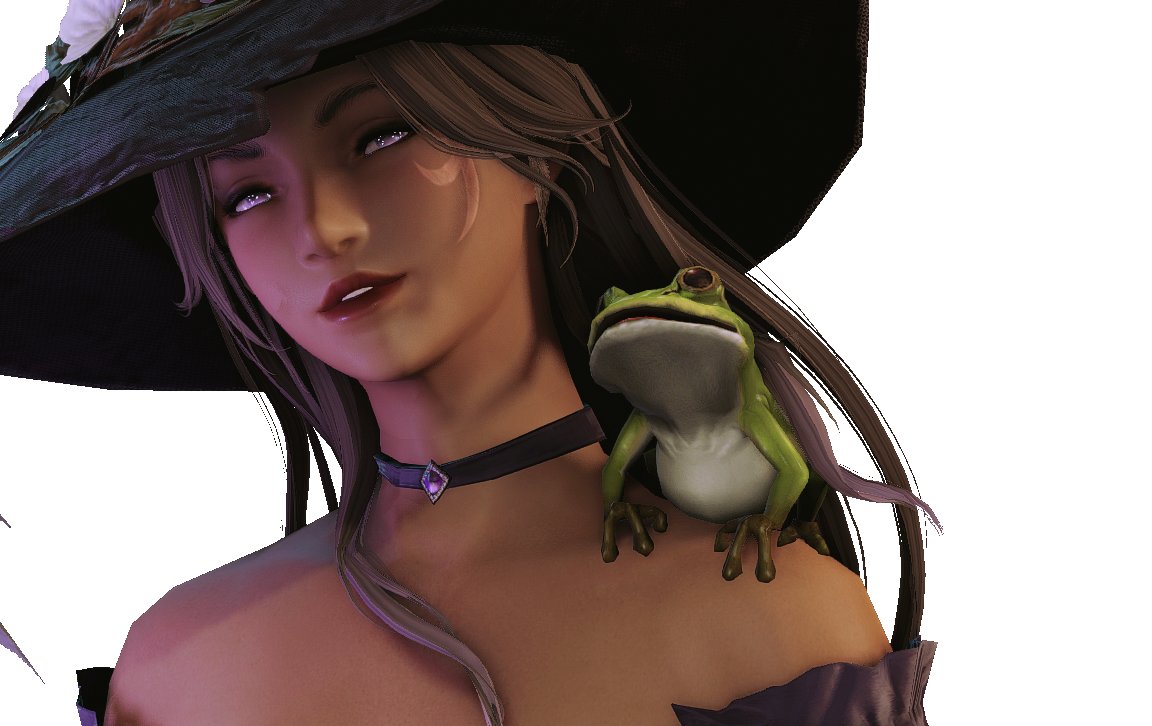
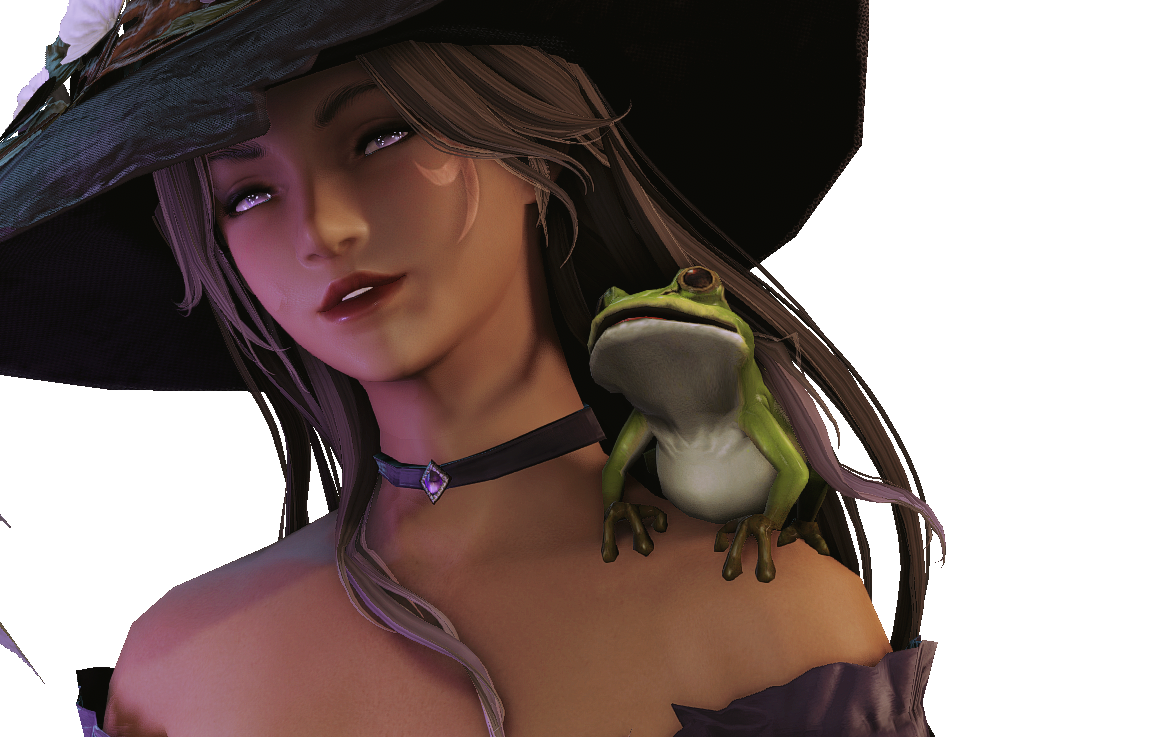
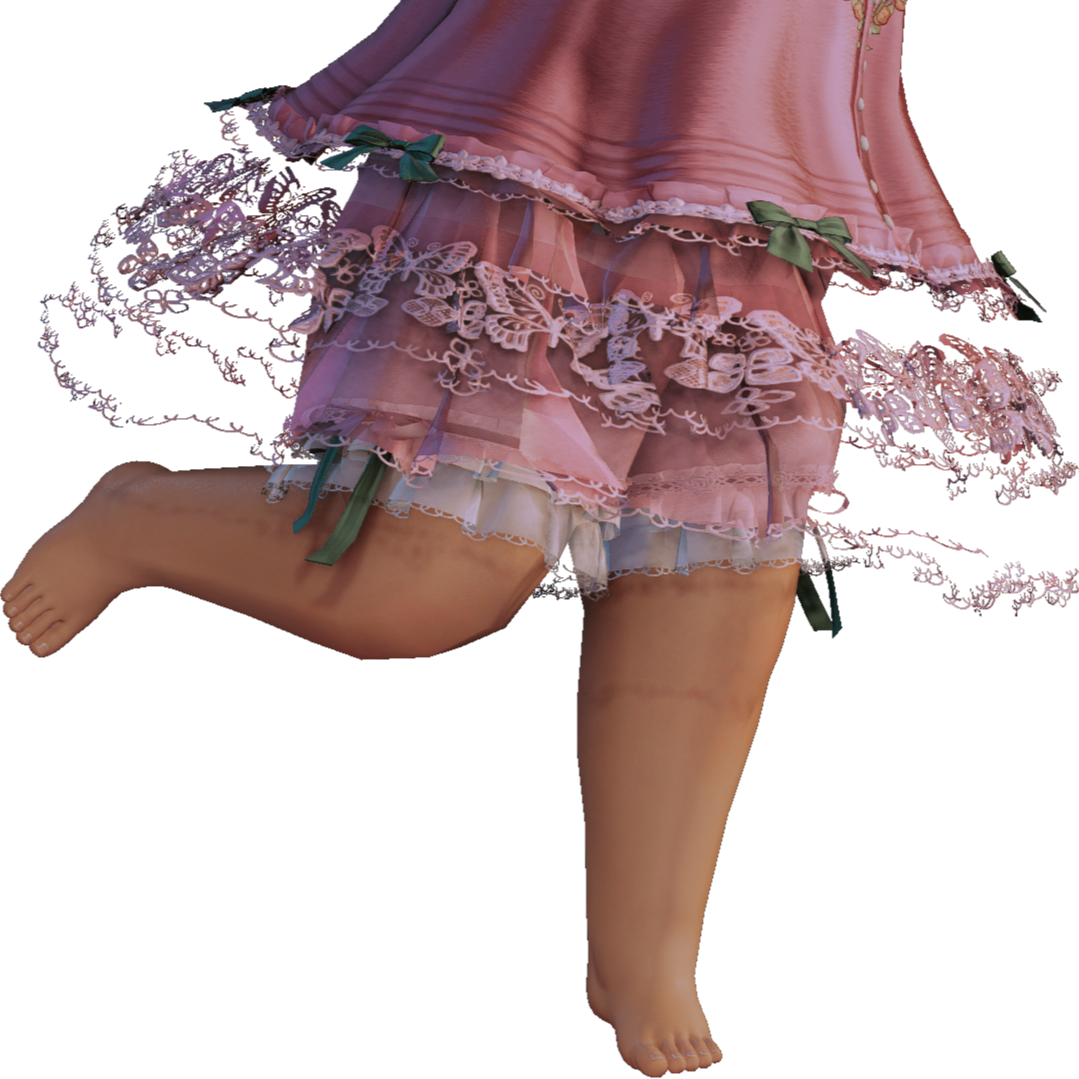
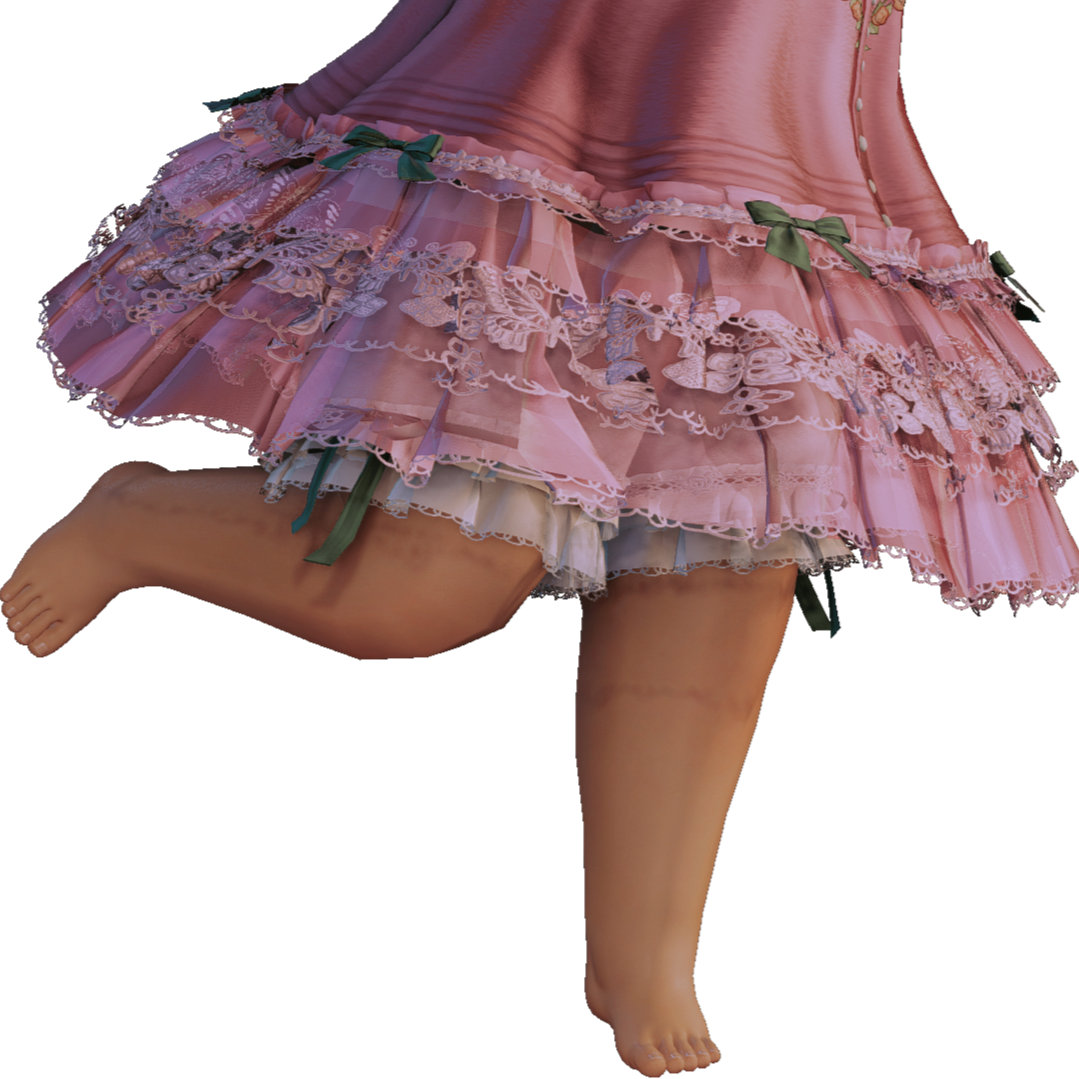
Hope that helps give you some neat, clean shots of your characters. Have fun scrapbooking your characters, their little minions and favorite accessories and maybe making them a cute little lookbook. Once you're done, though..!! Do remember !!
Once you're done with your gpose session to always check your "Clear Alpha Channel" box again in your Reshade settings!
Wouldn't want all of your future gposes to come out transparent... with only your UI elements or something tragic like that.
Not that that's ever happened to me at all ever.
Definitely not every single damn time, no sir.
Anyway, it's always a good habit to check your screenshots as soon as you take them!Happy gposing ♡
Teary Eyes
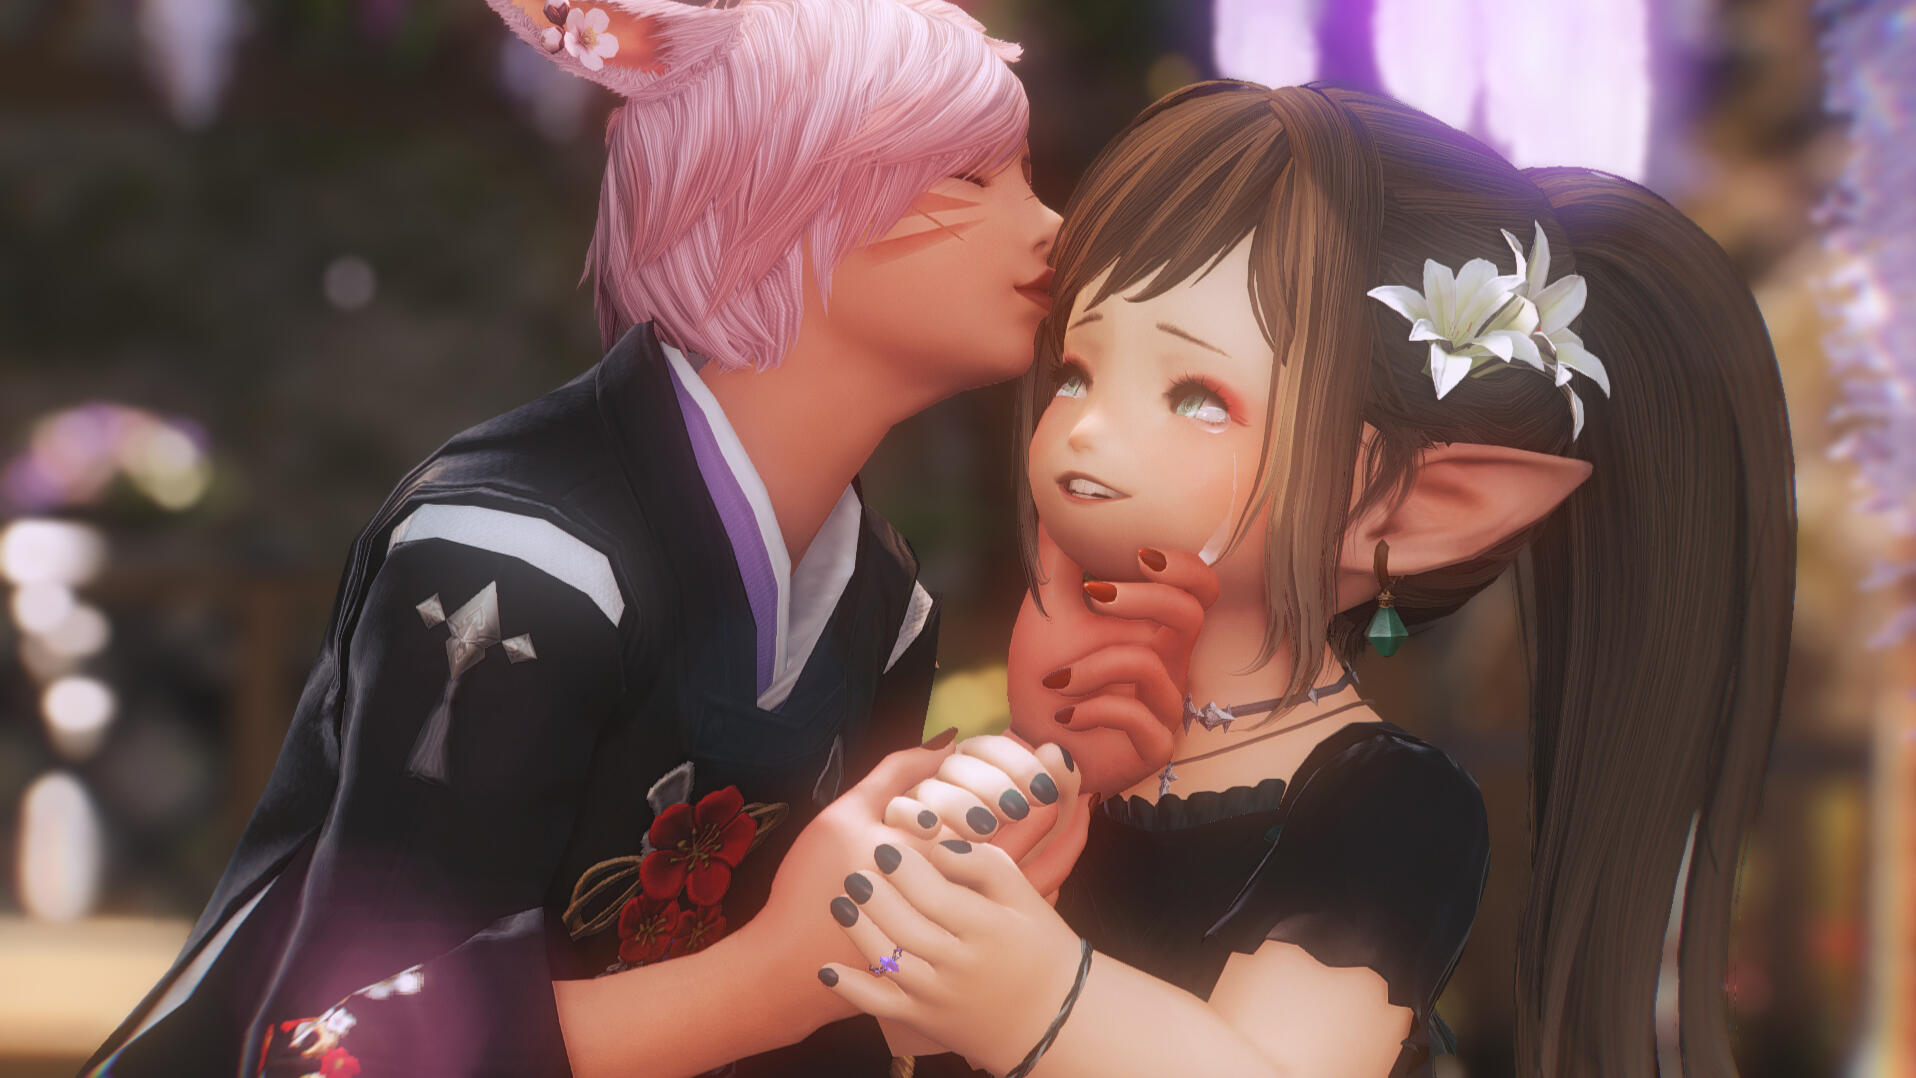
Is your dramatic scene missing some waterworks?
Want to put your OC in the emotional grinder but can't figure out how to get that vfx of teary eyes you see in cutscenes?
Yeah same. But I have the next best thing: a teardrop prop.
1. Find and equip the prop 9072, 1, 1 (Crystal tear)
You can equip props (handheld object) within gpose using any of the three posing tool, so just pick your favorite. In case you're using Brio, make sure to check the boxes that say "Replace with a Prop" over your character's main hand and offhand slots.
Either search "crystal tear" or manually input the prop ID.
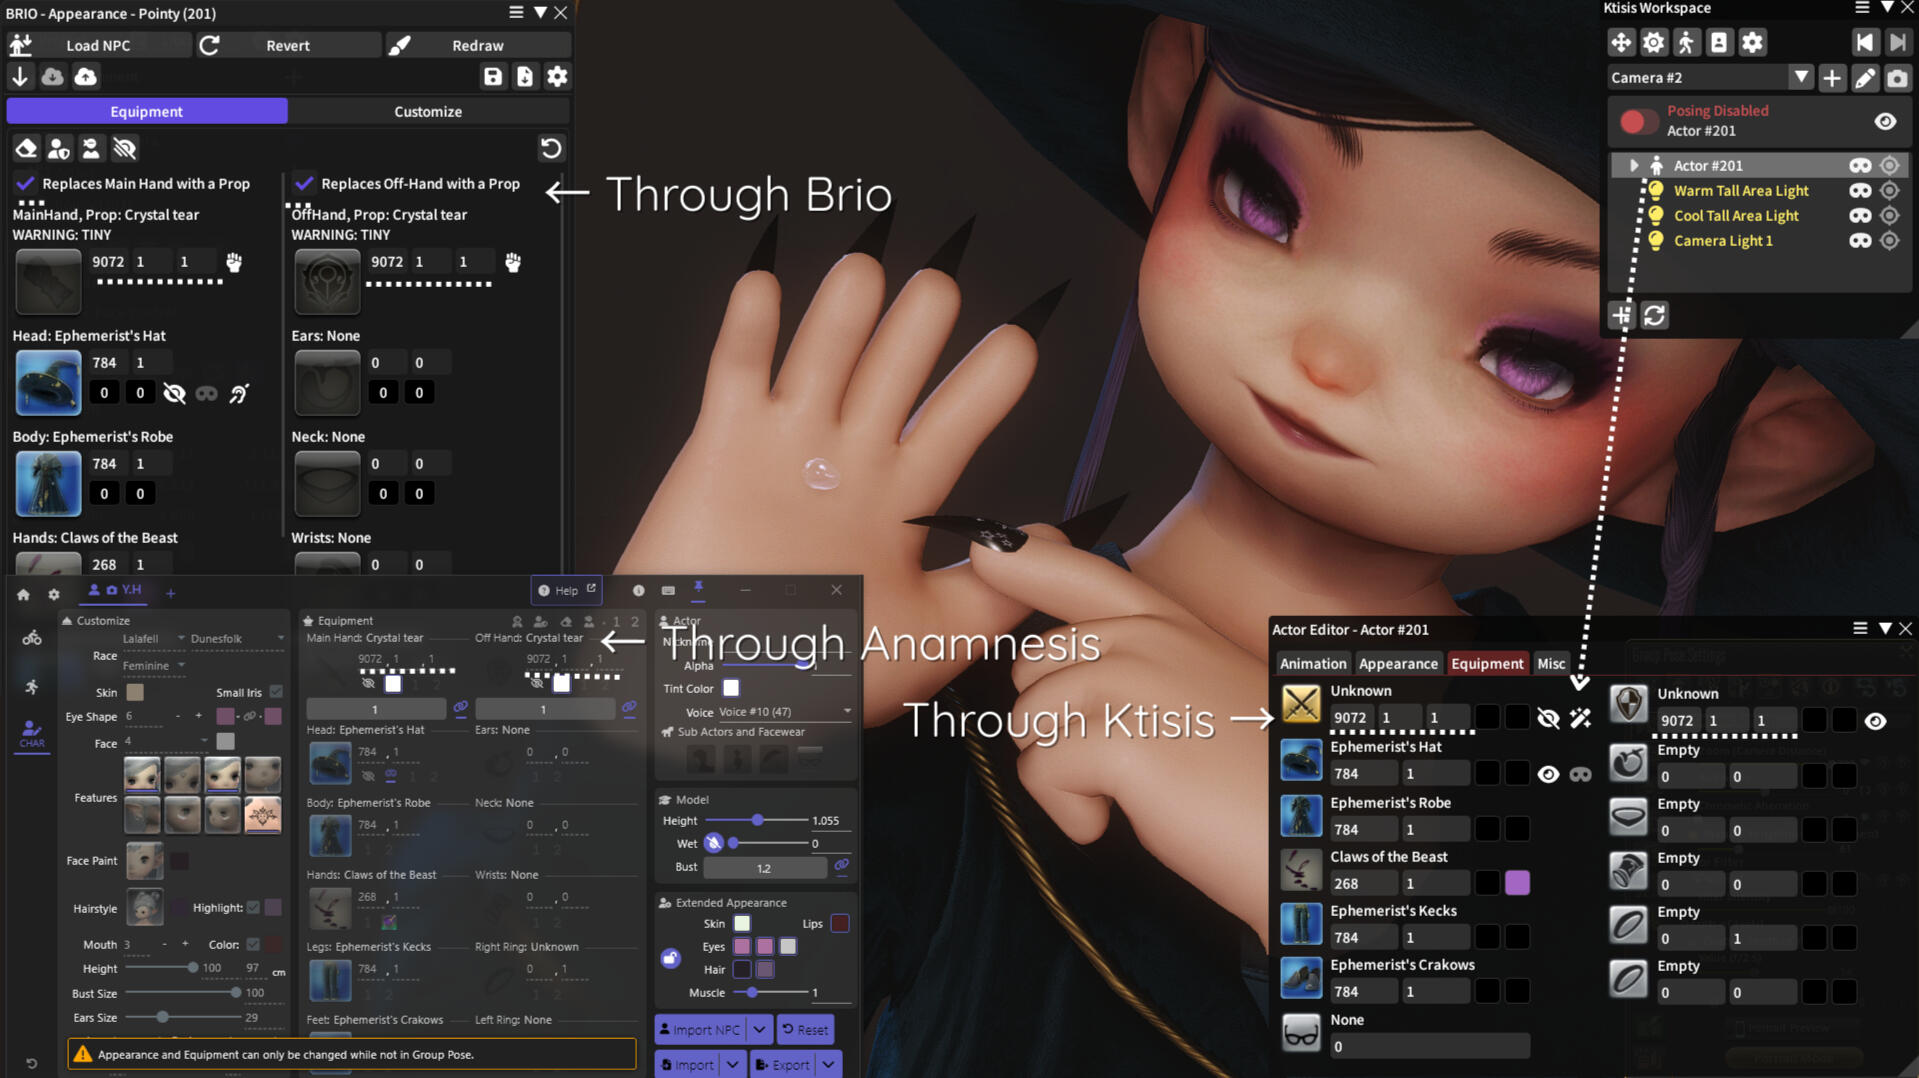
Now keep in mind, this prop is a super tiny, transparent droplet. It can be hard to spot. So you can scale it up by selecting your weapon bone and blowing it up to x5 if you're having trouble finding it, but it should pop up in your character's hand if you had started out in a default position with no weapons drawn.(If you had entered gpose with weapons drawn, you may spot it wherever your drawn weapon should be.)
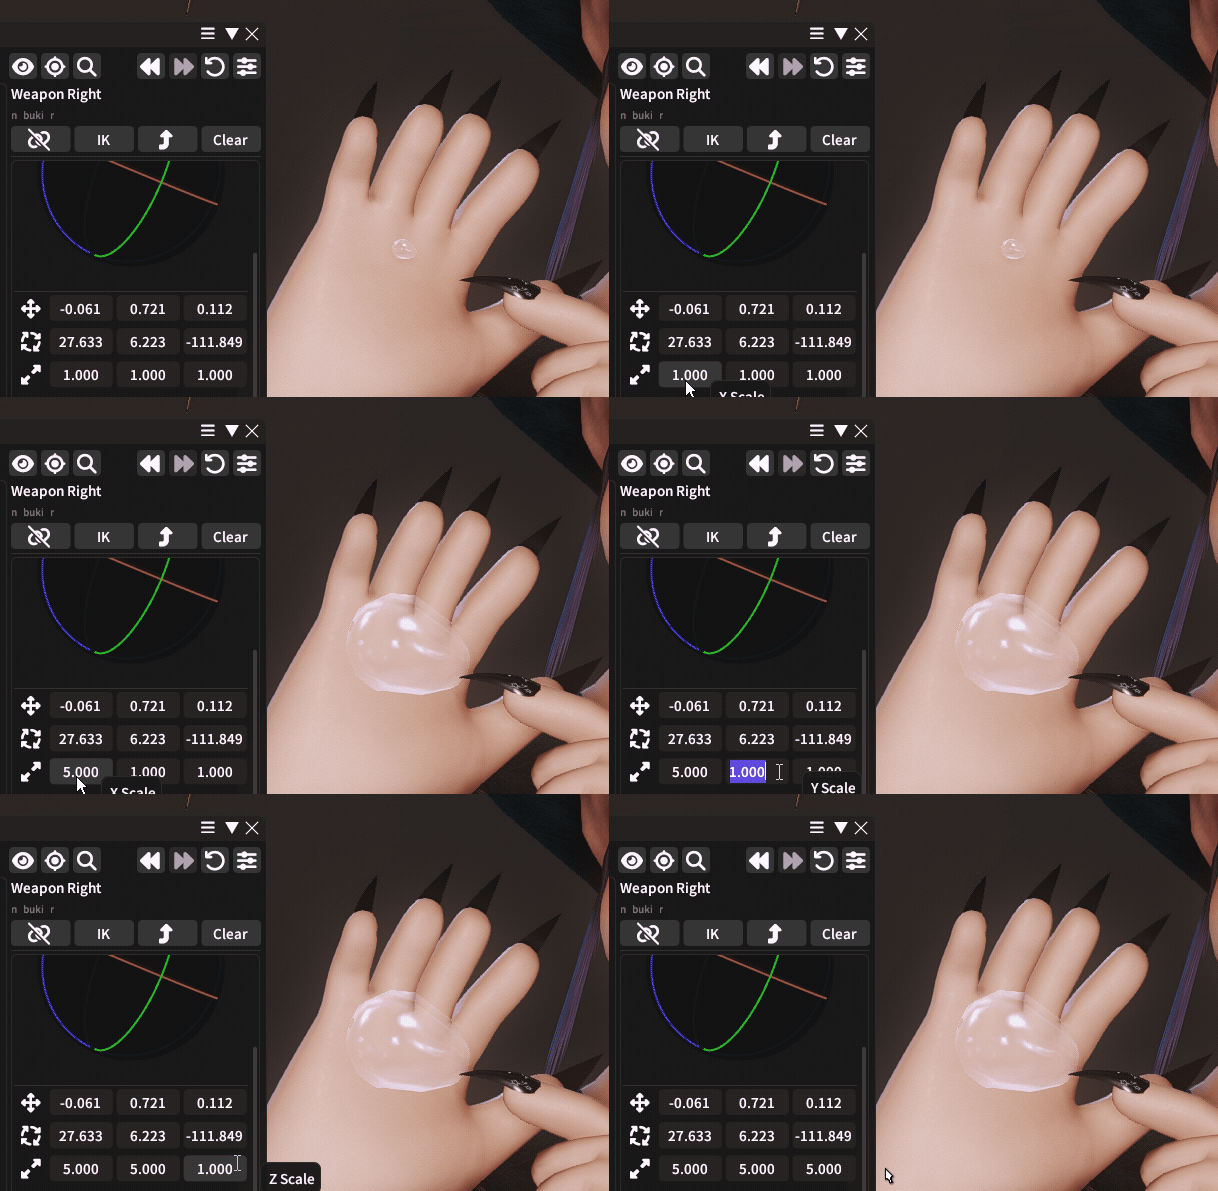
If you still don't see it, hit the "attach weapon" hand icon to force it to show (or toggle weapon visibility with Ktisis or Anamnesis.)
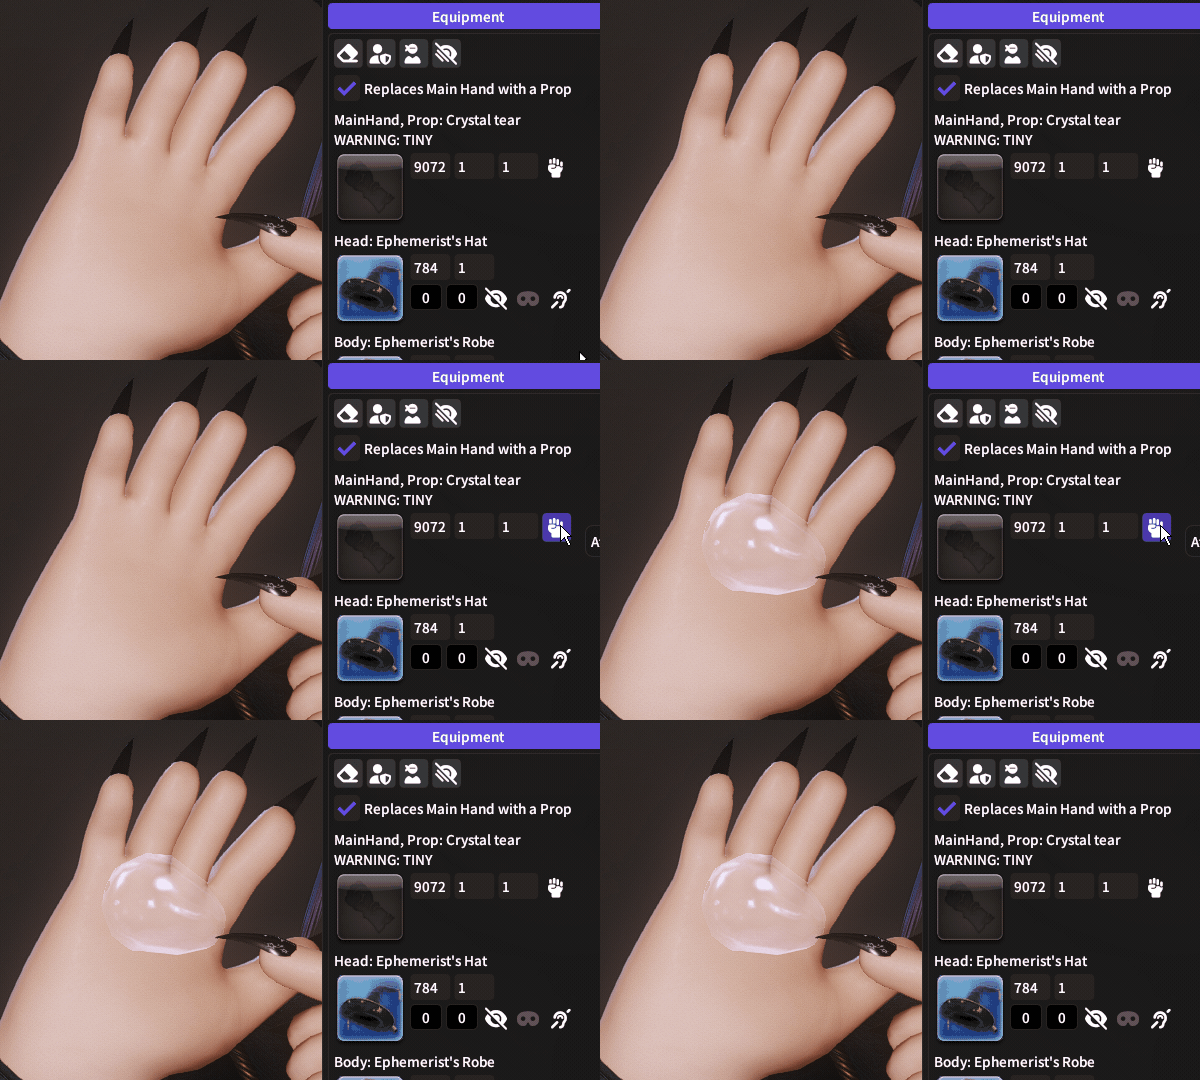
If you still can't seem to get it to show, no worries you're not alone. You can instead spawn the tear as a stand-alone prop with Brio, which seems to work better for many gposers.
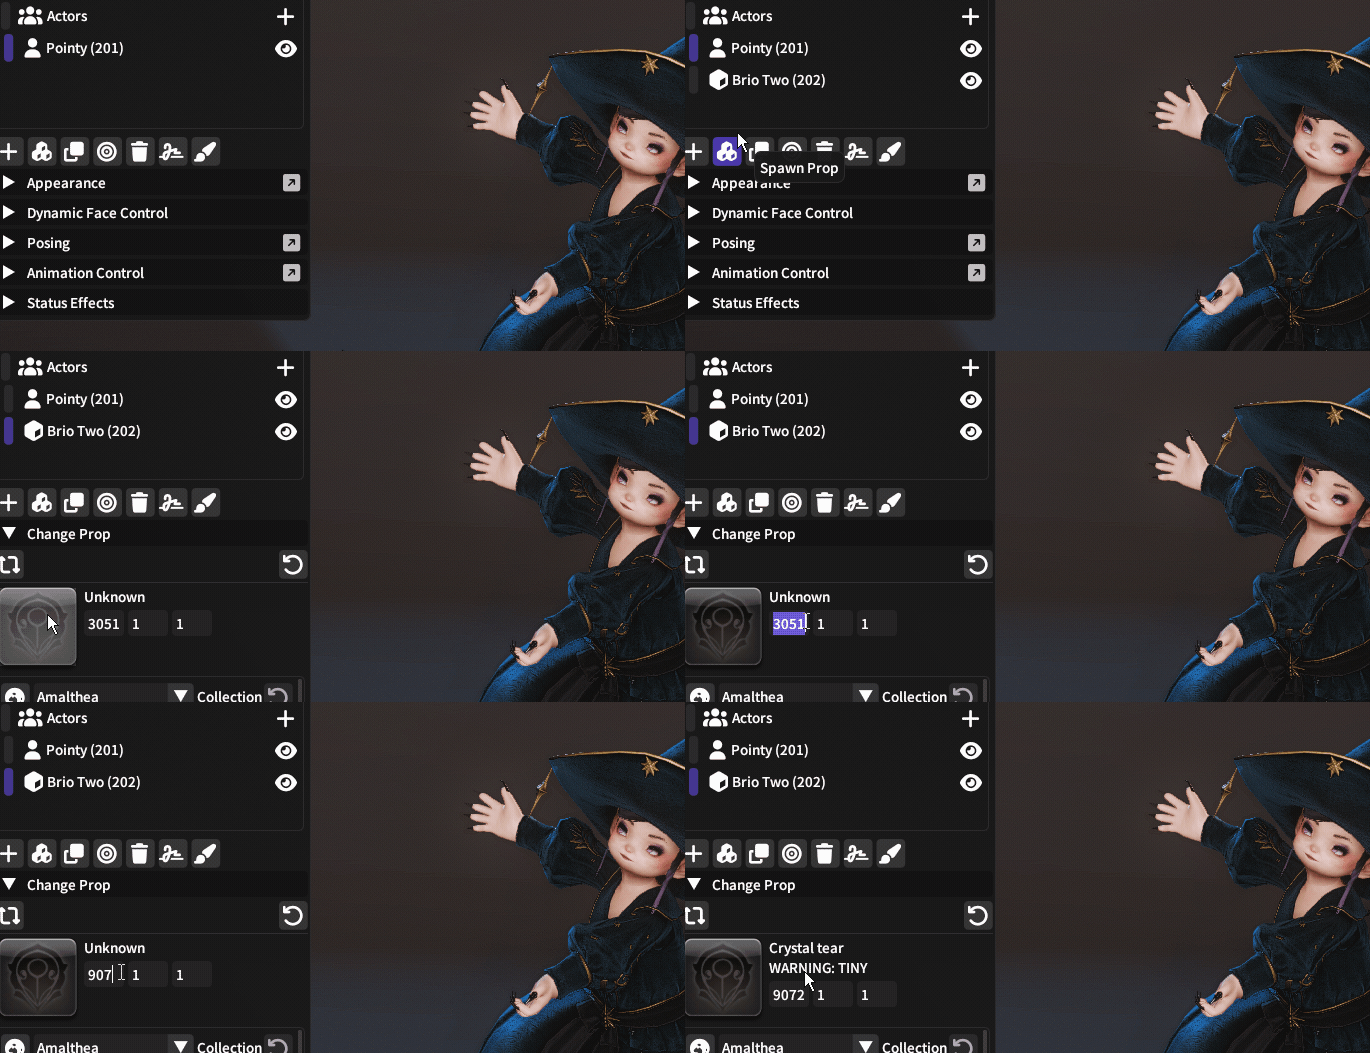
Prop spawning is still a bit wonky so you'll have to be a little patient. It'll probably spawn you a cursed miqo boy with a blade on your first few tries. Just keep reloading the prop, changing its Penumbra collection, scaling it up to 5-10 and raising it off the ground and you should see the tear drop turn up (eventually!)
...Now do it again for the second tear drop :D
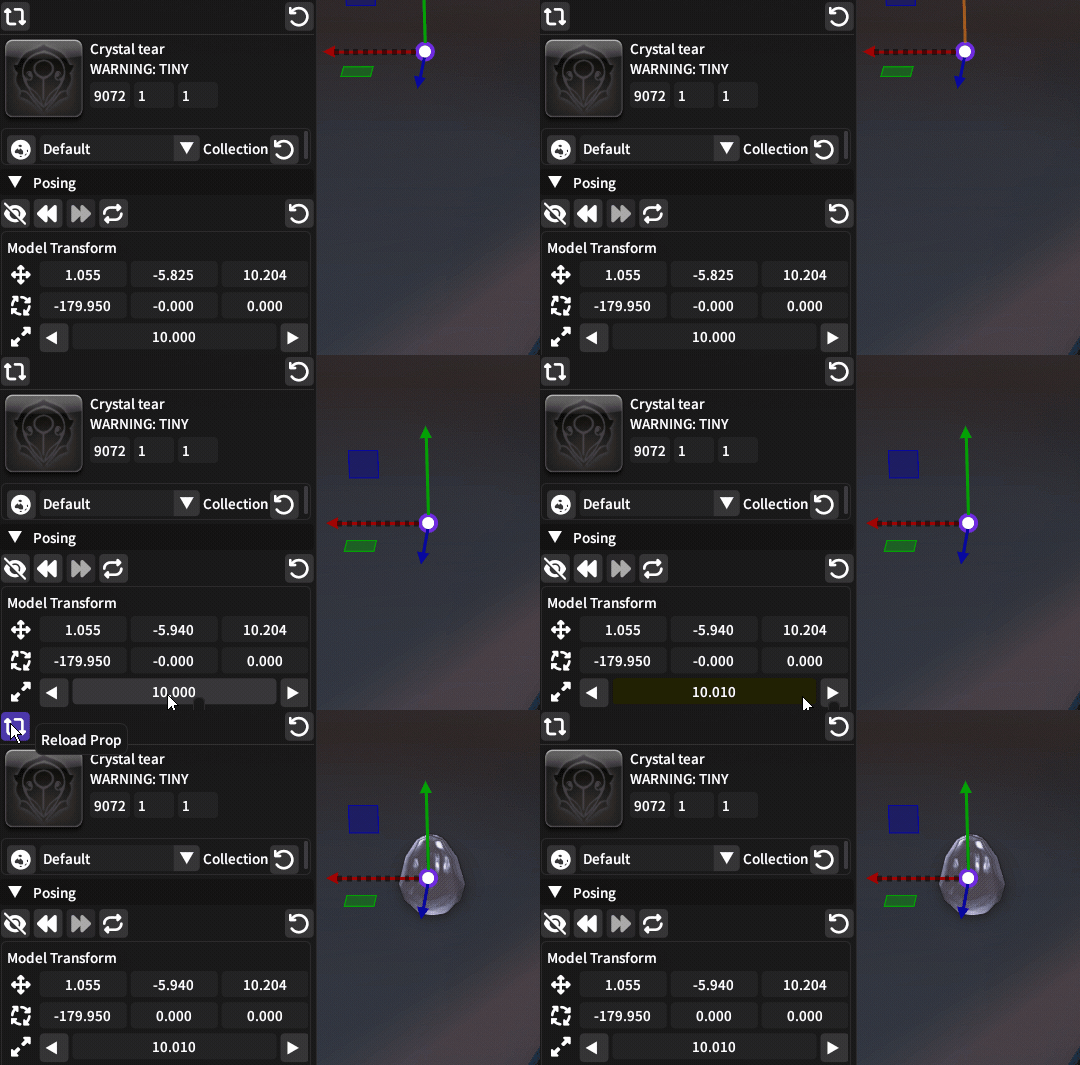
So you have your tear props ready now!
That was the part most people have trouble with, so from here on it should be a lot more fun. 'Cause we're going to play with it like playdough.
This part is also why I recommend spawning it as a handheld rather than a stand-alone prop. For now, Brio's standalone props are only scaleable as a whole, and you can't scale them along the x,z,y axes individually the way you can with handheld object bones. So you'll have to make do with the teardrop shape as it is by default. But if it's a handheld object, you get to stretch it however you want!
2. Position, rotate and shape
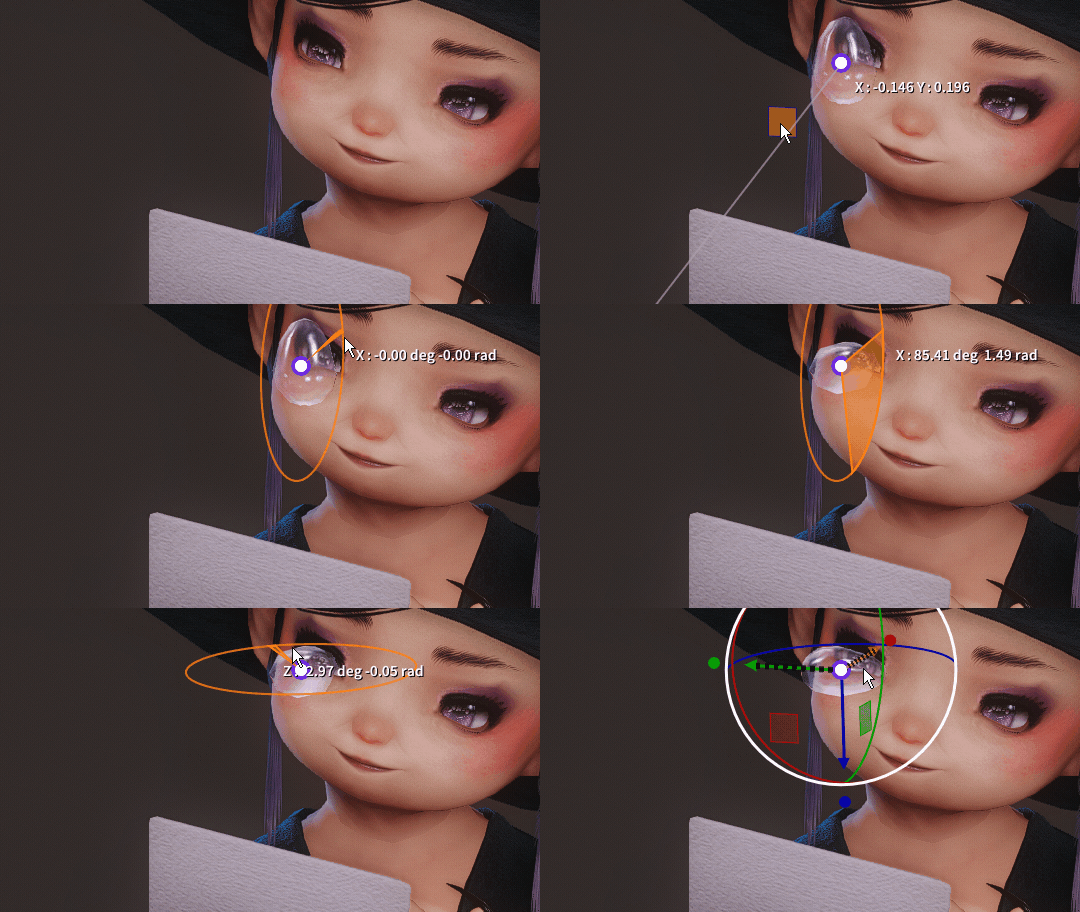
After you've posed your character and have them just the way you want them, position the tear drops over the eyes, rotating them sideways so the drop shape matches the shape of the eyes, so pointy ends toward the inner corners and round ends toward the outer corners.
Shoujo Intensification Beam
You have several options as to how you want your teary eyes to look, depending on just how heavily you want your character to tear up and how realistic or comical you want your shot to look.
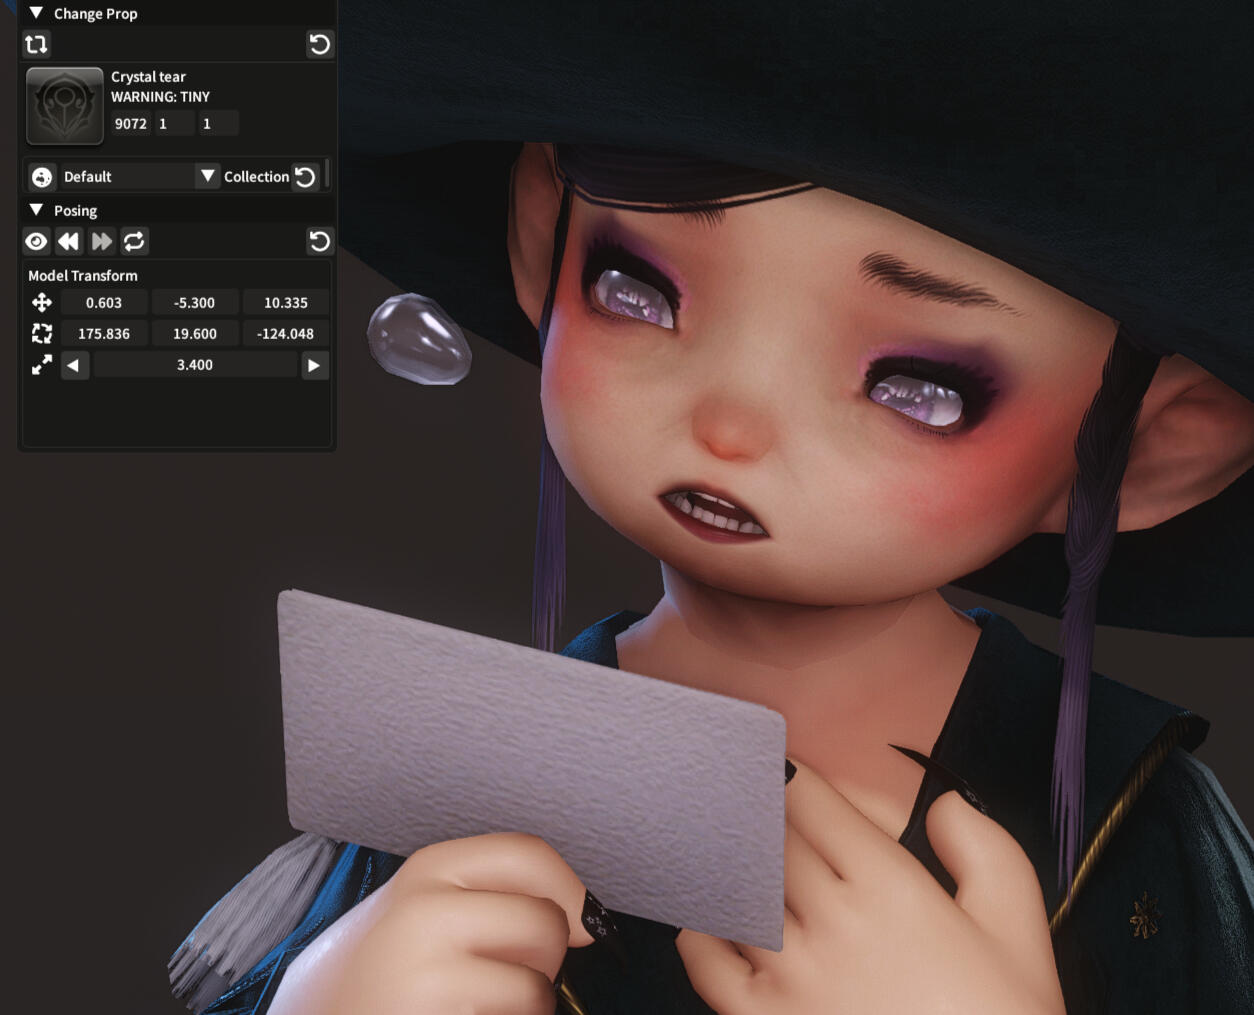
A. The Full Tataru
The closest I think we can get to the OG Tataru crybaby look is by covering the entire eye with the tear prop, shaping it width and lengthwise so it fits perfectly just beneath the eyelids.
B. The Halfway Heartbreaker
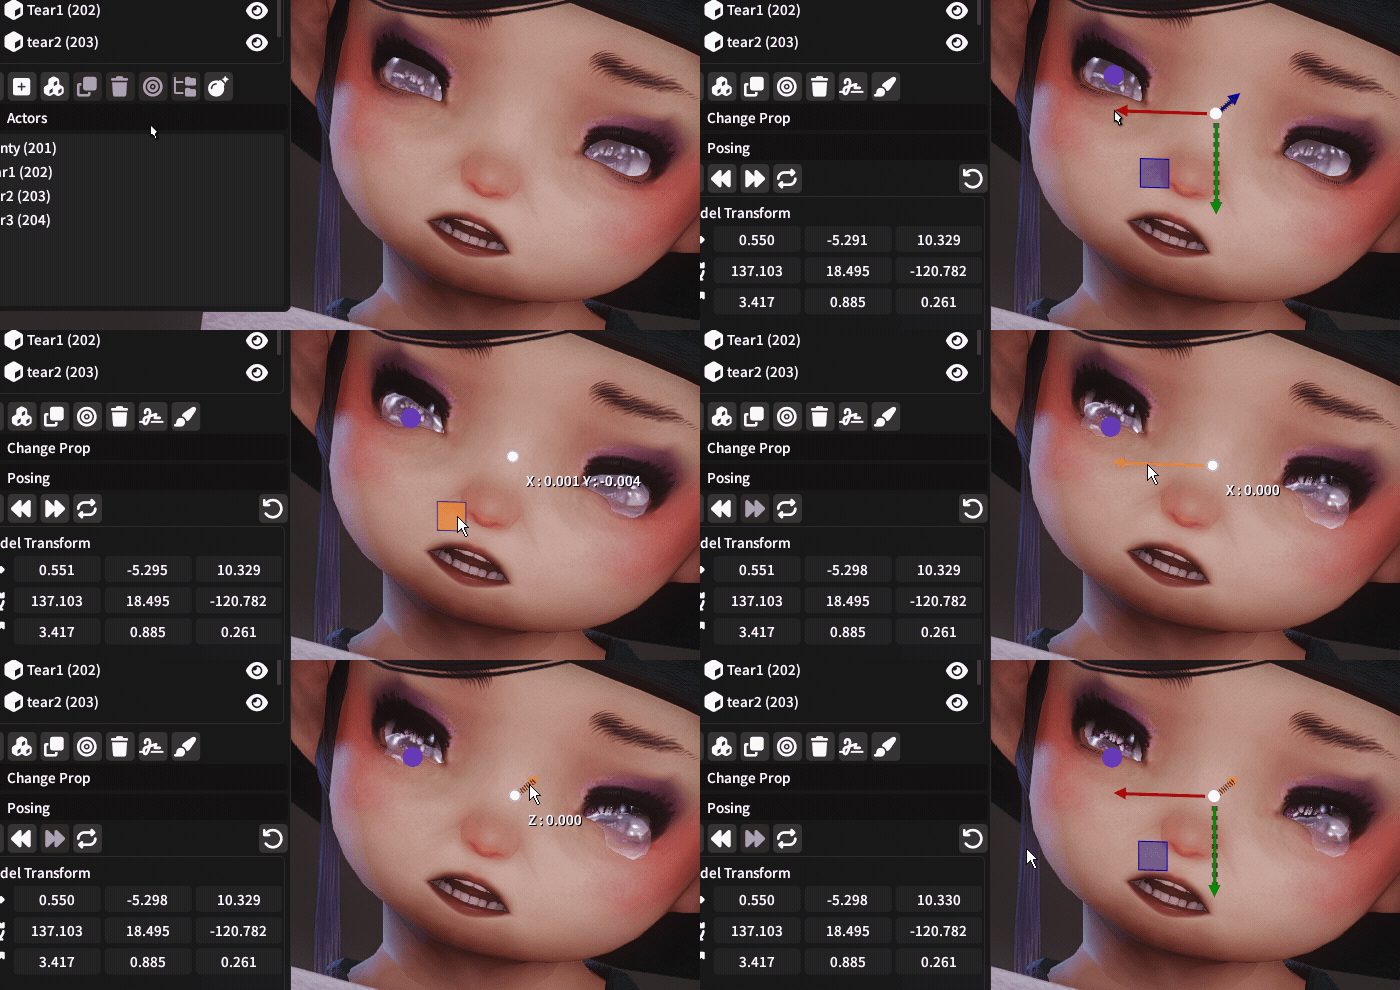
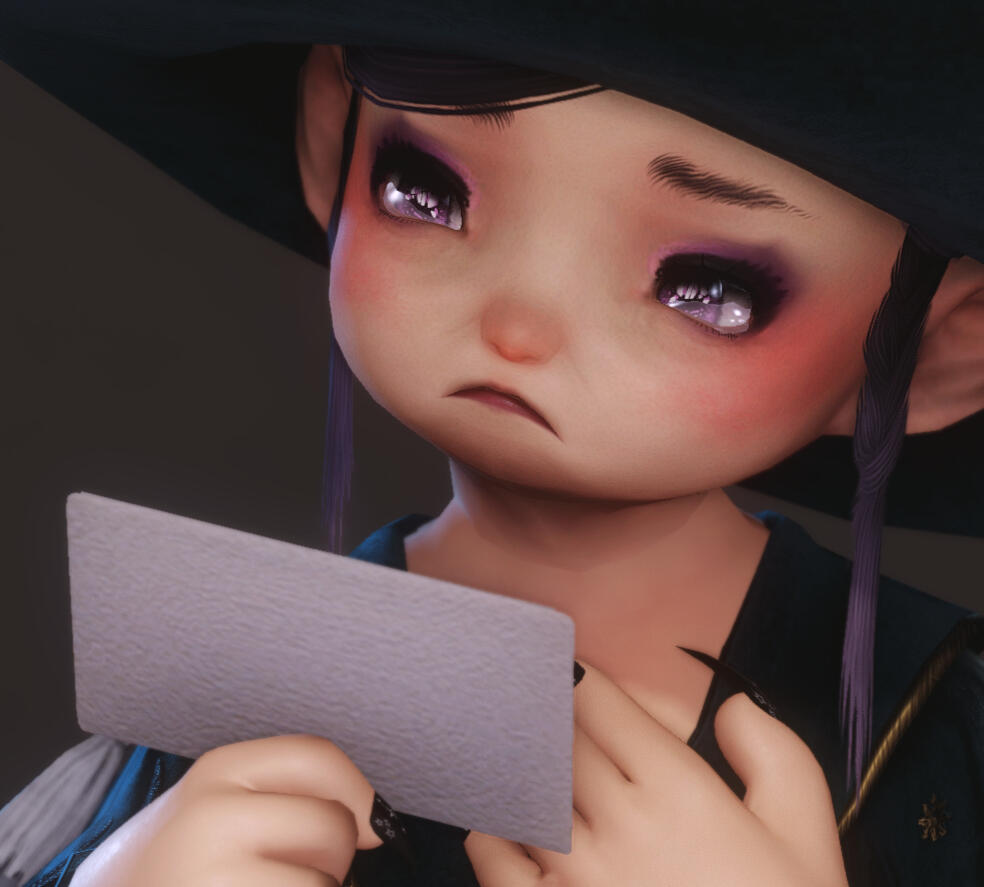
My favorite way is lowering the tear just enough so it covers the bottom half of the eye as if it's welling up with tears.
Bonus points if you get one to clip ever so slightly over the lower eyelid, threatening to spill over இωஇUseful to know: You can hold ctrl and click through multiple actors on your list to position them together (while shift-clicking multiple bones on the same actor helps move those together.)
C. The Dramatic Dewdrop
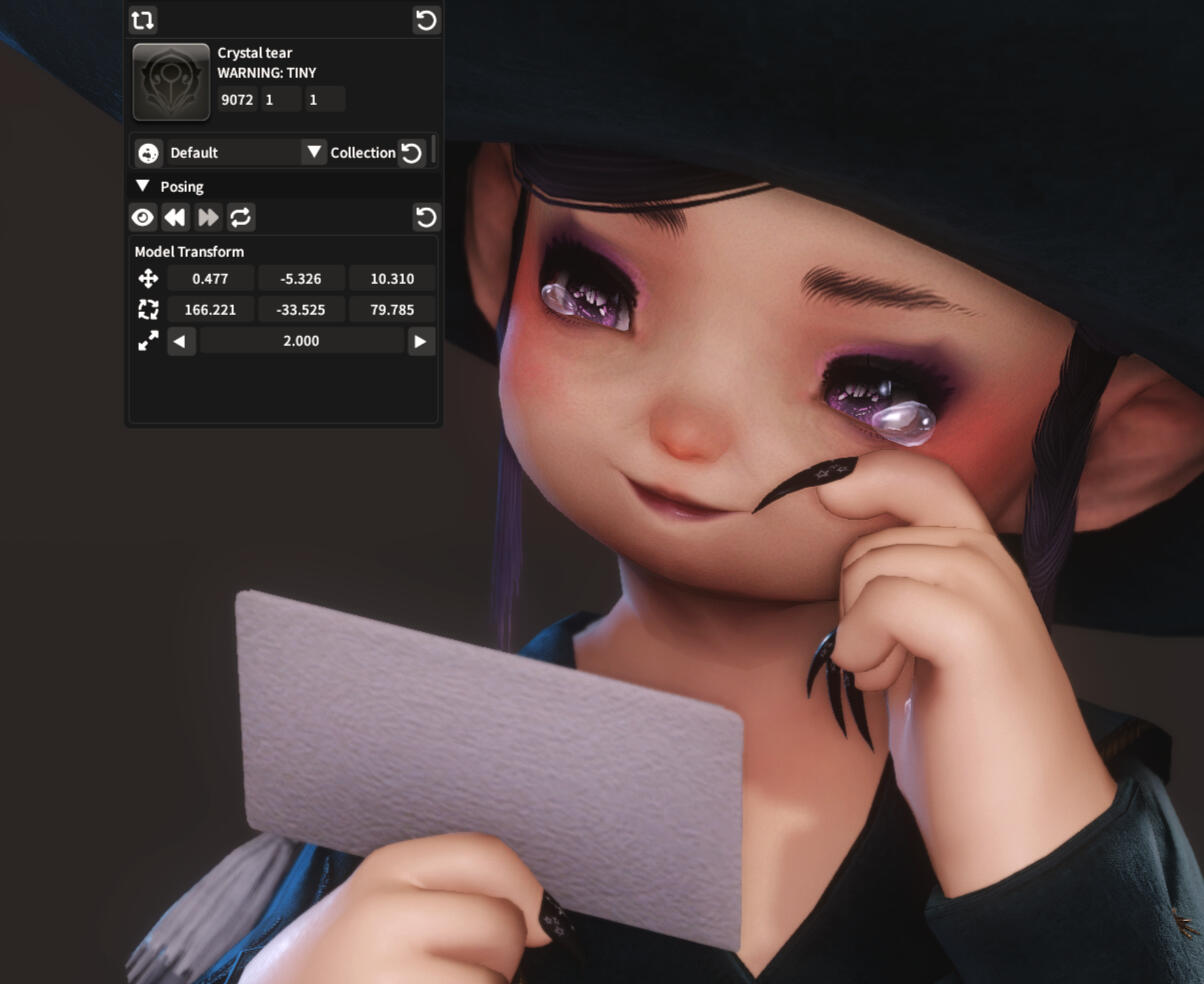
The least labor-intensive way, but by no means ineffective, is simply to lay the drop sideways on top of the lower eyelid, toward the outer corner. No clipping or shaping required, and still shoujo af. The bigger the more comical. Go nuts!
D. Streaming down the face
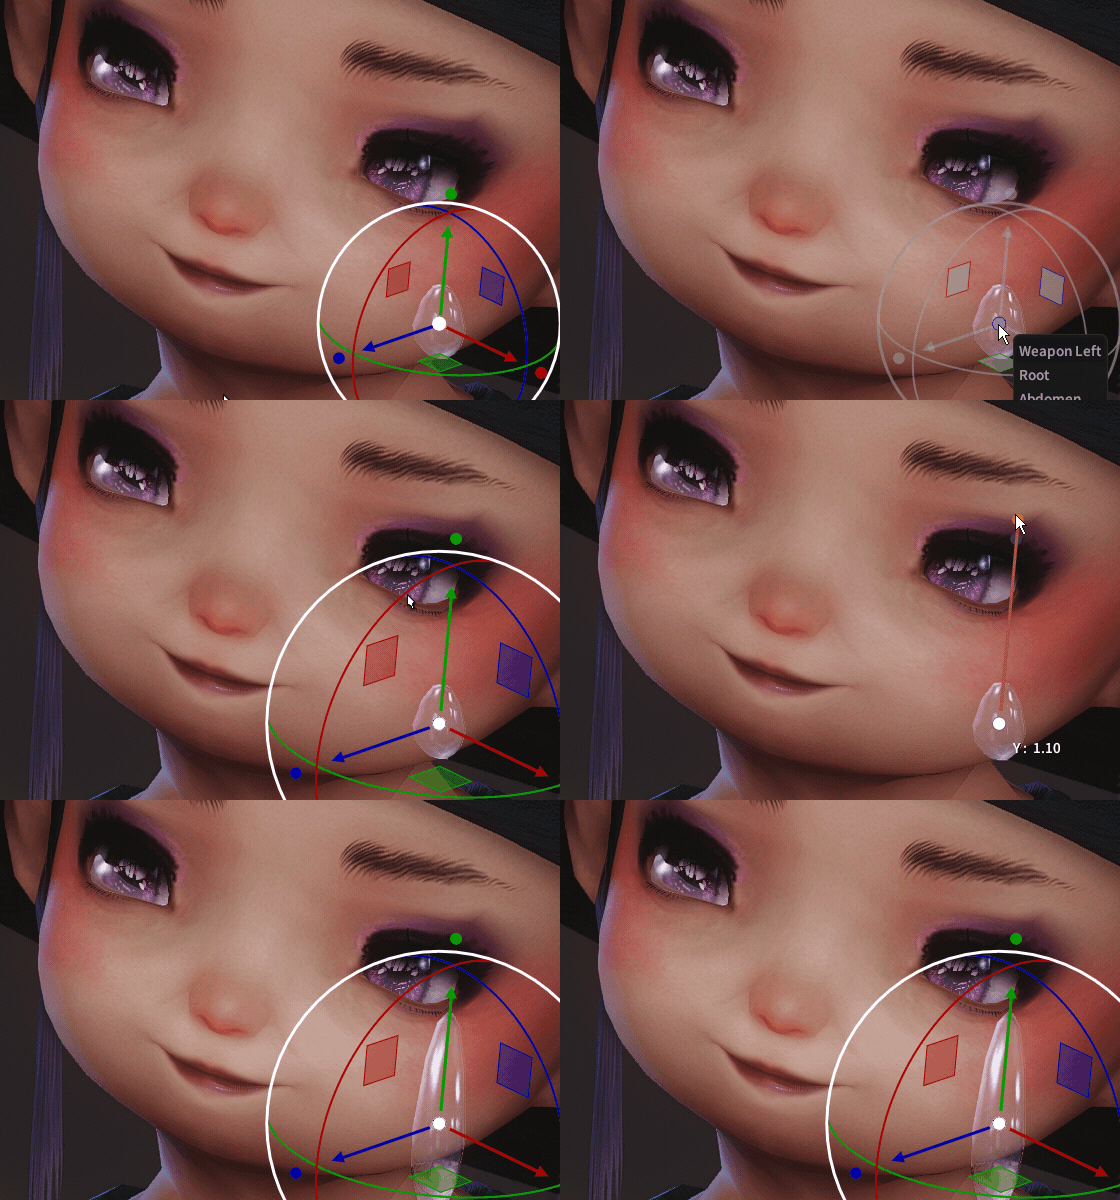
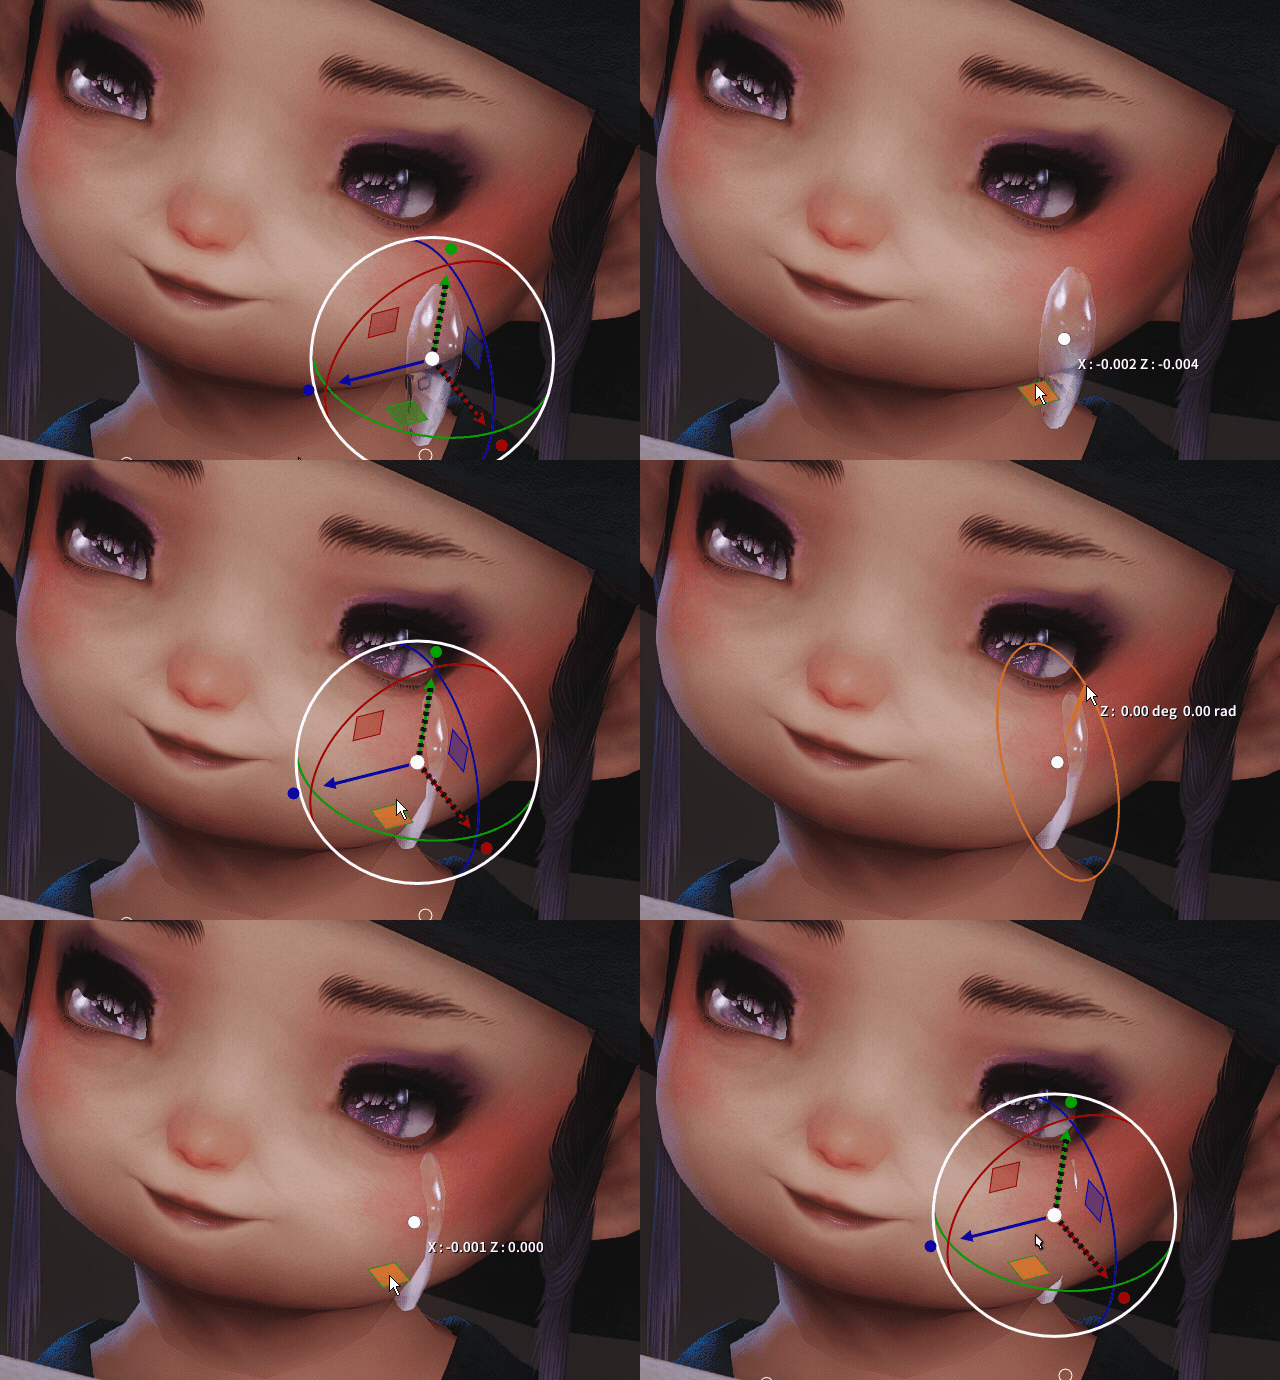
If you're having fun stretching this thing, you can take it a step further and scale it lengthwise into a whole stream running down your character's face.This is a little trickier to get to look decent and believable, but if you rotate and clip it through the cheek the right way it really can look as if tears are streaming down. If you squint.If you can't seem to stretch it, try targeting the abdomen bone rather than the main weapon or root bone.It makes it easier here to flip the tear upside down so the round end is at the top. I find this helps align it better along the shape of your character's cheek and jaw.
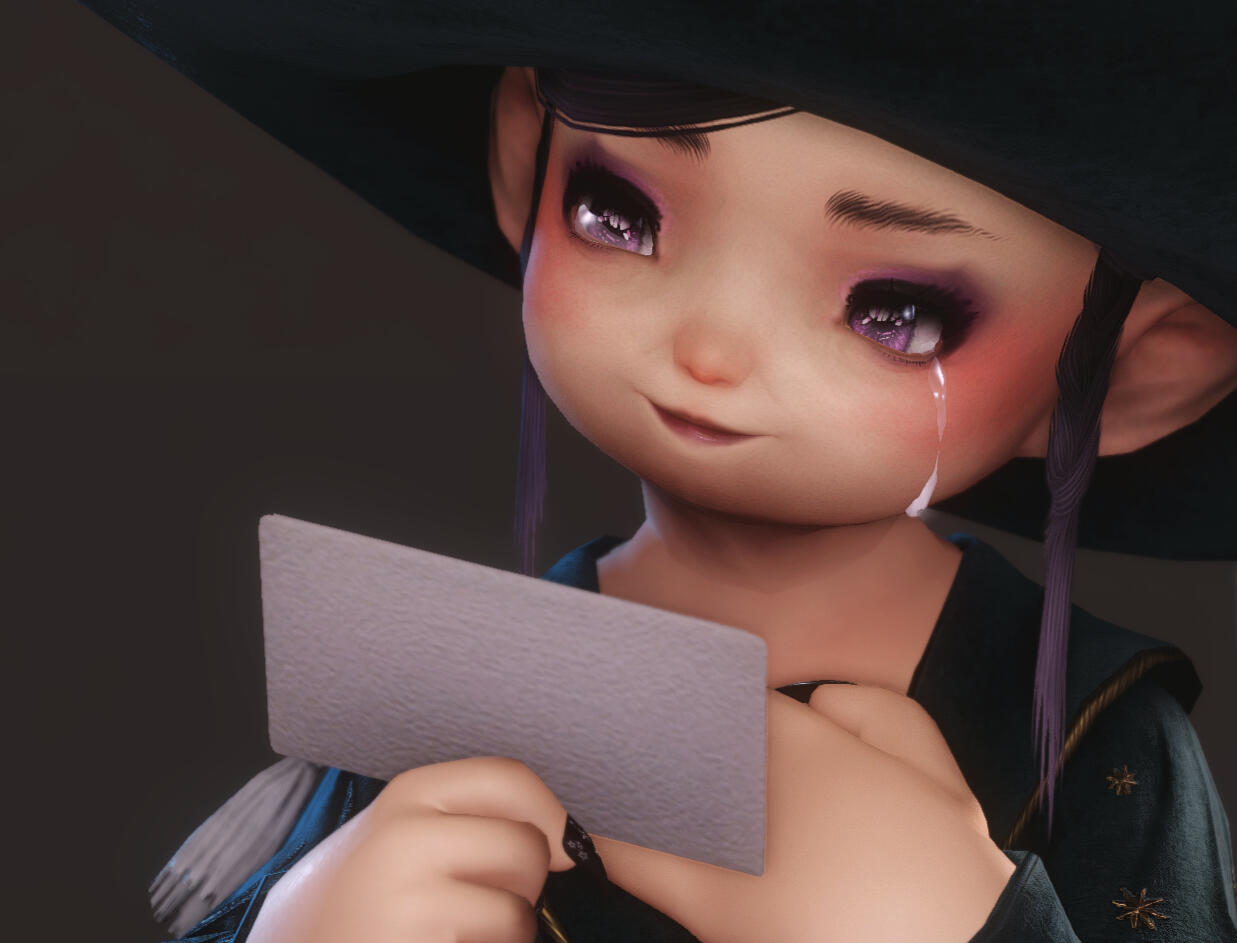
With a bit of fiddling, stretching, rotating and clipping, you can get it looking something like this!
(Live footage of me reading through the tags you leave)And like everything else, it gets easier and more intuitive the more you practice and experiment with it.
For inspiration, take a look at how some amazing gposers have used this prop on Bsky, courtesy of Mir Phoenix, Trazellie Ellie and Mekima on Bsky. Falling tear drops? tears over glowing eyes?? Think of the drama you can create with these little things.
Hope this gives you a better idea what you're able to do just within gpose before you even take your screenshot to Gimp for touch-ups and post-editing. If you have zero photoediting skills like me, you can still do a lot with gpose. And if you're already proficient at it, you can still use gpose to get your shot as close as possible to the ✧ vision ✧ before post-editing.Happy gposing ♡